Gransie’s Recipe Box

Cocktail Meatballs, yum
My home in Munds Park is a cabin that my grandpa designed himself. He built it with his own hands (and the hands of my grandmother, mom, and aunt) over the summer of 1979. He tells me that back then, all the roads in the village were still dirt. Our little corner of town off of Mustang only had around 4 houses in it. He made sure to buy a lot adjacent to the National Forest so nobody could ever build behind the house. To this day, you can still see hummingbirds, skunks, javelinas, and other critters from the living room, unobscured by any signs of civilization or development.
The cabin is my grandpa’s masterpiece. It’s a cozy haven of unfinished wood and 70s orange surfaces, filled with windows that let in sunlight and views of the trees. As in many vacation homes, no object ever seems to leave once someone brings it here. Over the decades the house has accumulated a record of our family’s story, with mementos collecting in waves like sediment washing up on a beach.

The cabin, most of the way completed
Not everything in the cabin makes me feel sentimental. I got rid of the two dozen phone books that filled one bookcase, and I don’t think I’m ever going to use the 22-volume encyclopedia that sits on a shelf gathering dust. I’m not sure why the cabin needed four coffee machines, five teapots, and 60 towels, but I have them available in case I need them. Even the junk serves a purpose, though, because I often discover gold while sorting through my family’s forgotten belongings.

Gransie and Grandpa
My grandmother, who we call Gransie, loves to entertain. The albums in the cabin are filled with photographic evidence of parties from decades ago attended by people I don’t recognize. The kitchen closet still has chafing dishes and a coffee urn left over from when this house was a social hub. Gransie needed recipes to feed all those hungry guests, and brought up some cookbooks and a box of recipe cards for inspiration.
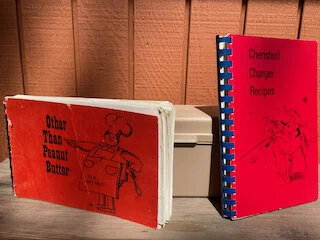
The source material
Most of the cookbooks are at least 40 years old, and they’re fascinating. They open a window into a departed era of American cooking when jello ruled the land and anything with mayonnaise on it could be called a salad. Some of the books haven’t aged well (The Magic of Microwave Cooking is particularly horrifying), but many of them have great recipes hidden amongst the gloopy midcentury casseroles. My favorites are the community cookbooks, because they have the recipes homemakers were actually using, not just the ones that some author thought were fit to print. The community cookbooks capture the feel of the place and time they were made better than almost any other kind of historical artifact.
Even more precious than the community cookbooks is Gransie’s recipe box. This unassuming grey container is filled with neatly organized index cards with recipes on them, sorted by labeled tabs into different categories. Gransie typed out most of the recipes herself, citing the magazine or neighbor where they originated. I feel very close to her when I read her scribbled notes on the cards, imagining her 50 years ago sitting at a typewriter copying a recipe out of the newspaper.
I decided to cook a dinner entirely using recipes from the community cookbooks and Gransie’s recipe box. I made a recipe for spinach knishe, a kind of filled savory pastry, from Other Than Peanut Butter, published by the A. & A. Meyer elementary school PTO in 1972. I found a recipe for classic cocktail party meatballs in 1979’s Cherished Charger Recipes, written by parents and students from McClintock high school. Both schools were (and still are) located in Tempe, where my family lived in the 70s. I took a recipe for “Chinese cole slaw,” also known as ramen noodle salad, from Gransie’s box.
All three recipes turned out great, and I would highly recommend trying them out. Not only did they taste delicious, but they made me feel like I was at a potluck in the Phoenix suburbs in the late 70s. I was able to time travel, and all it took was an evening in the kitchen.
Cocktail Meatballs (adapted from Cherished Charger Recipes)
1 lb ground beef
1 egg
¼ cup minced onion
1 burger bun or 2 slices of white bread
¼ cup heavy cream
¼ tsp nutmeg
¼ tsp white pepper
2 tsp salt
1 bottle Heinz chili sauce
½ cup grape jelly
Preheat oven to 350. Toast the burger bun or bread and then grind into bread crumbs in the food processor. Mix the crumbs with everything except the chili sauce and jelly and form into meatballs slightly larger than a golf ball. Place meatballs in an 8”X8” baking dish. Microwave the chili sauce and grape jelly together in a bowl and mix until combined. Pour over the meatballs, then bake for 1 hour.
Spinach Knishe (adapted from Other Than Peanut Butter)
For the dough:
⅓ stick of butter, sliced
⅓ cup boiling water
½ tsp salt
1 tsp white vinegar
1 cup flour
¼ tsp baking powder
1 egg
Sesame seeds
For the filling:
2 tbsp butter
2 tbsp flour
⅓ cup heavy cream
¼ tsp nutmeg
1 tsp salt
1 tsp black pepper
¼ medium onion, diced small
A few handfuls of spinach leaves
Preheat oven to 350. To make the dough, add butter to a heatsafe bowl. Pour the boiling water over it and mix until the butter is melted. Add the vinegar, salt, flour, and baking powder, and mix until combined into a smooth dough. Cover and chill in the fridge while you prepare the filling.
To make the filling, saute the onions in a little oil, then add spinach a handful at a time and saute until cooked. Take the spinach and onion out of the pan and chop finely. Melt the butter in a small pot on medium heat and add the flour, whisking to combine. Cook for about a minute, then add the cream, salt, pepper, and nutmeg, stirring vigorously to make a thick white sauce. Combine the sauce with your chopped spinach.
Take your chilled dough and roll into a rectangle about 3 times longer than it is wide and about ⅛ inch thick. Spoon the spinach filling on the dough and roll it into a tube, pressing the seam to seal the dough. Place the roll seam-side down on a cookie sheet, brush it with beaten egg, and sprinkle with sesame seeds. Bake for about 45 minutes, until lightly golden. Cut into 1-inch slices to serve.
Ramen Noodle Salad
For the salad:
¼ head purple cabbage, sliced thin
¼ head green cabbage, sliced thin
2 small carrots, grated
1 bunch scallions, sliced
⅓ cup sesame seeds
⅓ cup slivered almonds
1 packet ramen noodles, crushed into small pieces
For the dressing:
½ cup neutral oil
⅓ cup apple cider vinegar
½ tsp sugar
1 tbsp soy sauce
The seasoning packet from the ramen
In a large bowl, whisk the dressing ingredients together until emulsified. Add all the salad ingredients and stir to combine. Let sit at least half an hour in the fridge before serving to allow the noodles to absorb some dressing and soften up.
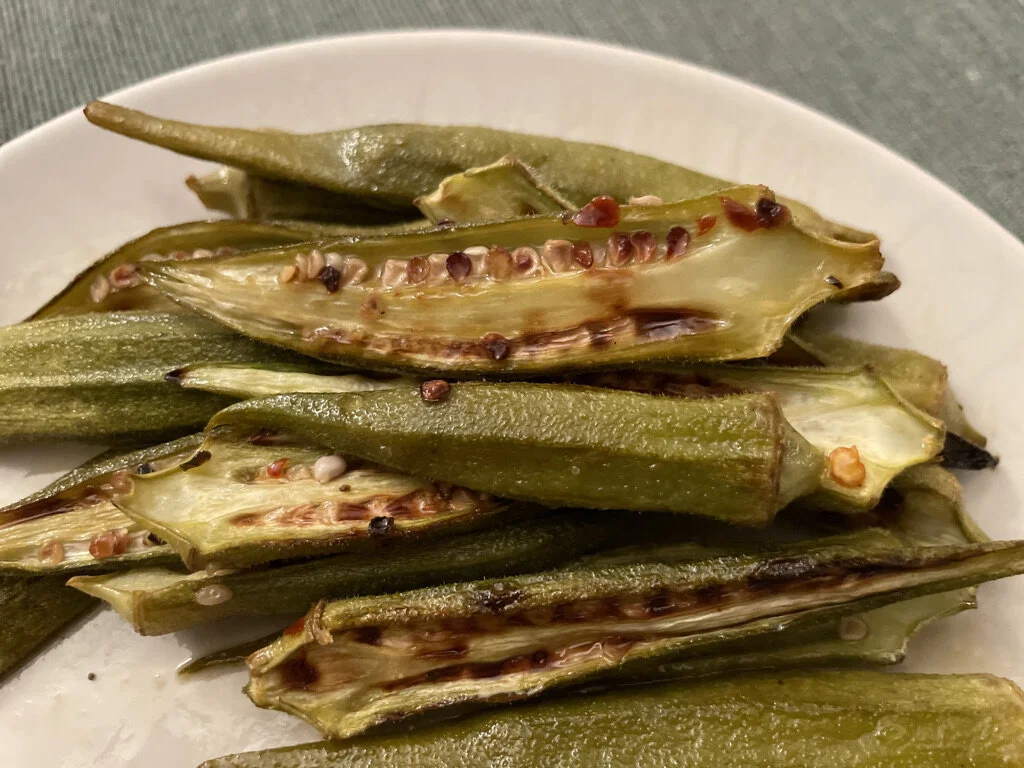
Snackable Okra With A Sweet and Sour Glaze
It turns out you can turn okra into an addictive finger food without breading it and deep frying it.

Summertime!
I guess I just have a thing for controversial vegetables. If you follow my blogging, you’ll have seen my previous apologia for radishes, celery, and Brussels sprouts. I feel drawn to vegetables that a lot of people hate because I believe in the transformative power of proper technique. There are no bad ingredients, only bad recipes. That is doubly true for today’s contender: okra.
Many, many people claim to hate okra. I was once one of them. I don’t even remember seeing it served anywhere when I was growing up in the Northeast US. The South is the only region I’ve been in where okra is a fairly commonplace ingredient. Not coincidentally, Southern cooks are more likely to know how to prepare okra correctly than cooks anywhere else.
Okra’s least popular attribute is the mucilaginous slime that it produces after being cut or put in contact with water. Some okra fans love the slime, and it’s great for thickening soups and gumbo, but today I’m sharing a recipe for slime-haters.
This recipe produces an addictive side dish that’s easy enough for as weekday dinner. I simply split and broil the okra and finish it with a vinegary, spicy glaze inspired by Carolina vinegar barbecue sauce. It can all be ready in 15 minutes.
Hot and Sour Charred Okra
Ingredients:
1 lb okra
3 tbsp apple cider vinegar
3 tbsp lemon juice
1 tbsp brown sugar
2 tsp red chili flakes
Lots of black pepper
3 large cloves of garlic
Set your oven to broil. Find a pan you can put under the broiler and line it with foil, then oil the foil. Split the okra longways and arrange in a single layer cut-side up in the prepared pan. Drizzle with olive oil and season generously with salt. Put under the broiler, ideally about 4 inches away from the heat. Check every 4 to 5 minutes and rotate as needed for even browning.
While that’s cooking, mince the garlic and add to a small saucepan with all the remaining ingredients. Cook on high heat until the mixture has lost about 1/3 of its volume and smells slightly less acidic.
Pull your okra out of the oven when it’s fairly well browned all over the cut side, with a little bit of char on some of the edges. This should take 10 to 15 minutes depending on your oven. Pour the glaze over the okra, mix it around a bit, and return to the broiler for one to two minutes. Watch it the whole time! You want to cook it so there’s no liquid glaze left, but if you go too long it burns easily during this stage of the process.
Taste one piece of okra. Yum! Does it need more salt? Add a little more to taste. Serve alongside any protein you desire, cut some bread, and that’s dinner. Just don’t be surprised when the okra steals the show.

Strawberry Shortcake: A Balm For Wistfulness
In the summertime, when the weather is fine, your strawberries will be sublime… Crawford Smith is an eclectic cook and musician living in Austin, Texas. Find his unique & inventive home recipes and music videos on crawfordsmith.com.

In the summertime, when the weather is fine…
The coming of the warmer months is making me yearn to return to the setting of my childhood summers: my great-grandfather’s cottage on Bass lake in Ontario.
Norman McLeod, my great-grandfather, built our rickety lakeside cottage in the late 30’s from a kit. It’s constantly falling apart, requiring some kind of intensive maintenance work every visit. It is, nevertheless, quite charming, and my childhood summers were spent canoeing, swimming, and barbecuing in that blissful environment.
Norman himself was by all accounts, a force of nature, and locals still tell stories about him. He was the kind of country doctor who performed surgeries on farmhouse kitchen tables and drove on dirt roads to reach house calls across an entire county. Up until his 70s, he did one headstand a year just to prove he still could. Norman was known to occasionally eat entire bowls of maple syrup with a spoon. His medical school graduation picture hangs in my Grandmother’s study, and Norman’s visage, with fearsome brows and piercing, dark eyes, haunted me as a child.
Time at the cottage was filled with culinary delights. The local bakeries produced many treats that were unique to cottage country or Canada more generally. For breakfast, we would eat tea-cakes or cinnamon-y Chelsea buns with butter and local cream honey, so thick you had to use a knife to spread it. We allowed ourselves to eat dessert with both lunch and dinner when we were at Bass Lake, gorging ourselves on syrupy butter tarts and decadent loaf cakes. Social occasions were accompanied by chocolate-coconut Nanaimo bars, lemon squares, and fig bars.
Summer in that part of Canada was also a magnificent time for the local produce. Wax beans, sweet peas, corn and new potatoes would be simply boiled and served with butter. The tomatoes were at peak season, and black raspberries grew wild on the gravel road the led to the cottage. Usually our visits also coincided with the height of strawberry season. I would eat scores of the tiny, dark, sweet berries, nothing like the pale, unnaturally large California ones available in supermarkets.
My father celebrated strawberry season by making shortcake. The recipes for whipped cream and berries always stayed about the same, but he was constantly fiddling with his shortcake recipe, trying out a new method every time. I have continued his experimentation, with my favorite so far being this recipe:
Strawberry Shortcake
Strawberries
1 quart extremely ripe, in-season strawberries
1/4 cup granulated sugar
Pinch of salt
Cream
3 cups heavy whipping cream
1/2 cup powdered sugar
2 tsp vanilla extract
Pinch of salt
Shortcakes
Approx 1 cup of AP flour
2 tsp baking powder
1/2 tsp baking soda
1/2 tsp salt
1 tsp lemon juice
Cut the greens off your strawberries and slice them root-to-tip into 4 to 8 slices each, depending on size. Sprinkle with the granulated sugar and a pinch of salt and stir until all of the sugar is wet. Leave on the counter for 30 to 45 minutes, stirring occasionally, until all the sugar is completely dissolved and a fair amount of syrup has been produced. Chill until ready to serve. This mixture will keep for a few days in the fridge, although the texture will change.
Reserve a couple tablespoons of your ice-cold heavy cream in a small dish and pour the rest in a bowl with the powdered sugar, vanilla and pinch of salt. Whip by hand or with an electric beater until stiff peaks form. Reserve 4 to 5 cups of the whipped cream in another bowl and put in the fridge. This will also keep for a few days, and can be rewhipped if it starts to deflate.
Mix your flour, baking powder, soda and salt together in a bowl. Add lemon juice to the cup or so of remaining whipped cream and stir gently with a rubber spatula to incorporate. Dump half your flour mixture into the lemon cream, and fold gently with your spatula. Once this is mostly incorporated, fold in the rest of the flour. The goal here to not deflate the cream; be gentle. Adjust the texture of your dough with milk or extra flour as necessary. It should be stiff enough to form with your hands, but wet enough that it feels a little sticky still.
Form your dough with your hands into six biscuit-shaped rounds and place on a greased baking sheet, preferably lined with parchment paper. Place the tray of shortcakes in the freezer or fridge for 15-30 minutes; this will help prevent them from spreading in the oven. Once chilled, brush the tops with the reserved unwhipped cream and sprinkle with a pinch of granulated sugar. Bake at 425 F for 10 to 15 minutes, until the tops are golden brown. Cool for a few minutes before putting together your shortcakes.
For assembly split the cake in half with a fork and place in a bowl. Top liberally with strawberries and their juices, and cover with an immodest amount of whipped cream. You can add ice cream as well, but I think that gilds the lily.
Braised Celery: Turning The Worst Vegetable Into The Best
We all know celery is gross, but what if it’s just horribly misunderstood?
For most of my life, I didn’t understand celery. As a child, I watched my peers happily crunch on ants on a log and felt a deep sense of alienation. Why could I not enjoy this classic American treat? Later, when I was learning how to cook, I thought of celery as the weakest component of the traditional European flavor base, mirepoix (onion, celery and carrot). The celery seemed to contribute nothing to cooked dishes, and I found its fibrous crunch unappealing in its raw state. The sad celery sticks beside my chicken wings always languished uneaten, and my stocks were seasoned with onion and garlic instead of the classic mirepoix.
I have lately had my Road to Damascus moment with celery, and it is now one of the most popular vegetables in my house. Celery’s superpower lies in its high nitrate content. Nitrates are the chemicals that help cure and preserve meats like bacon and ham. Concentrated celery juice is actually used as the curing agent in the so-called “uncured” or “nitrate-free” versions of these products.
Nitrates have a savory flavor somewhat reminiscent of MSG. That savoriness is celery’s contribution to the stocks and sauces of old-fashioned European cuisine. It’s what gives Thanksgiving stuffing its addictive quality. I have noticed that if I season with celery too aggressively, dishes can actually start to taste cured, almost like hot dogs.
This recipe, my ultimate recipe for cooked celery, is an attempt to capture the vibe of the celery strained out of a batch of chicken stock, while retaining a little more texture and a slightly fresher flavor. The super overcooked, mushy vegetables left over from a stock or a braise have always tasted really delicious to me. They have a luxurious savoriness, and I enjoy really soft vegetables. This dish is intensely flavorful, and you can eat a ton since celery is basically air. Quoth Kristen, “I hated celery my whole entire life, and this dish turned me into an addict.” Speaks for itself folks!
Braised Celery
One bunch celery
One cup good chicken broth, or mushroom broth if vegetarian
Half an onion, diced small
One clove of garlic, minced or crushed
A few sticks of fresh thyme
One bay leaf
One tbsp olive oil
One tbsp butter
Salt, pepper, and bouillon or msg, to taste
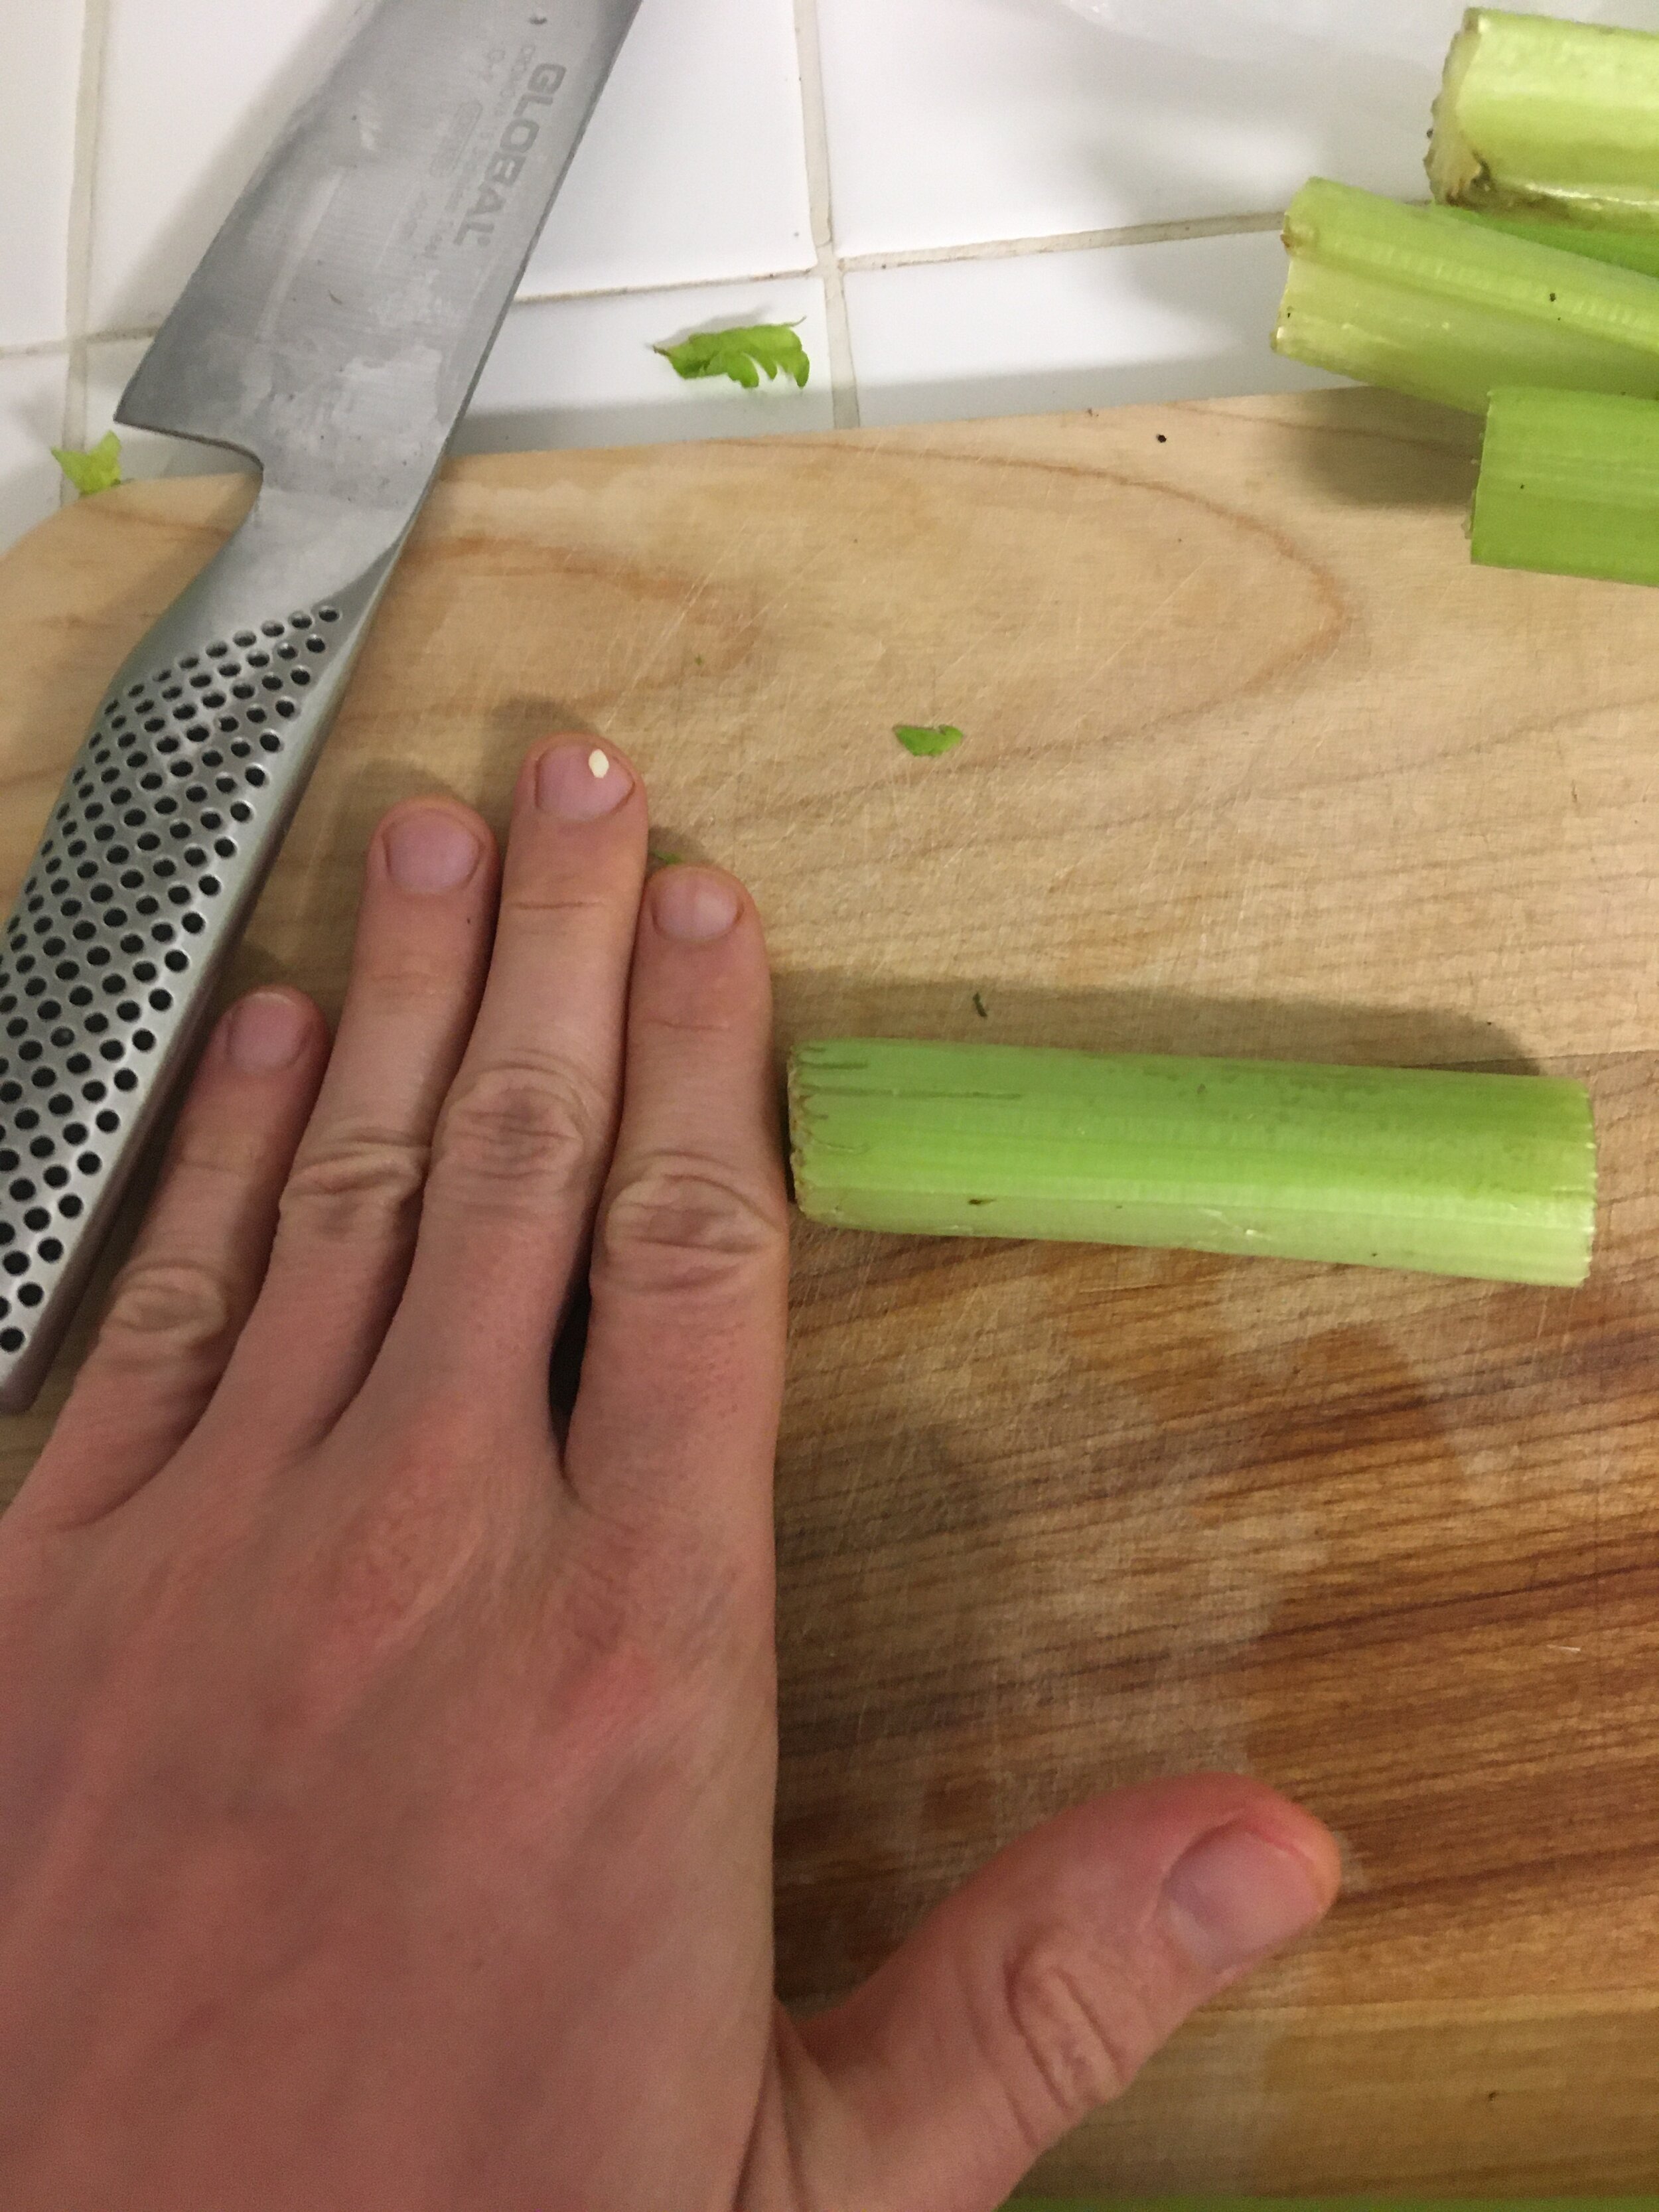
Appropriate celery length, with hand for scale (hand sizes may vary)
Cut celery into spears around 3 inches in length. Don’t use the smallest inner ribs for this. You want the big, sturdy outer spears. If you want a very soft, refined texture, shave off the fibrous outer layer of the celery with a vegetable peeler (I normally don’t bother, but if you want to spend the time, go for it. It does make a difference).
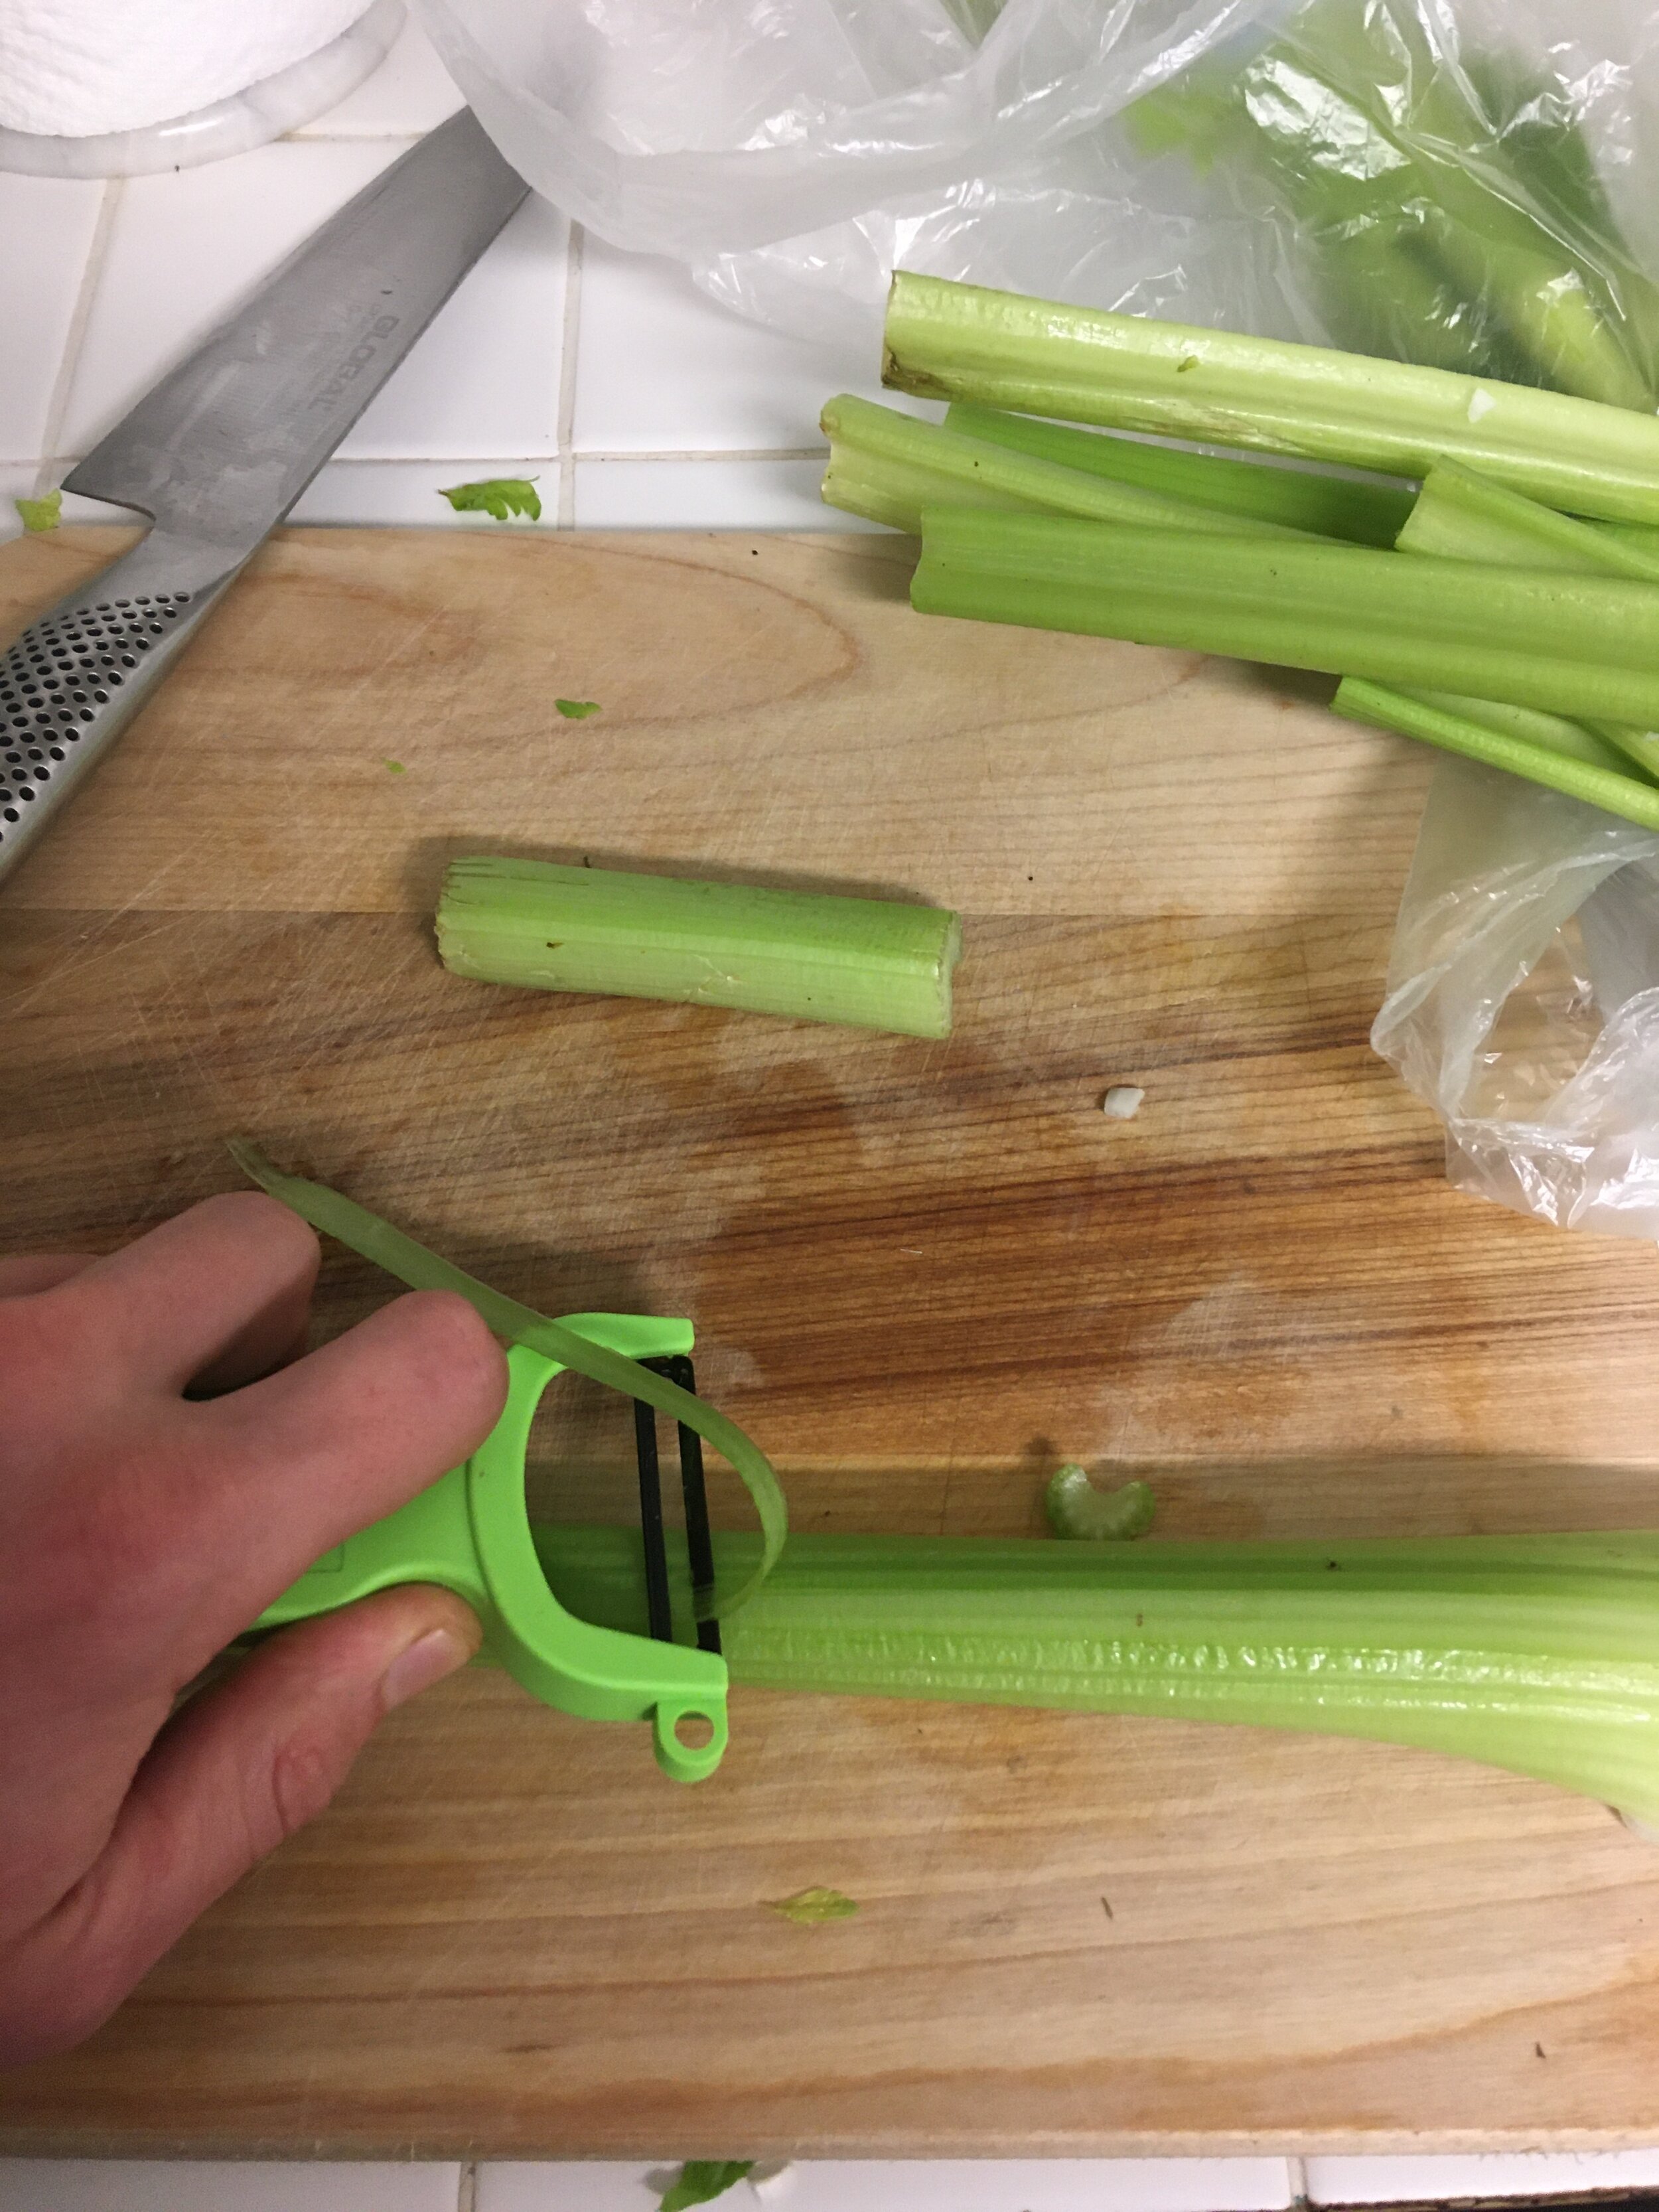
Demonstrating peeling technique
A bunch of crispy, peeled celery (gross!)
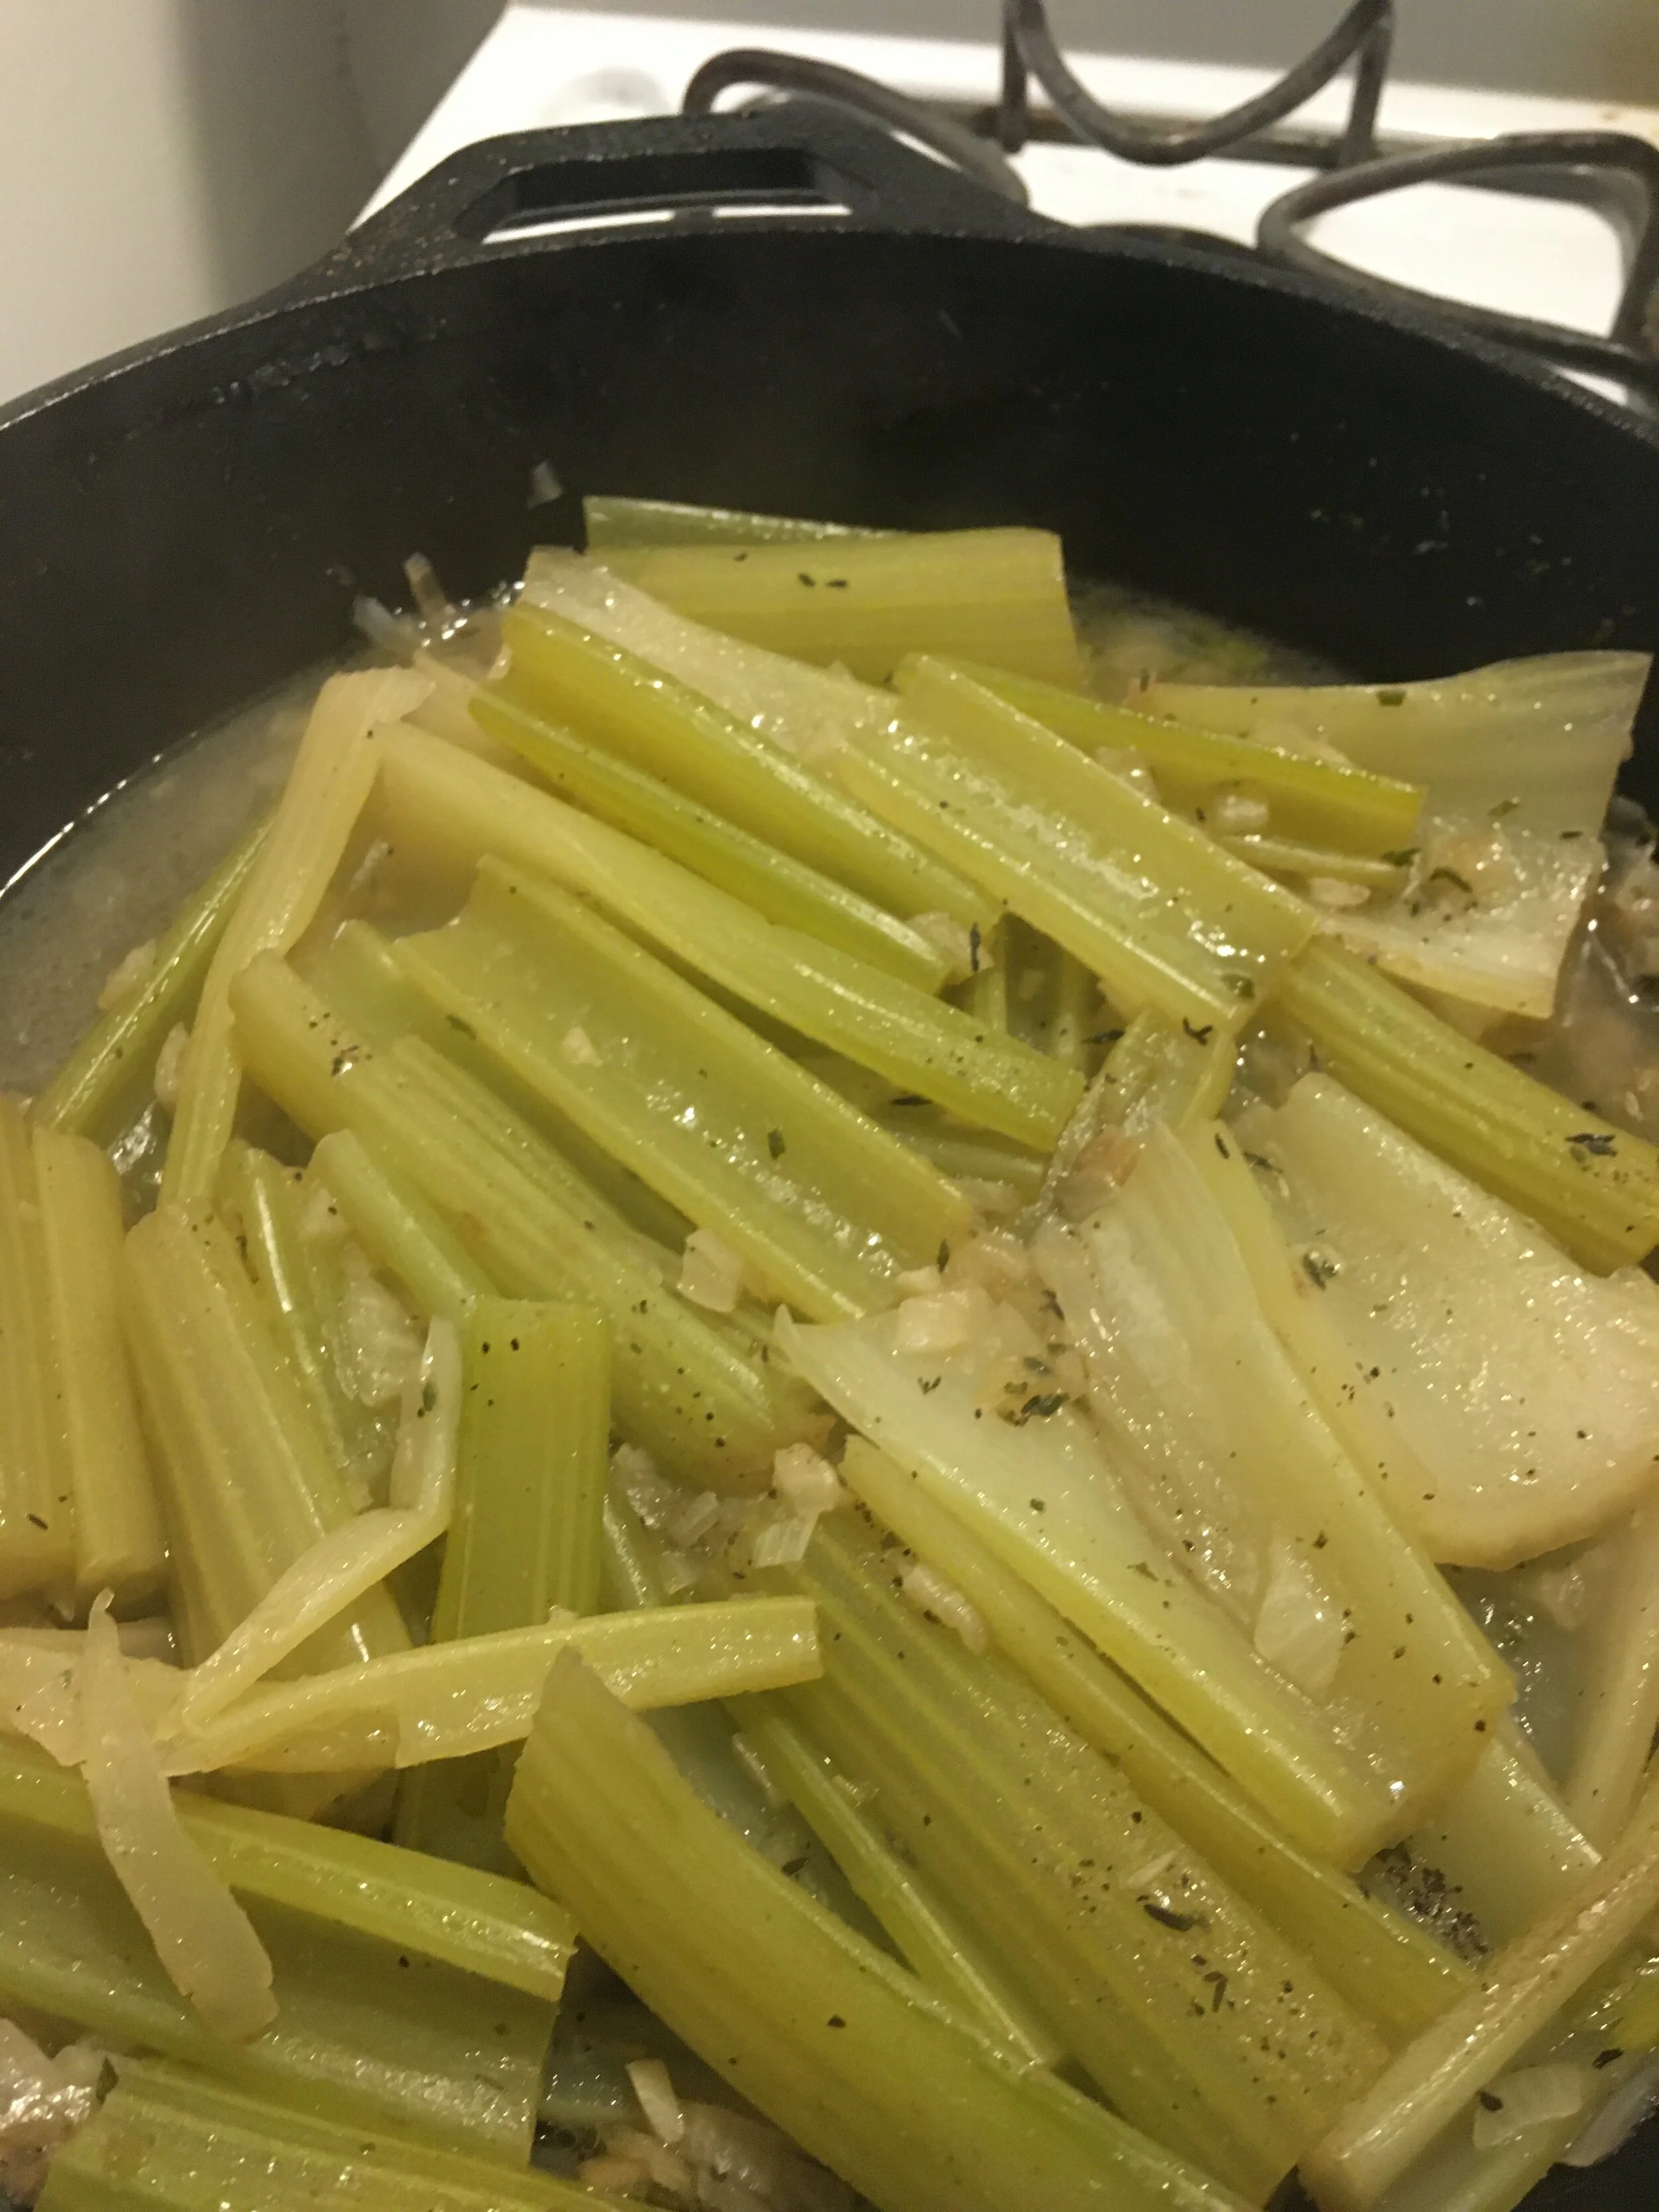
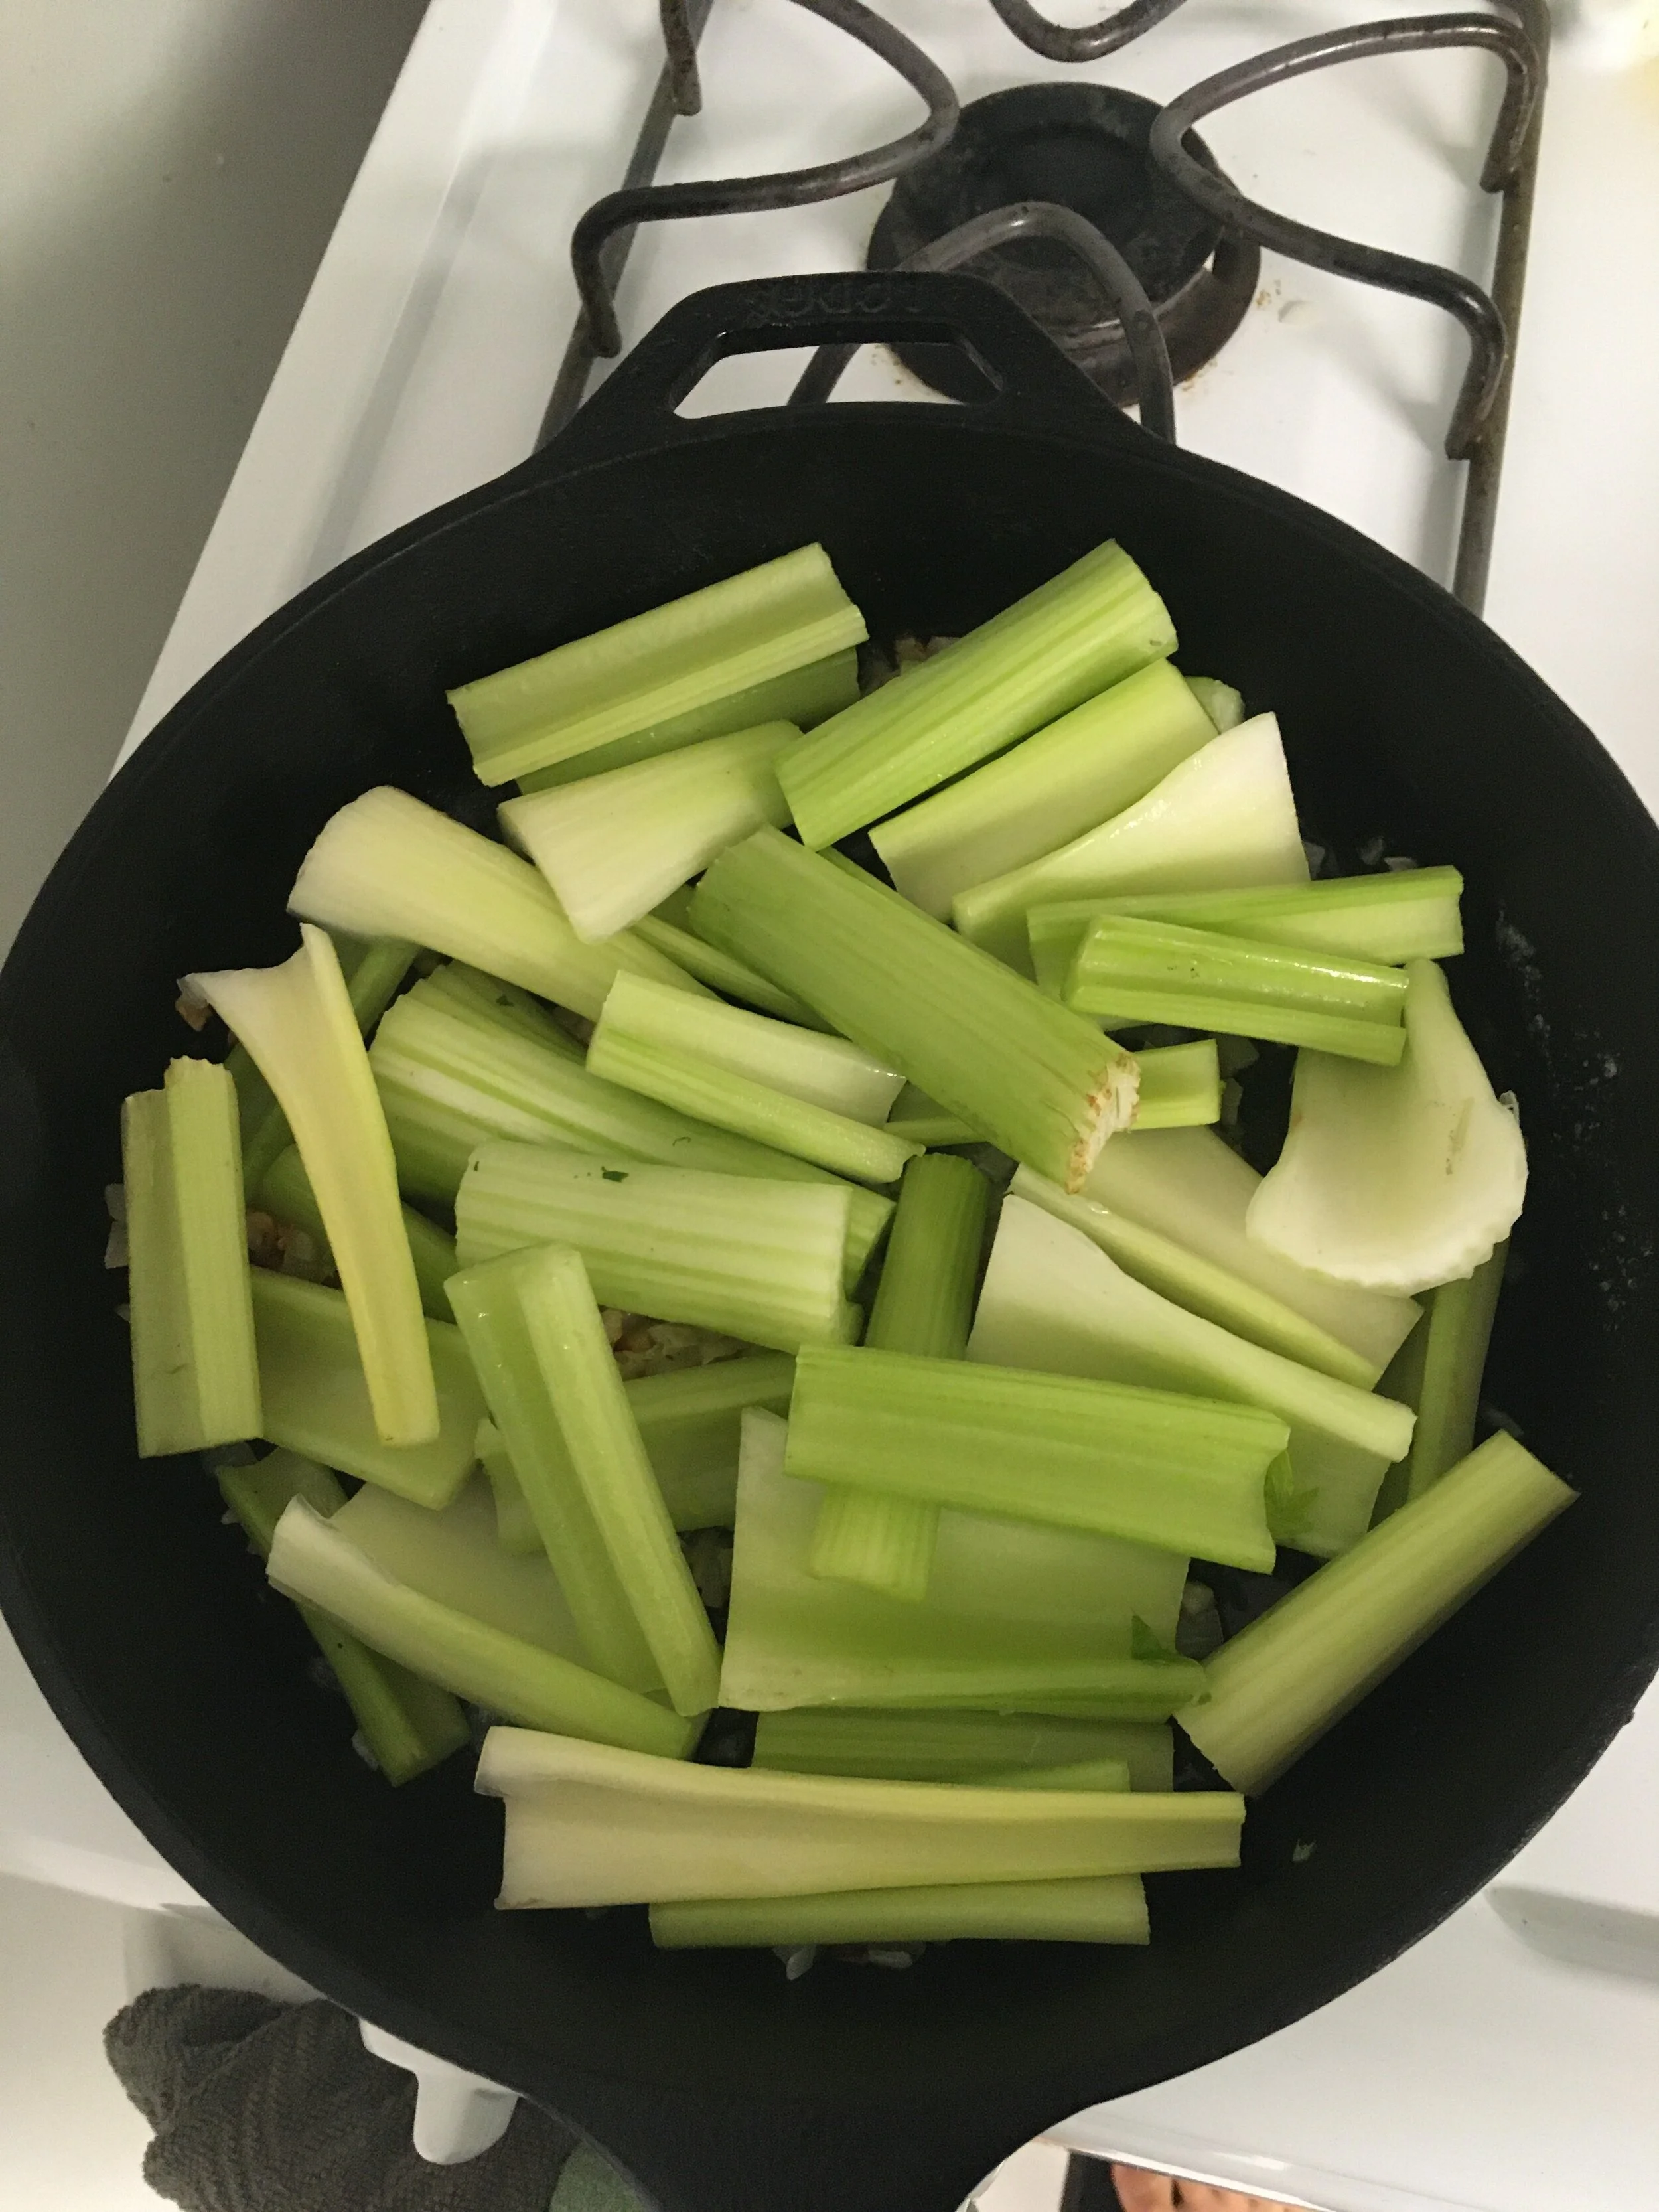
Heat your oil and butter over medium heat in a large, high sided skillet and add the onion with a pinch of salt, sautéing until translucent but not brown. Toss in the garlic and herbs and sauté for about a minute until fragrant. Add in the celery and chicken broth, cover, and set your pan to low. At this point season with salt, pepper, and bouillon if using. Be conservative with the salt here, because most of the liquid in the pan is going to evaporate, concentrating the sodium. Cook until the celery is as soft as you like it. I usually do about 45 minutes, which gives me a melting but not quite falling-apart texture. When it’s done, fish out the thyme stems and bay leaves.
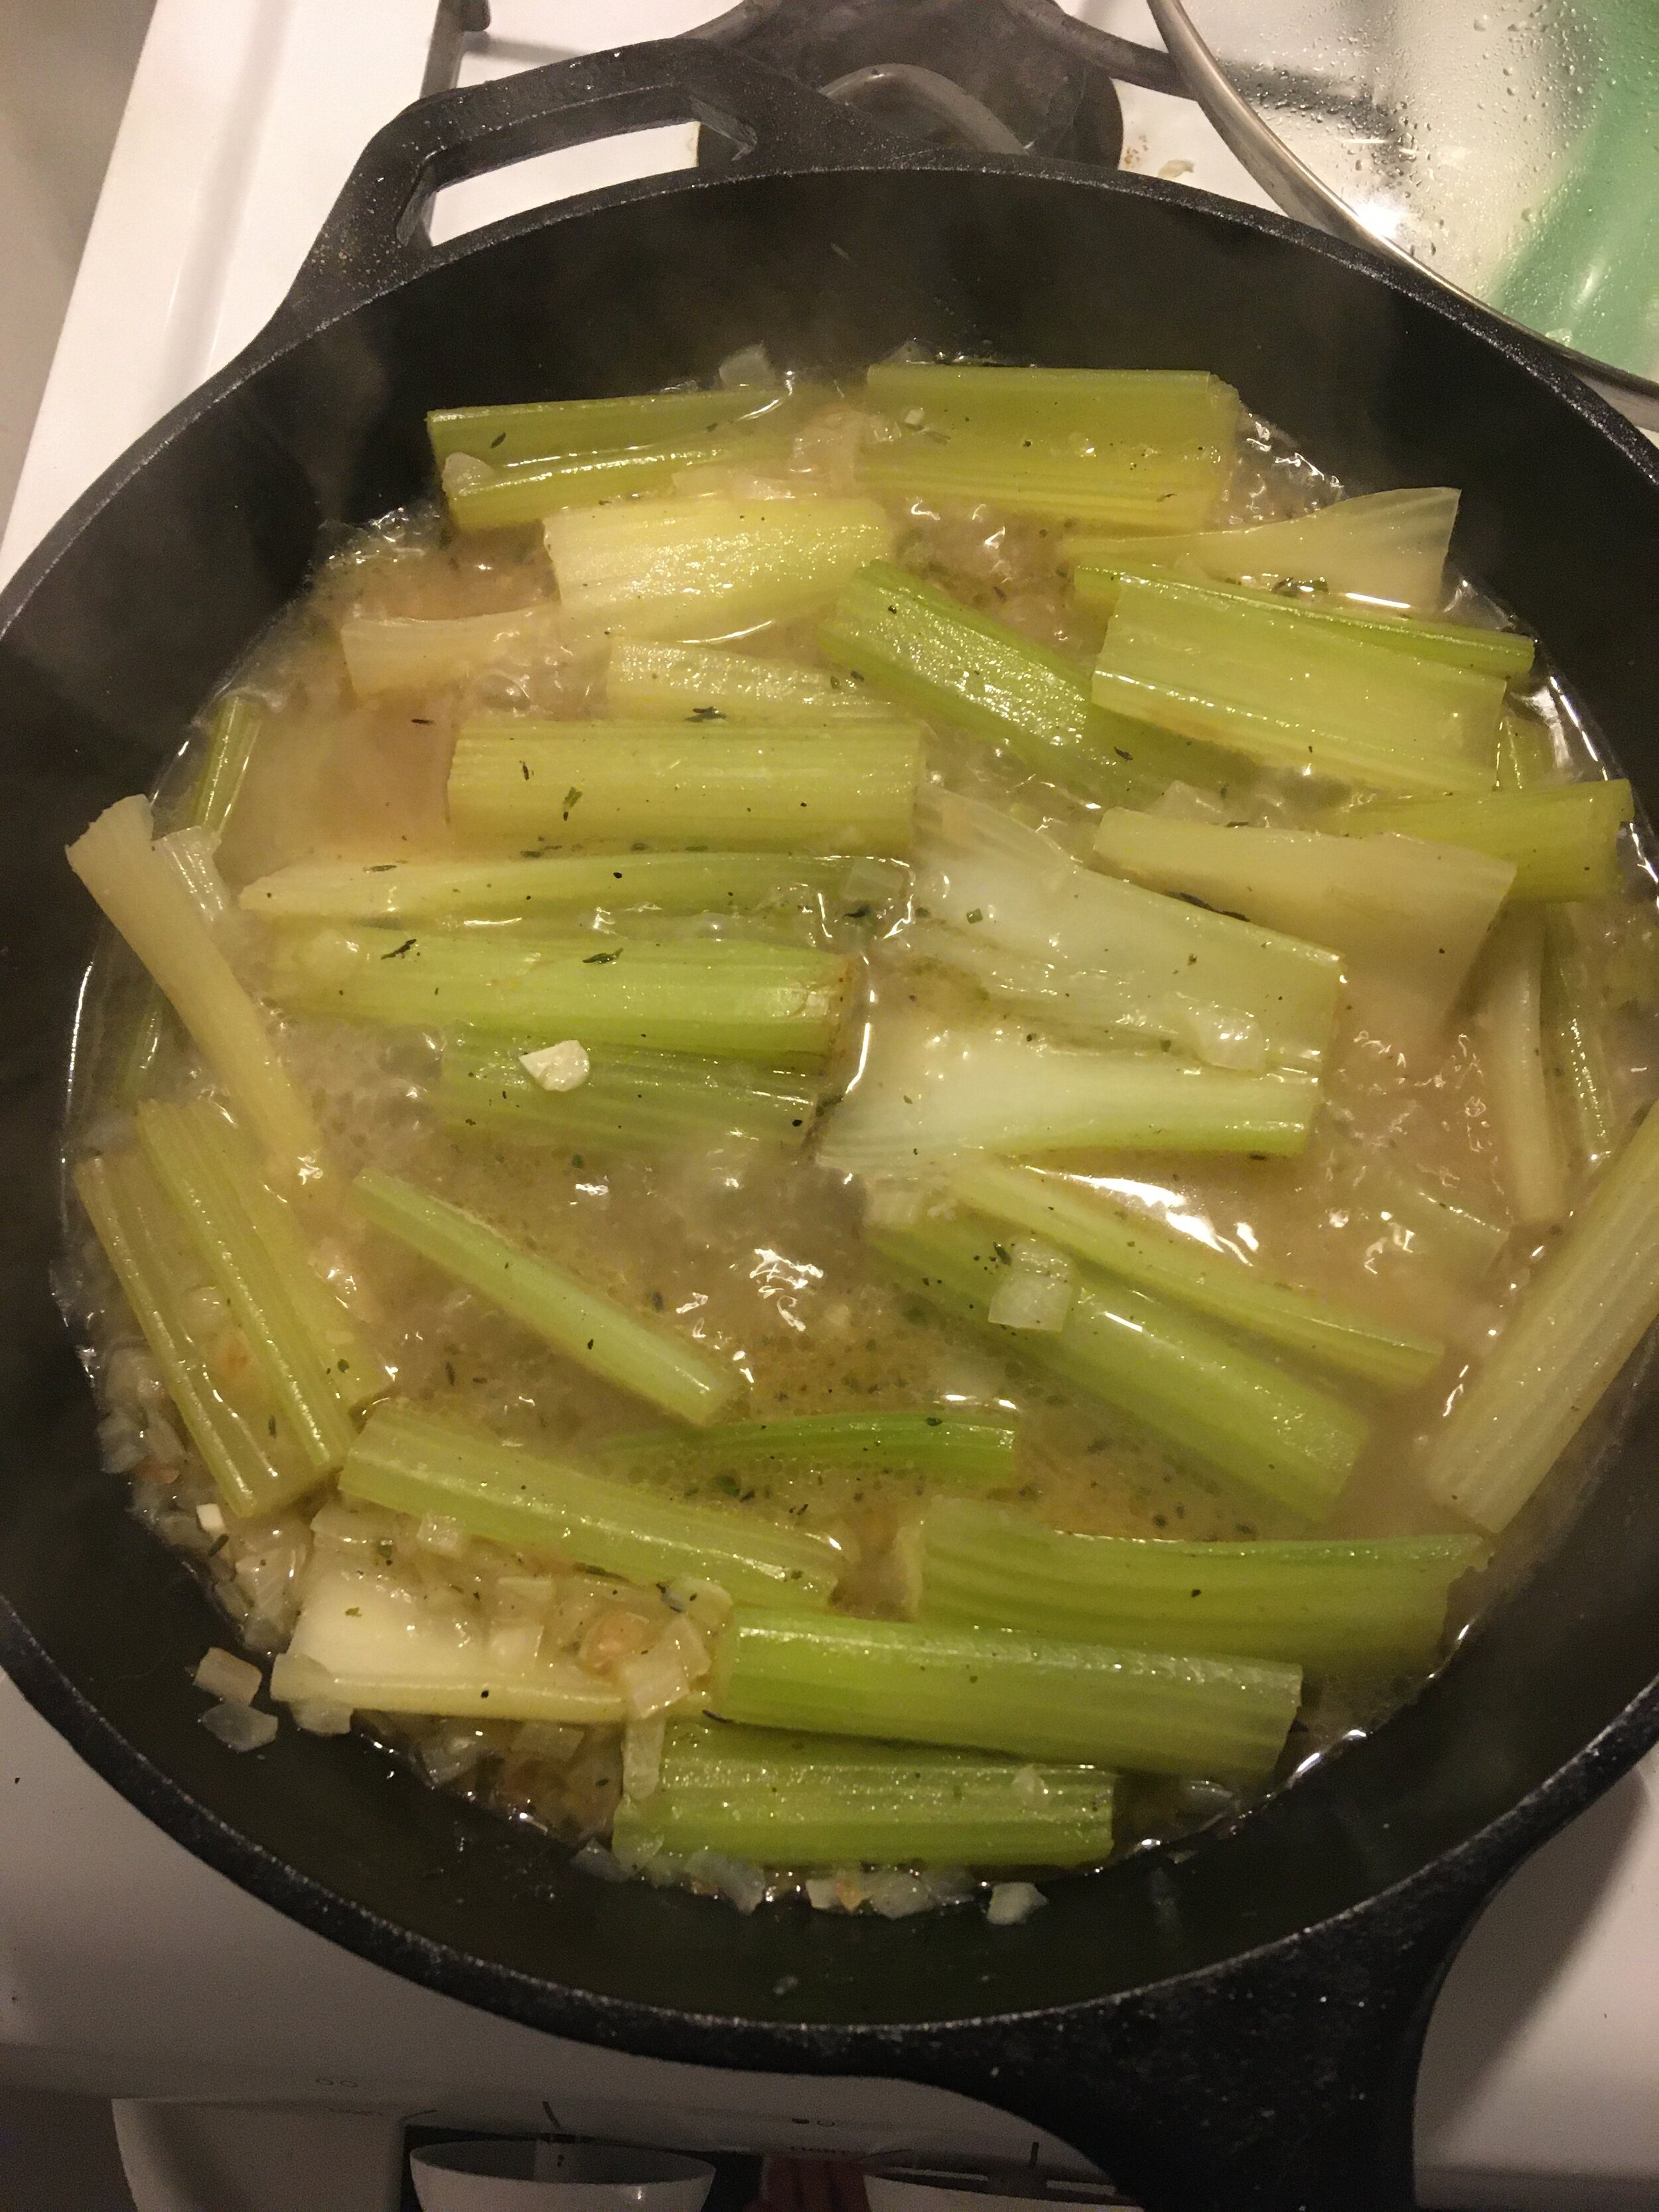
Celery is mushy, but still too wet! If this happens to you, take the lid off and crank the heat for a few minutes to reduce and thicken your stock
Depending on your stove and how tight your skillet’s lid is, you may need to add a little extra liquid during the cooking time. Don’t add too much, though. The goal is for the stock to thicken and concentrate over the cooking time, becoming a glaze that you can spoon over the celery to serve. I like this dish as a side for roast chicken, since its flavor reminds me of stuffing, but it would also be good with fish or pork. Or, you know, on its own, if you’re not a flesh eater living in sin.

Perfect! As you can see, the thyme leaves have fallen off the stems during the cooking process. That’s why I almost always cook with whole thyme and just pick out the stems later. Picking the leaves off of fresh thyme is soul-sucking.
Thanks, Sohla: Spicy Fried Chicken
A little history of Bon Appetit’s Shakespearian demise, and a recipe inspired by the courageous person who took it all down.
Like every food-obsessed internet person, I used to be in love with Bon Appetit’s Youtube channel. The channel combined good recipes and skilled on-air talent with creative editing, high production values and humor to make compulsively bingeable videos. The channel’s secret sauce was that it made Bon Appetit seem like a cool, fun workplace where everyone knew each other and helped each other out. The constant cameos and crossover appearances by different chefs in the Bon Appetit roster kept the videos fun and engaging, and made the on-air talent feel like a friend group you were a part of.
Of course, it’s 2020 and everything good is actually bad, and it turns out that Bon Appetit basically wasn’t paying its nonwhite contributors for their video appearances. Editor-in-chief Adam Rapaport also once appeared in terrible brownface at a Halloween party as an offensive Puerto Rican stereotype.
Many of the details about BA’s sculduggery came from chef Sohla El-Waylly’s Instagram, where she revealed how low her pay was compared to her white coworkers. Bon Appetit promised to do better, fired Rapaport, and tried to write new contracts to retain the workers they had been screwing. Ultimately BA failed to provide equitable pay to its nonwhite talent, causing fan favorites like Sohla, Priya Krishna, and Rick Sanchez to either leave the company entirely or to stop appearing in videos. The BA Youtube channel is now effectively dead, at least for now.
Sohla’s revelations were especially galling considering that she had established herself as probably the most talented, imaginative, and technically gifted chef in the BA test kitchen during her short tenure there. People have even made supercuts of her schooling all the other chefs at Bon Appetit. Fortunately, she has been able to spin out of the Bon Appetit trash fire gracefully, and now has her own show on Bingeing With Babish’s Youtube channel. She also demonstrated her perfect fried chicken recipe in a video for the New York Times. Inspired by the video, I did a spicy fried chicken inspired by her methods on a day when my girlfriend was craving hot chicken. It slapped.
Spicy Fried Chicken With Chili Oil
4 skin on bone in chicken thighs
2 cups buttermilk
1/2 cup kimchi juice or the liquid from fermented mustard greens
2 eggs
1/2 cup flour
1/2 cup cornstarch
Tsp cayenne pepper
Tsp msg
Tsp cumin
Tsp coriander
Tsp black pepper
Tbsp Louisiana-style hot sauce like Crystal
2 tsp Lawry’s or other seasoned salt
Tsp garlic powder
Tbsp Chinese chili oil
Trim any excess fat and skin off your chicken thighs, and then soak them in a mixture of buttermilk and kimchi juice/mustard green liquid. Fermented mustard greens can be bought easily at asian grocers, or you can make your own. I actually soaked my chicken in straight mustard green liquid because I had a ton leftover from multiple batches of fermented greens. You could also use the liquid from spicy pickles. The main goal is to have a soaking liquid that is pickly, salty, and a little spicy.
You should soak the chicken for at least an hour or two, or preferably overnight. Mix all the dried spices together, and beat about half of this spice blend together with the hot sauce and eggs, thinning with a little water. Mix together your flour and cornstarch in a separate bowl.
Take the chicken out of its brine and dump it into the starch mixture, tossing to coat. Transfer from the starch bowl to the egg mixture, making sure every bit of the chicken is coated with egg, then dunk it back into the starch mixture. Press the flour into your chicken pieces forcefully, making sure every inch is thickly coated. You want to be kind of sloppy with this process, freely contaminating your flour mixture with little drops of egg and brine, because the liquid combined with the flour/starch is what creates the crispy craggy bits on the outside of truly excellent fried chicken.
At this point, you would ideally let the chicken sit at room temp on a sheet pan for a while to let the coating set, but this is not strictly necessary. Heat about an inch of oil in some kind of wide, flat bottomed pan over medium heat. Cast iron skillets are perfect for this, but if you don’t have one a high-walled stainless steel saute pan, a dutch oven, or even a pasta pot would all make adequate substitutes. Any kind of neutral oil with a high smoke point would work, but I think grapeseed oil, peanut oil, or lard are the best options. To me, canola oil and vegetable oil have off flavors that become quite noticeable when used in the quantities necessary for deep frying.
You’re shooting for around 350 degrees with your oil, but there’s no real need to bust out a thermometer. Just drop a little chunk of your breading mixture in, and if it sizzles vigorously, you’re good to go. Carefully lay in your chicken pieces one at a time, and immediately crank the heat under your skillet so the oil temperature can recover. If you don’t do this, the cool oil will all immediately rush into your chicken, leaving you with a greasy, sad bird. Keep the heat high until the oil is singing and sizzling at a pretty good pace, and then reduce back to medium. Cook the chicken for about half an hour to 40 minutes, flipping every 5 to 10 minutes to ensure even cooking. The chicken should be cooked all the way through when the coating is deeply golden brown all the way around, with some dark chocolate brown in the spots where it has made contact with the bottom of the skillet. If you’re unsure, pierce the biggest piece with a paring knife to see if the juices run clear.

I didn’t use quite enough oil, so there was a little ring of non-crispy chicken around the edges of my pieces
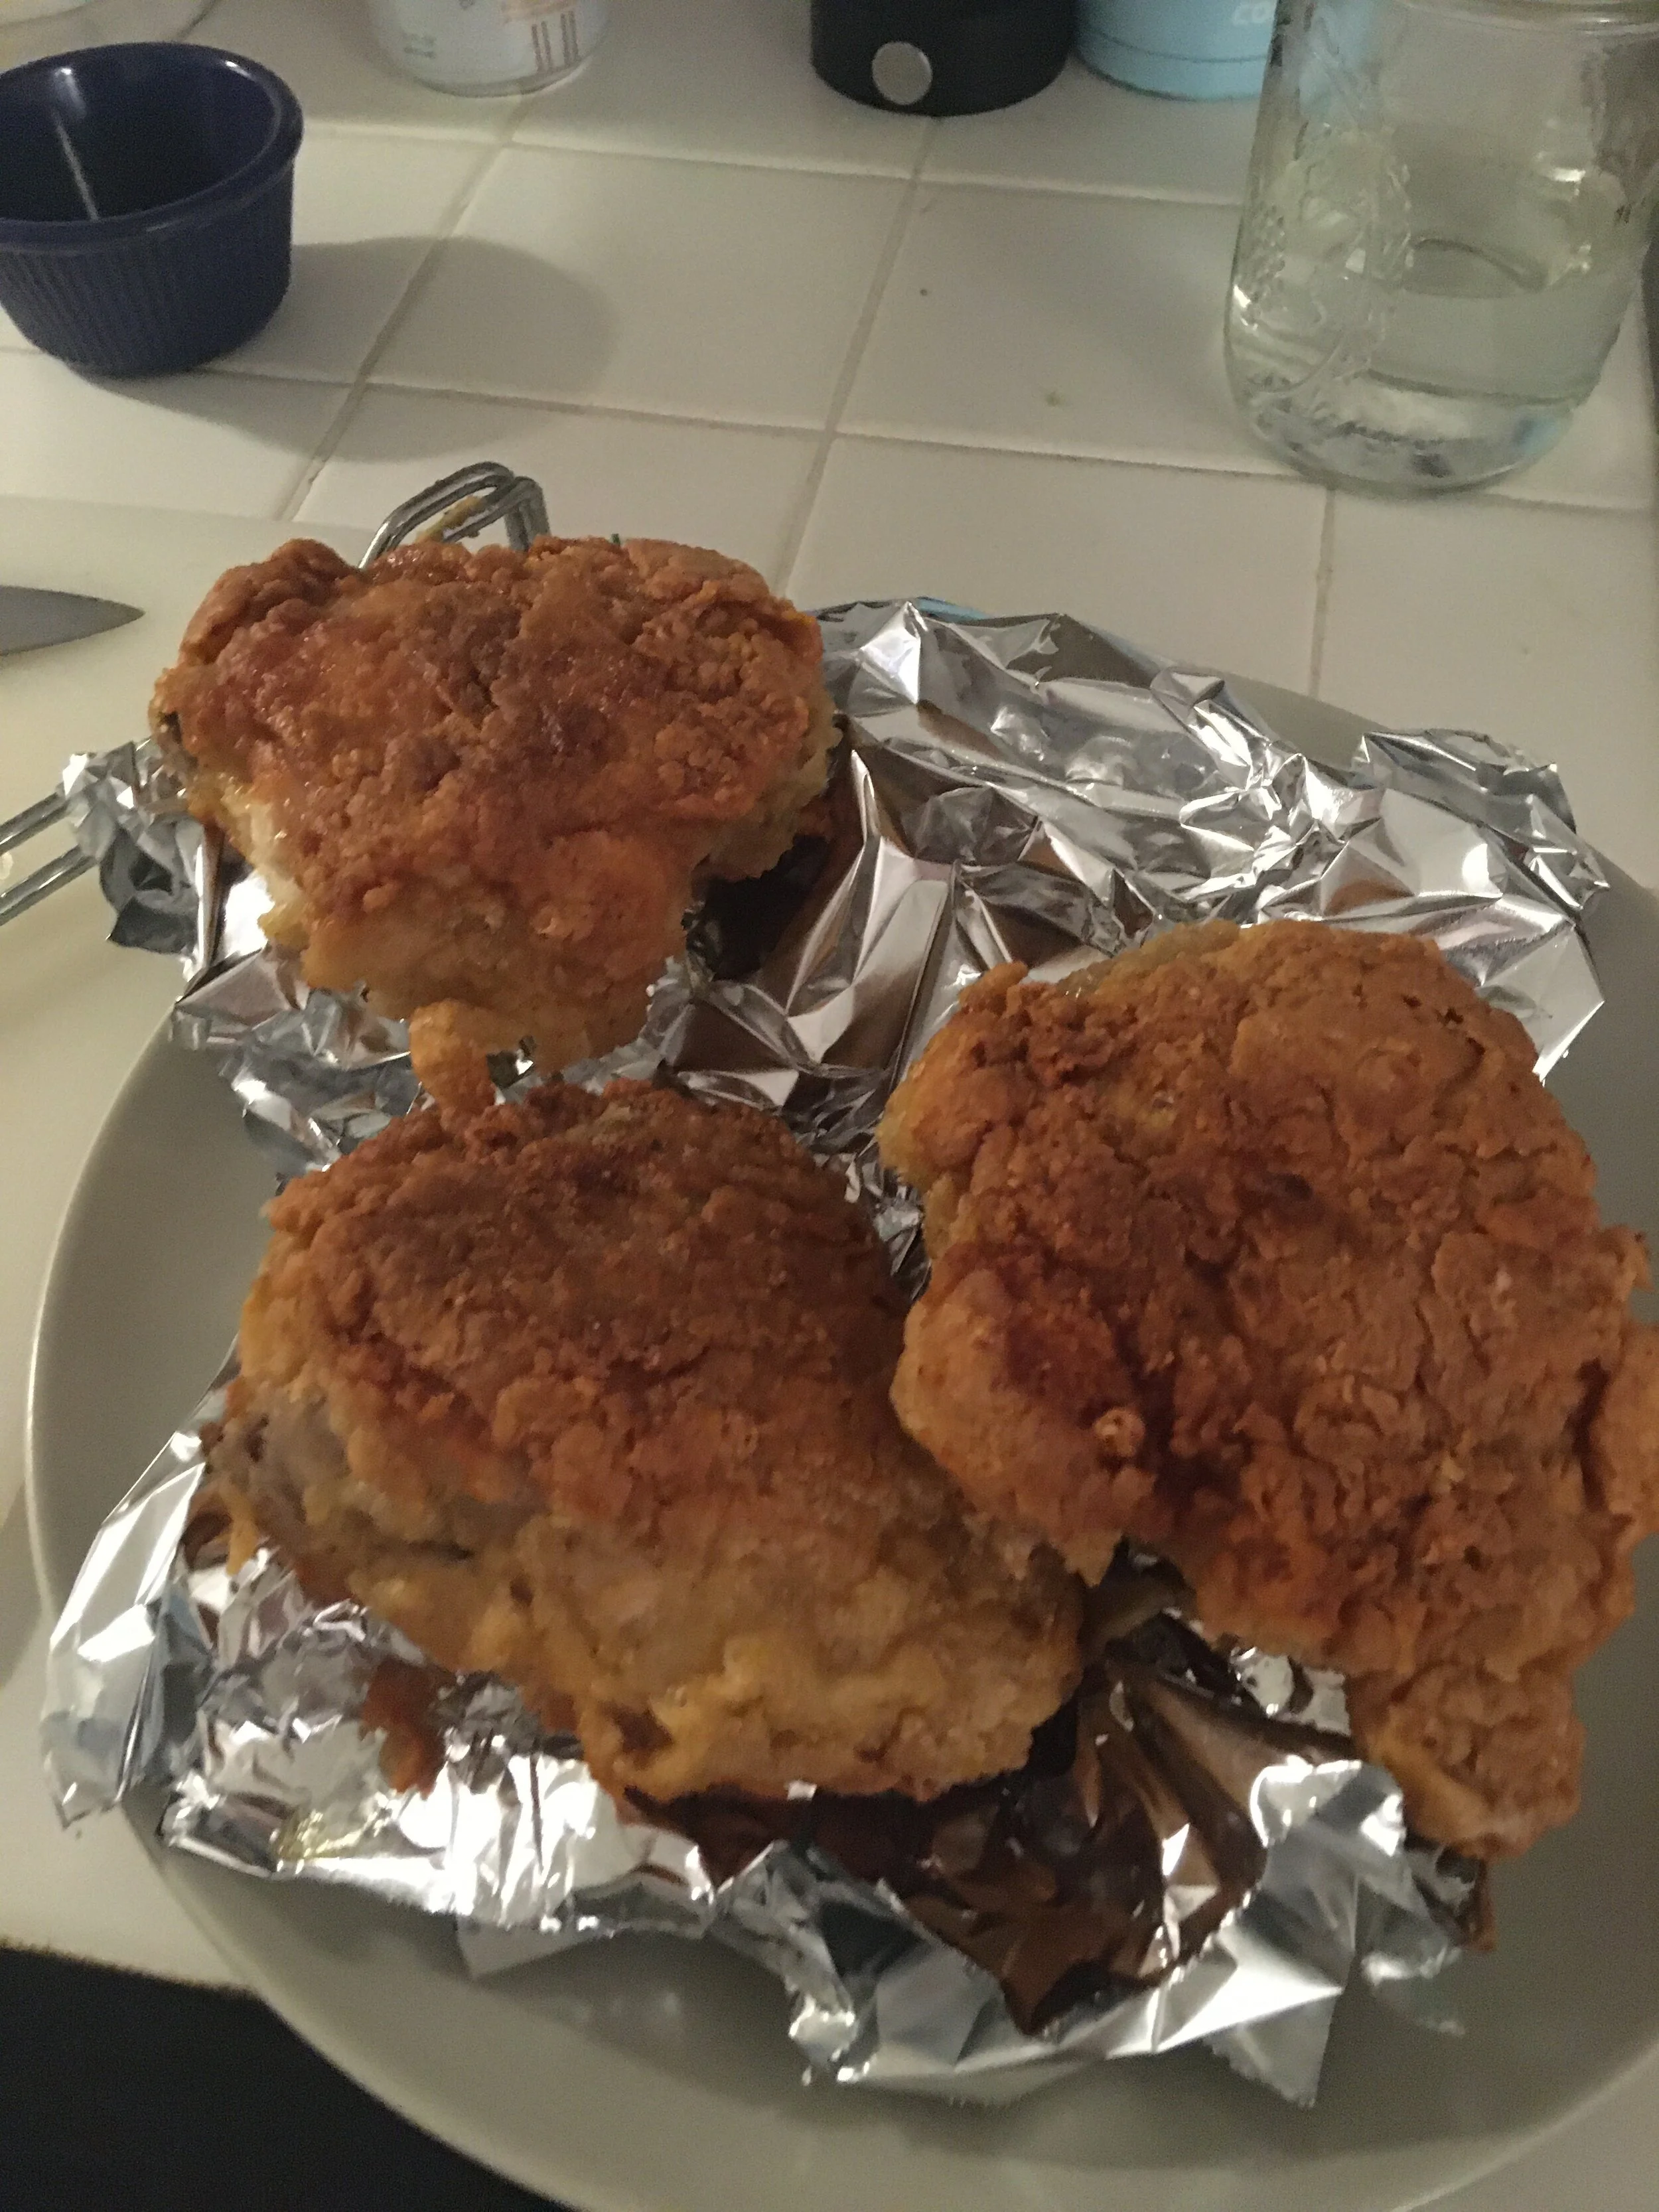
Remove your chicken from the oil with tongs and drain on a rack or a crumpled up piece of tinfoil. Immediately sprinkle it with salt and drizzle with chili oil to taste, then dust with your reserved spice mixture. I like to follow Sohla’s lead and serve mine with honey. Kristen eats hers with a mixture of Crystal hot sauce and ranch, which is also incredibly delicious. Wait a couple minutes before you bite in unless you want to remove all your tastebuds with scalding chicken juice.

The tinfoil elevates the pieces and keeps the bottom from becoming soggy
Let My Radishes Into Your Club
Using radishes in an attempt primarily to gain food media legitimacy, and also to create something delicious.
I’ve been trying to pitch recipe ideas to food publications lately. Keeping the dream of being a professional food writer-abouter alive! This is a recipe I dreamed up recently, trying to think of something bougie but simple that a food magazine would like. Nobody’s picked it up yet, but if this blog mysteriously disappears later, you know I got some good news!
Radishes are one of the few vegetables that remains in season through fall and winter. They’re an ingredient that chefs love, but the general population seems to regard with suspicion. Most people only think of them as a salad topper, if they think of them at all.
While I love the zippy crunch of raw radishes, roasting softens their texture and brings out their natural sweetness, mellowing the astringency that some people don’t care for. Also, the sauce on these would make a boot taste good, so this recipe is perfect for converting radish haters, if that’s something you’re trying to do for some reason.
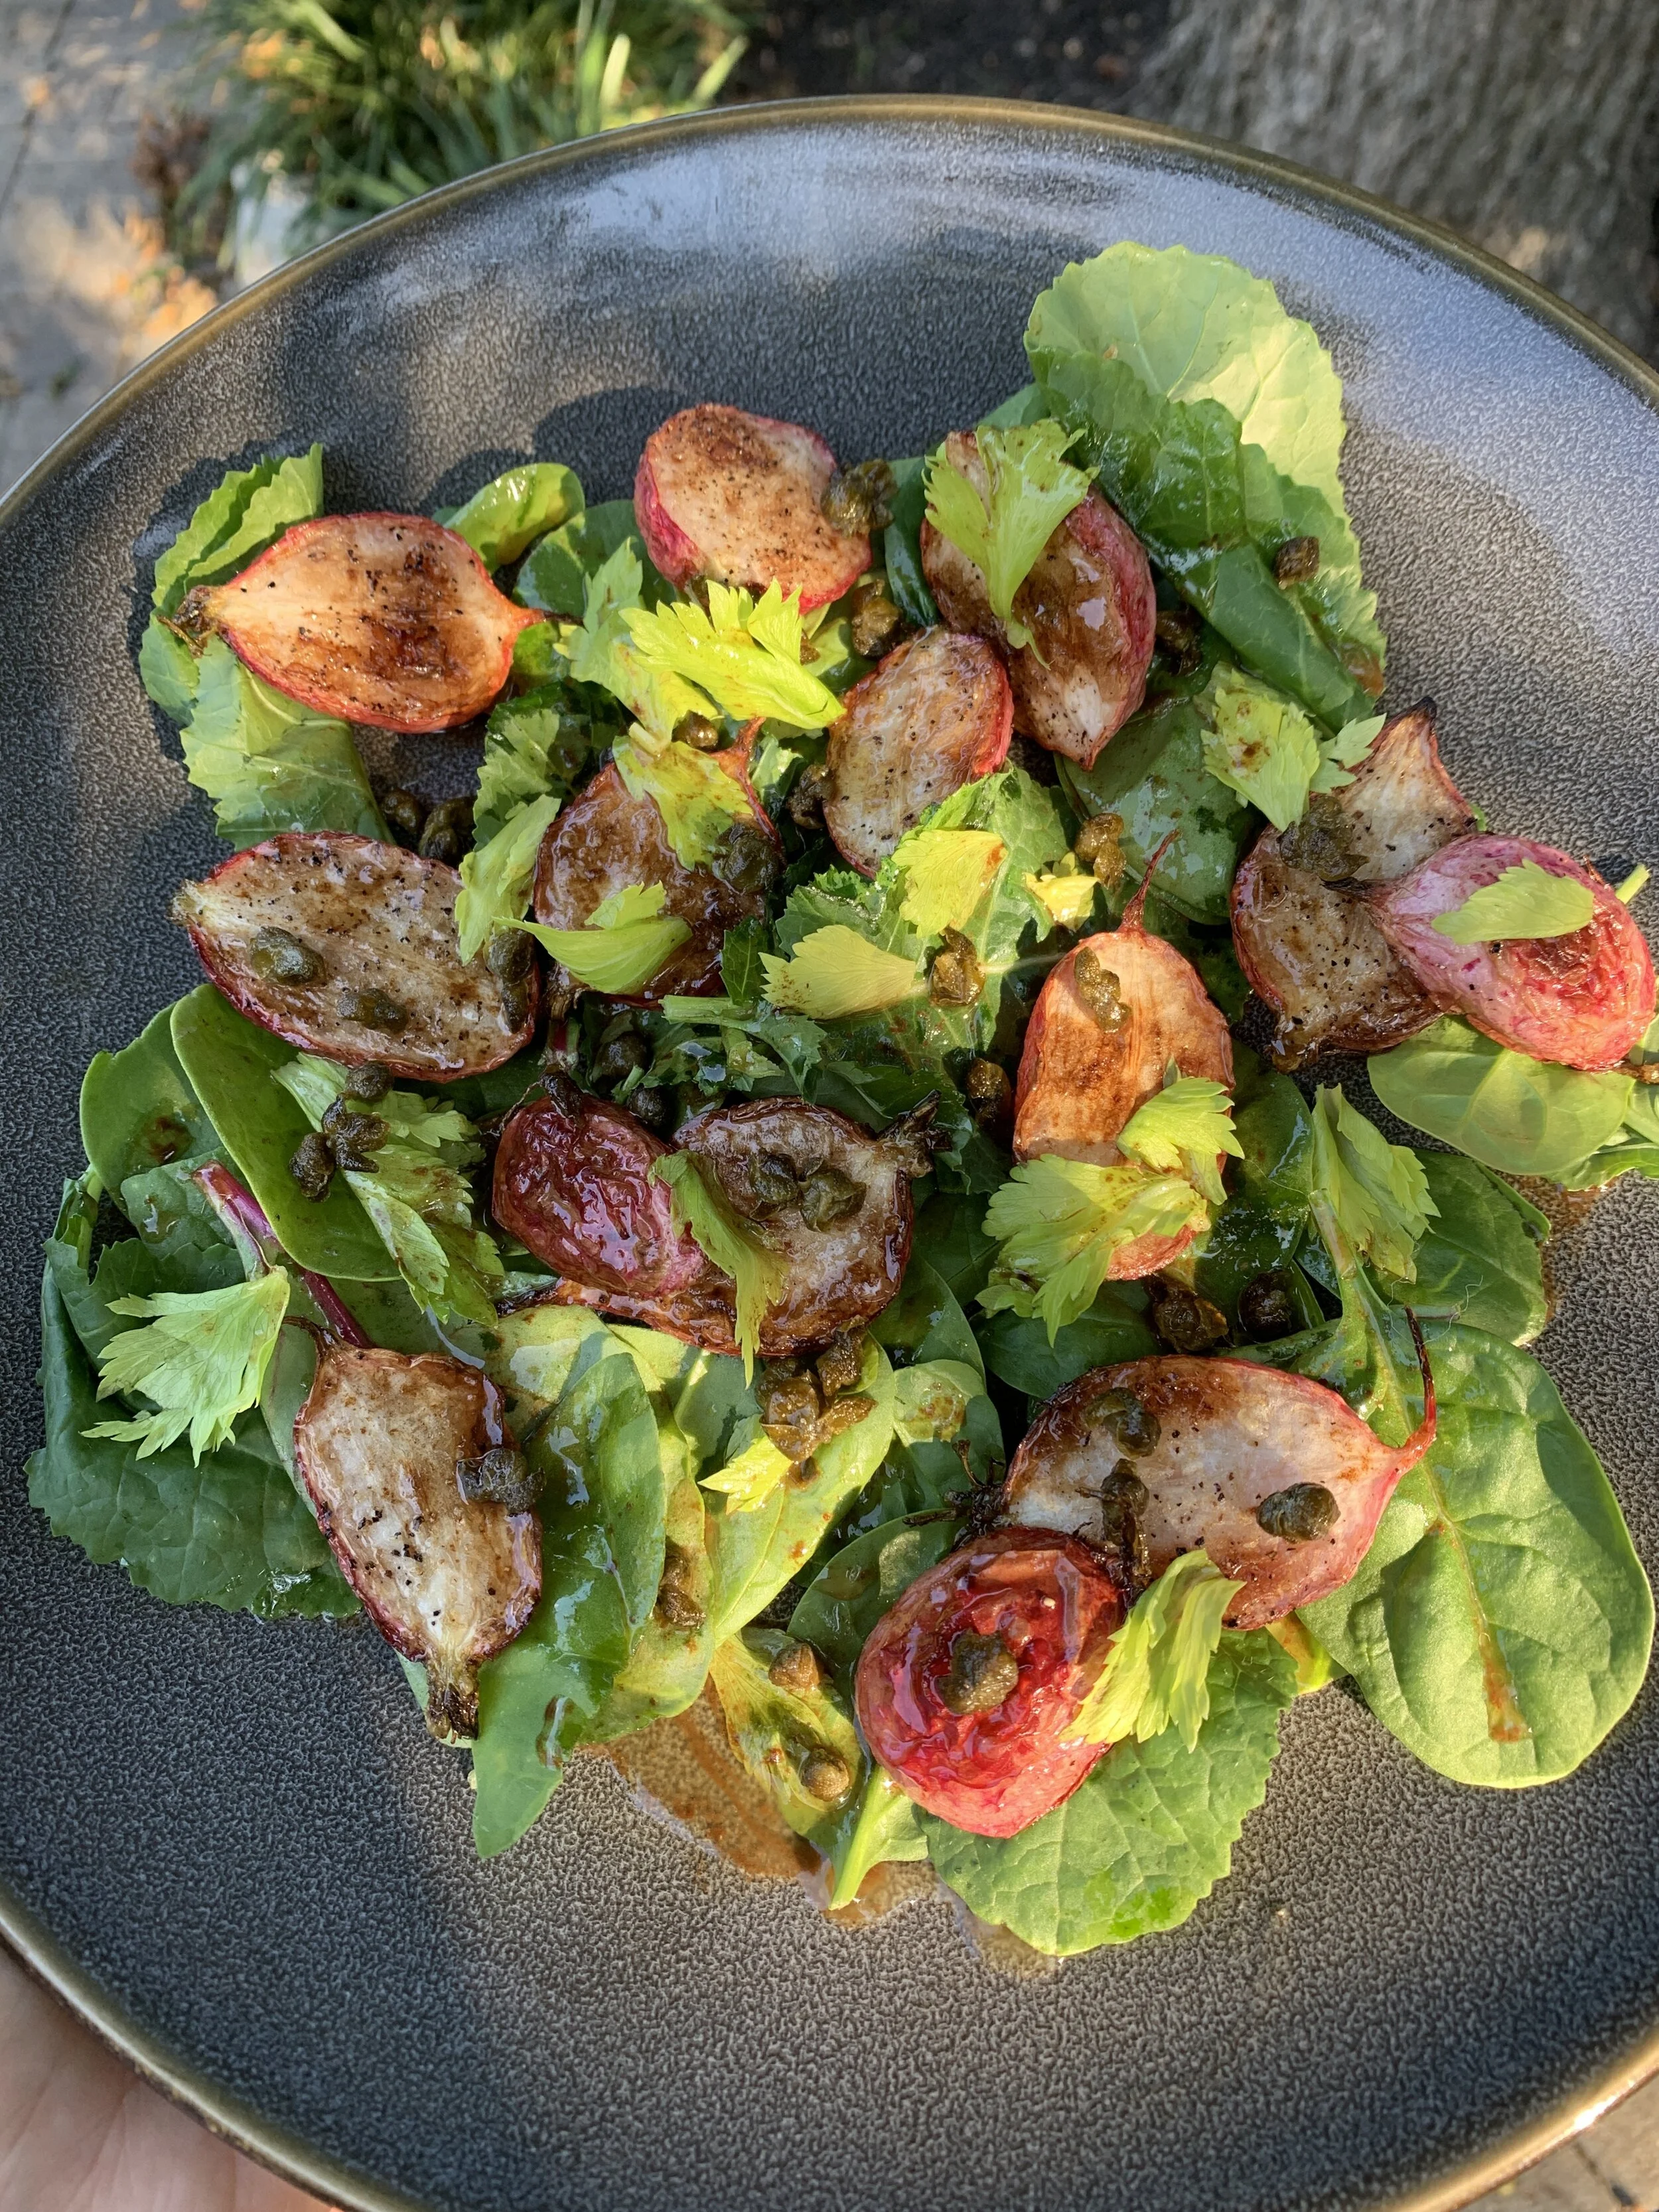
Roasted Radishes With Lemon-Black Butter Sauce And Crispy Capers
9 radishes
3 tbsp butter
Juice of half a lemon
1-2 tbsp capers
Celery leaves or flat leaf parsley
Preheat your oven to 400F
Cut your radishes in half from root to tip. Heat up a little olive oil in an oven-safe skillet over medium-high heat. You want enough radishes to be able to fill your pan with them in one layer, with a little gap in between the radishes to allow steam to escape so you get a good sear. For my 9 inch cast iron skillet, that’s 9 radishes.
Place the radishes cut side down in your skillet, and sear them on that side until they’re deeply browned, 5-10 minutes. Flip them over and season generously with salt and pepper. Put them in your preheated oven and roast until a fork slides in pretty easily, around 20 minutes.
While your radishes are roasting, melt the butter in your smallest skillet or pot over medium-low heat. Throw the drained capers into the butter as it’s melting. The goal here is to fry the capers while you brown the butter. It can be a little hard to see what’s happening, but the capers are done when they kind of “pop” or bloom and turn a little bit darker. The butter is done when the white milk solids turn a nutty brown color. In my experience, the capers will be done around the time the butter is browned.
Fish the capers out with a slotted spoon, reserving the butter in the pan. Drain your crispy capers on a paper towel. Squeeze the lemon juice into your brown butter and cook until most of the bubbling subsides, then remove from the heat. You have now created black butter, one of the most delicious substances known to creation. It’s good on pretty much everything.
When the radishes are tender, remove them from the oven and drizzle them with your black butter sauce. Garnish with the crispy capers and parsley or celery leaves. If using celery leaves, choose only the light yellow ones from the center of the bunch, as they are less tough and bitter than the green ones. Season with salt and pepper to taste.

I’ve never seen such good lookin’ radishes
These radishes are good as a hot side dish, and are also great served room temperature on top of salad greens. They would also be excellent on top of a piece of grilled bread spread with ricotta. Let your imagination run wild!
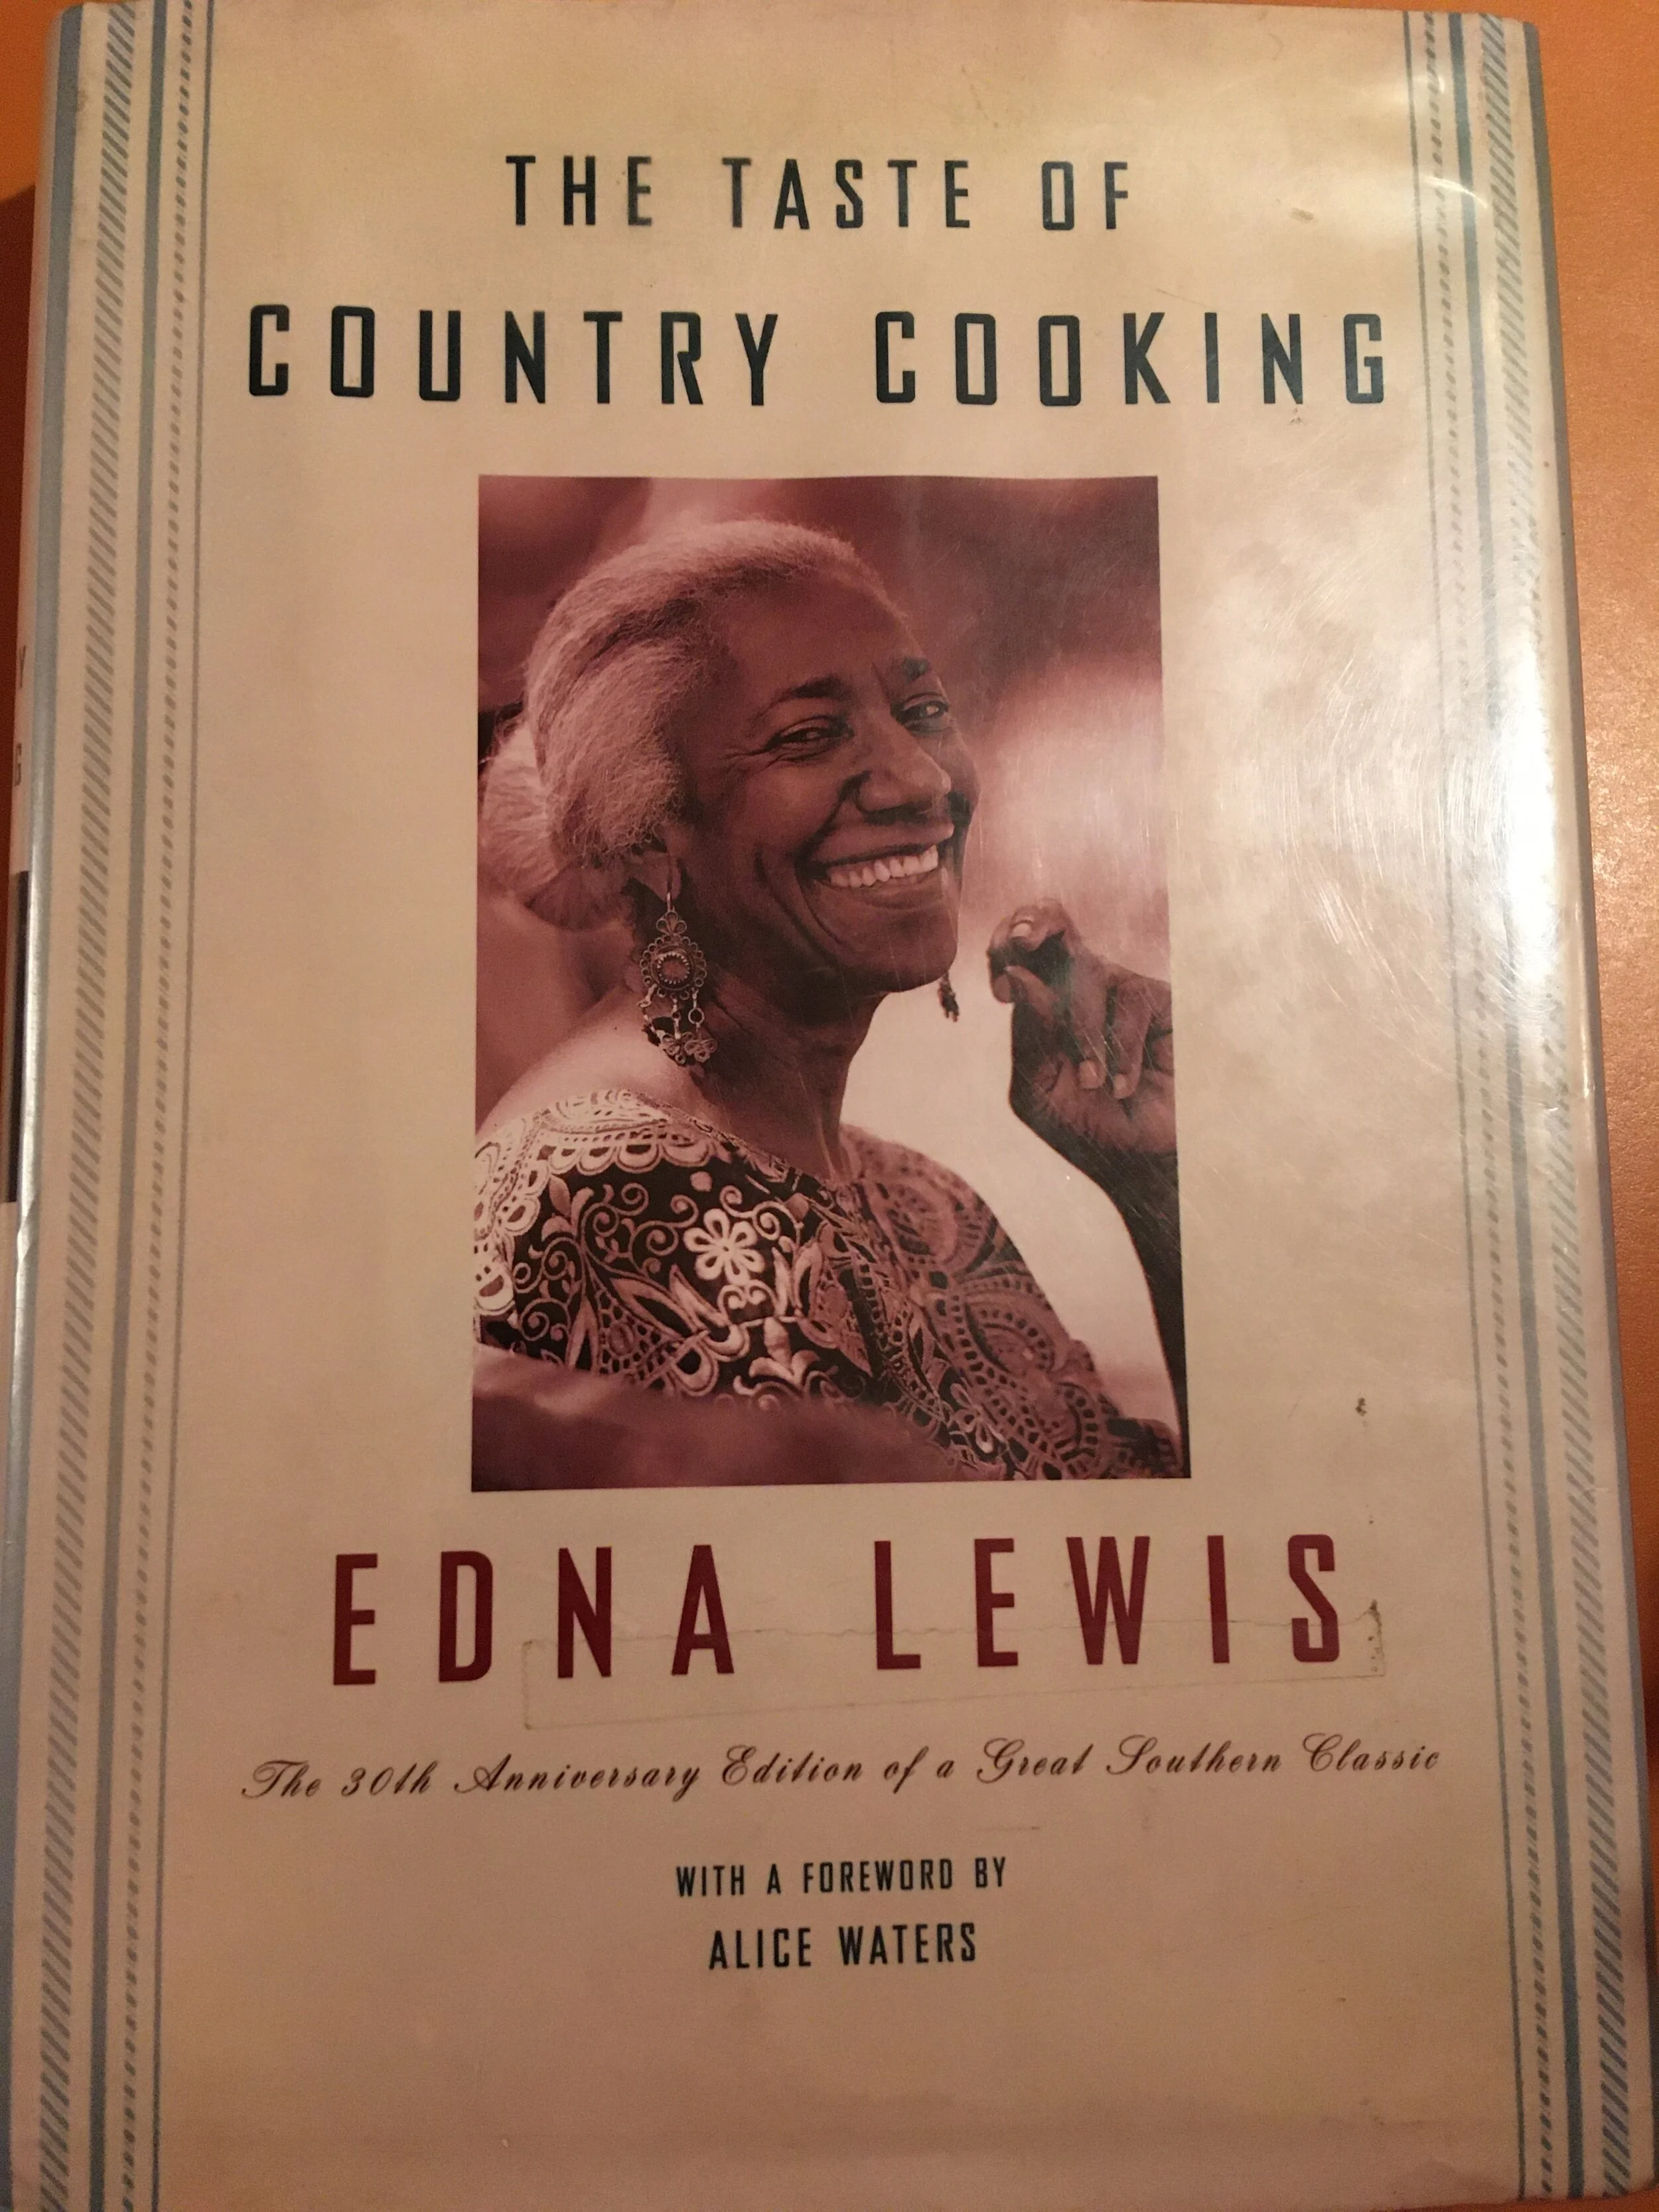
The Excellence Of Edna Lewis
An introduction to food heroine Edna Lewis, her incredible life, and her delightful recipe for watermelon rind pickles. Crawford Smith is an eclectic cook and musician living in Austin, Texas. Find his unique & inventive home recipes and music videos on crawfordsmith.com.
I just finished reading Edna Lewis’ incredible book The Taste of Country Cooking. Not just a cookbook, this work functions both as instructional material and memoir, using recipes to tell the story of a year in the lives of people living in Freetown, the self-sustaining agricultural community in rural Virginia where Lewis grew up.
The book is full of tips and instructions for seasonal, no-waste cookery. The range of techniques covered is expansive, from tips on slaughtering a pig and preserving its meat to refined recipes that showcase the daintiest vegetables of summer. Zero-waste and farm-to-table are now douchey fine-dining buzzwords, used to convince the wealthy to pay a few dollars more for an appetizer. In Lewis’ childhood, as in the childhoods of so many people from her generation, eating with the seasons and preserving foods via canning and fermentation were necessary survival tools.
The most impressive aspect of Lewis’ childhood community is how joyful and luxurious its food rituals were. Although the people of Freetown were basically subsistence farmers, they turned the natural bounty of the land they lived on into intricate multi-course meals and structured their lives around celebrations and feast days. Many “Southern” recipes like fried chicken and biscuits appear the book, as you would expect, but there are plenty of fancy French-influenced techniques too, like roast pheasant with fruit sauce or venison with juniper berries.

The smile of a true badass.
The self-reliance and prosperity of the community of Freetown is even more incredible when considered in its greater societal context. The town was founded by freed slaves in the Reconstruction period, and remained entirely populated by the black descendants of its founders through Edna’s childhood in the 1920s. By creating an isolated all-black farming community, Freetown’s inhabitants could escape some of the worst effects of Virginia’s Jim Crow laws that limited where and how black people could work and live. Freetown existed almost as an alternate reality, an intentional community celebrating freedom where black excellence could be nurtured and appreciated.
As someone interested in “Southern” or “country” food, I must be mindful of its fraught history. For too long, the celebrated figures of America’s most distinctive regional cuisine have been white men. The problem persists to the present day, when chefs like Sean Brock are given credit for revitalizing Southern food, taking media space away from the black and other marginalized voices who are responsible for so much of the Southern food tradition.
Loudly celebrating figures like Edna Lewis can help correct the whitewashed historical record. She was more badass than any modern chef I can think of, with a colorful life that included time in FDR’s re-election campaign, a stint in the American Communist Party, and encounters with a who’s-who of 20th century celebrities. That’s certainly a wilder life than contemporary chef adventure-bros like Dave Chang!
Most people probably don’t have alum powder at home these days. I substituted baking powder, which seemed to work.
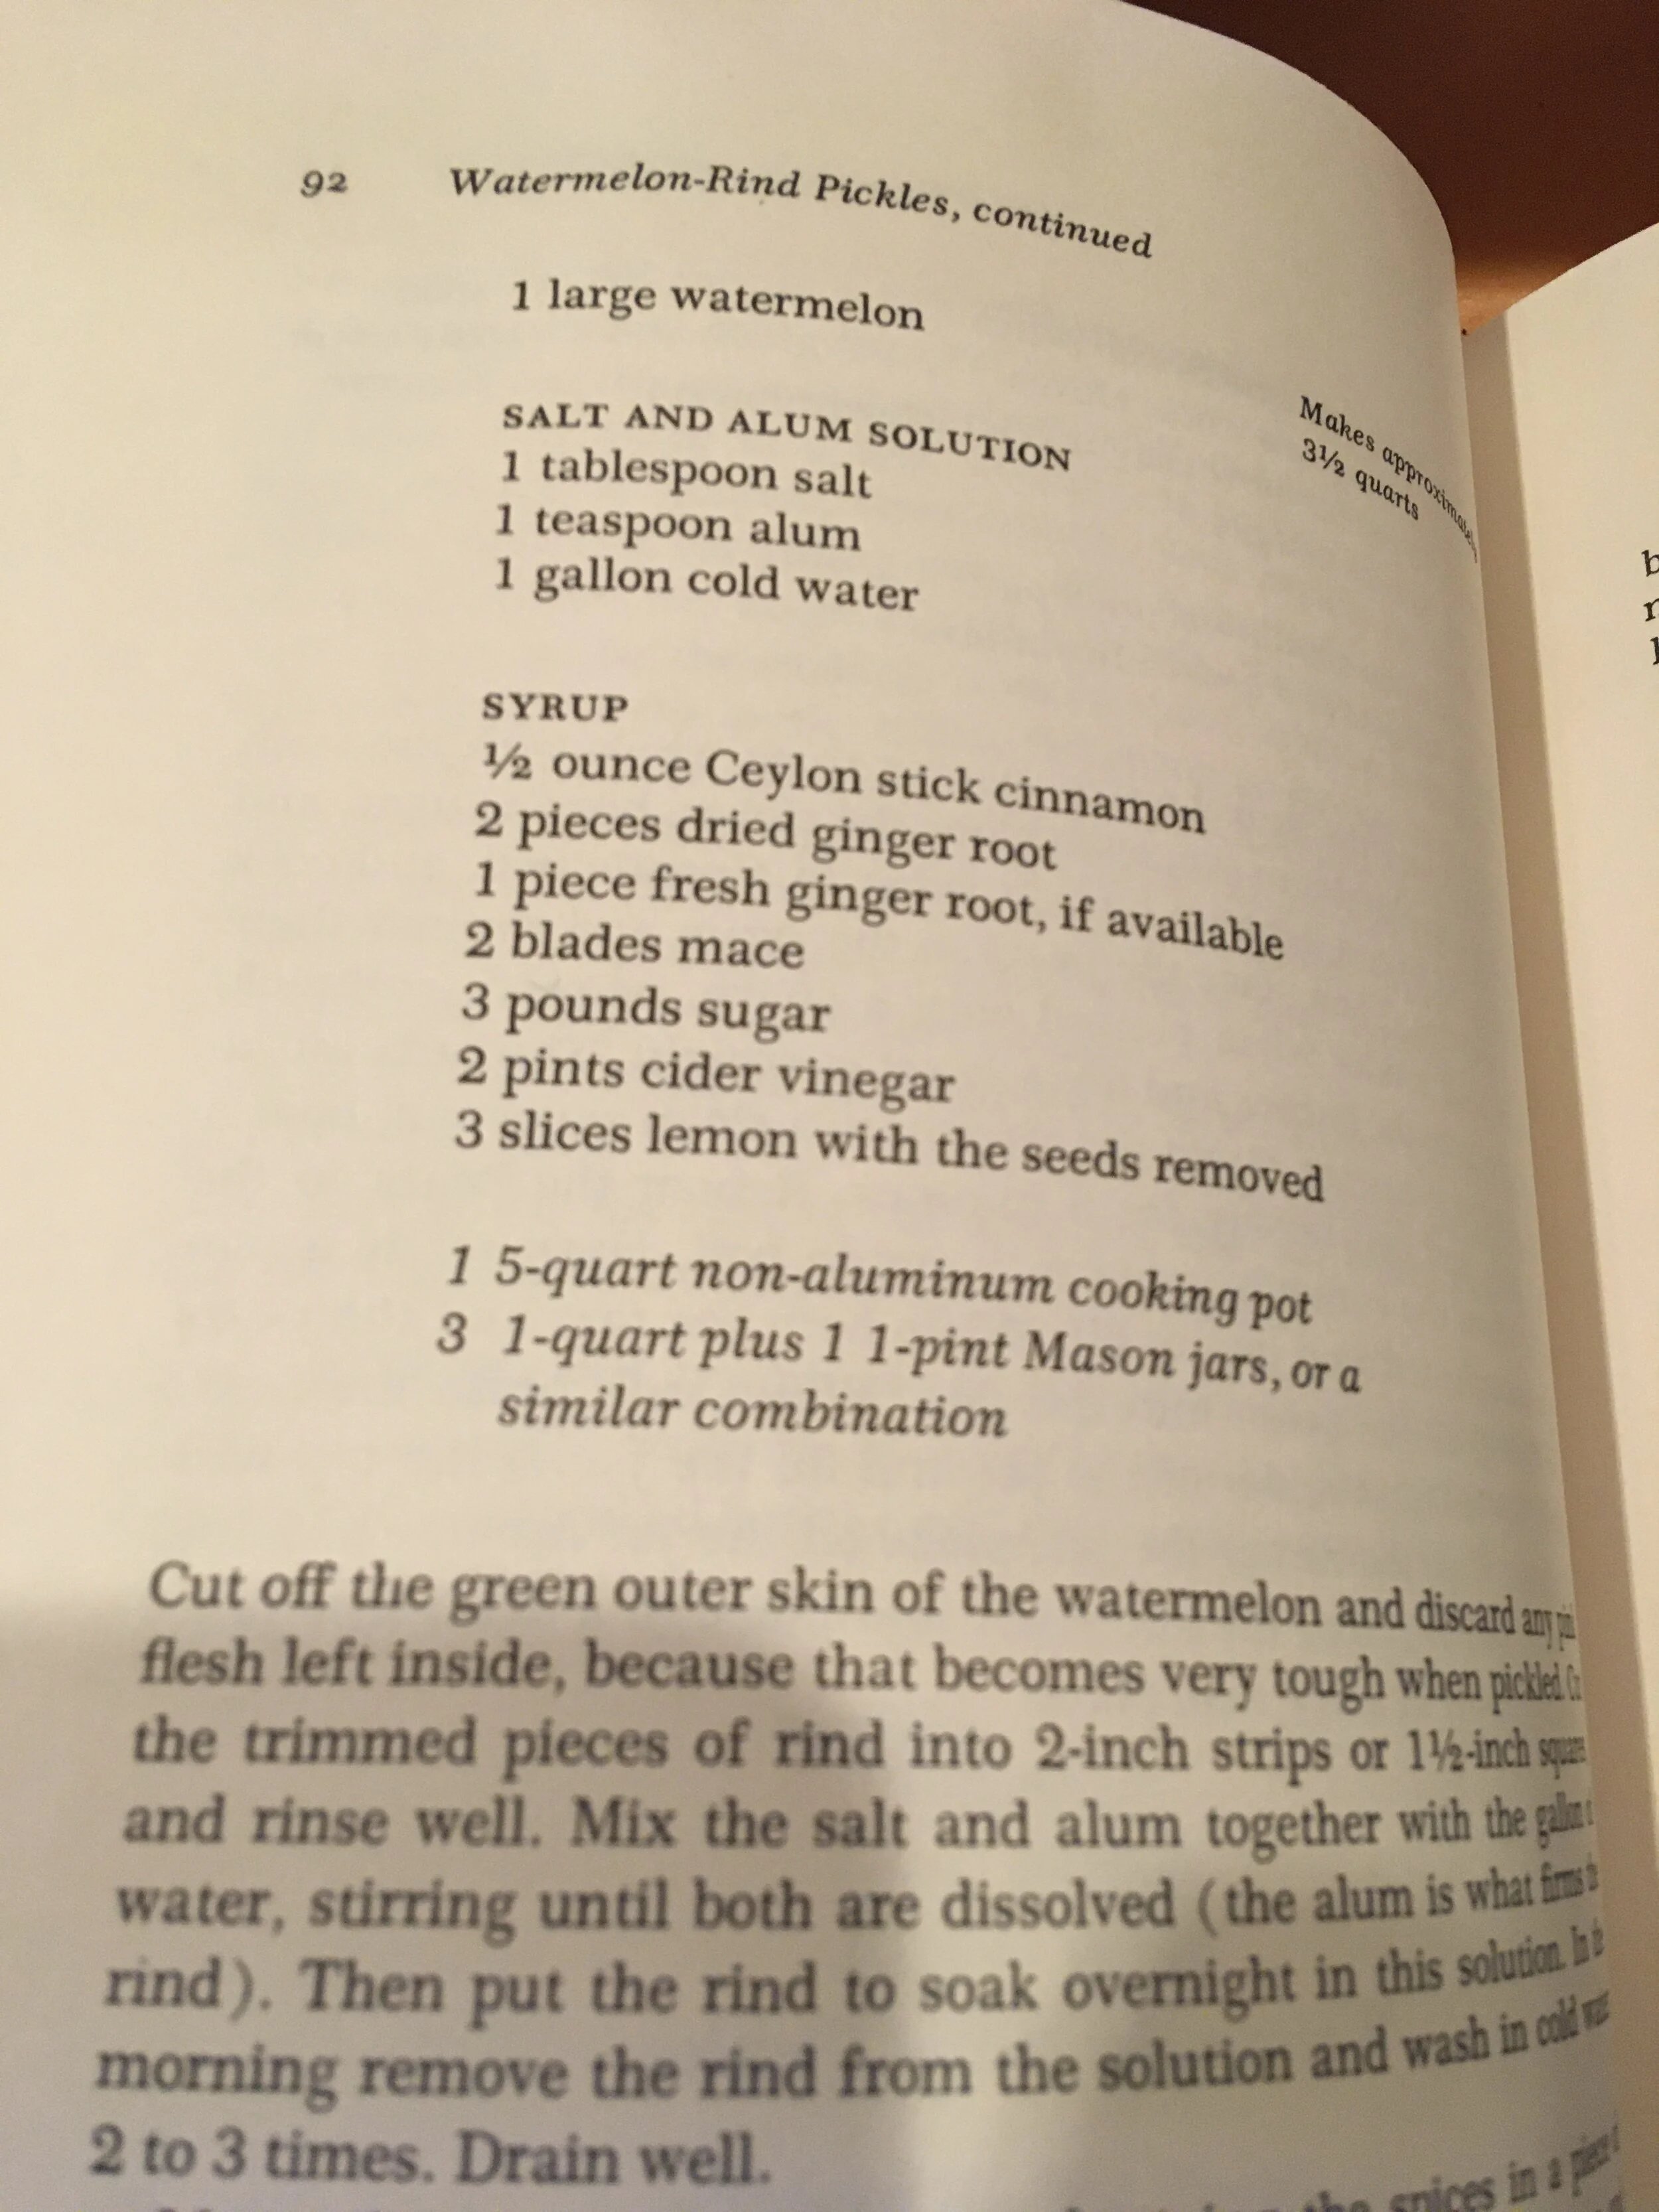
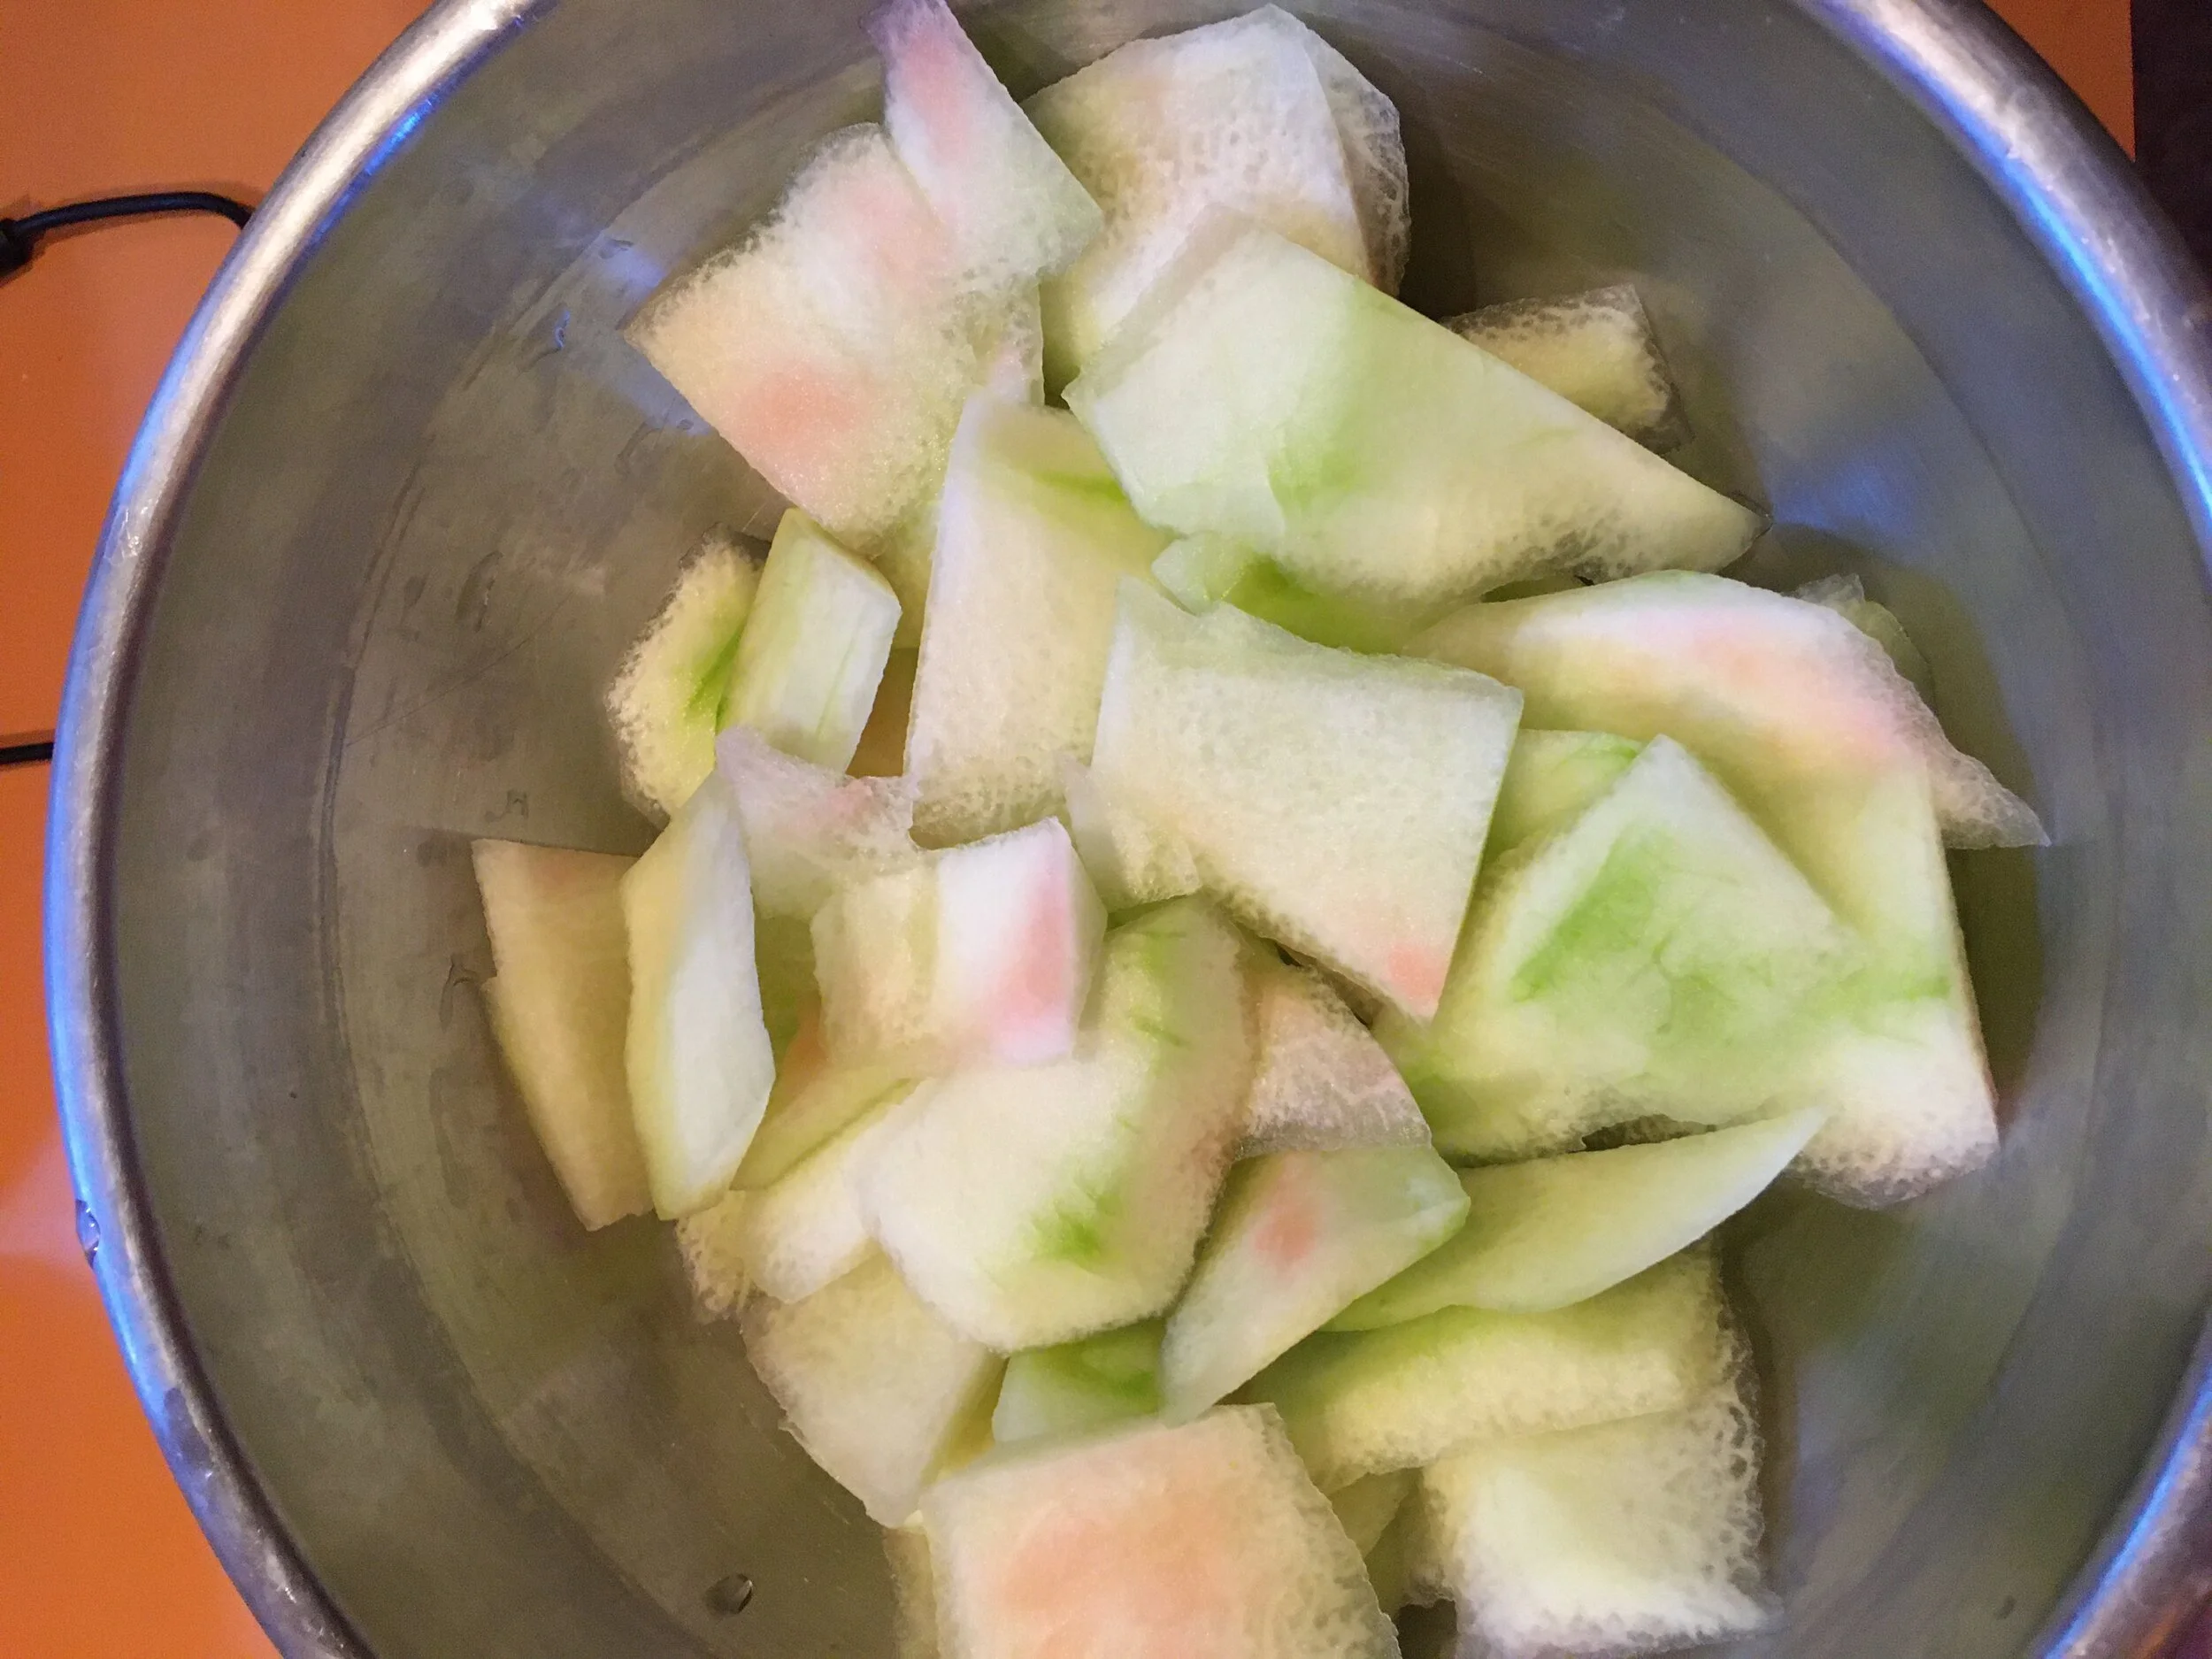
The first recipe I made from The Taste of Country Cooking was a watermelon rind pickle. I’ve read about this dish before, but never had the opportunity to try it, so I was excited to test it out. It’s a great use for something that otherwise gets thrown away. The sweet, delicately spiced pickle would be great as an accompaniment to fatty roasted meats, as Edna suggests. I have been eating it on its own as a snack or as a topper for bread and cheese. I have plans to turn the leftover pickle juice into a tangy BBQ sauce. I’m not going to reprint the recipe in full since you should just go buy the book! Just know that the page I have included here is missing crucial steps for making this recipe correctly.
Cutting the rind off gave me my first kitchen boo boo in a while.
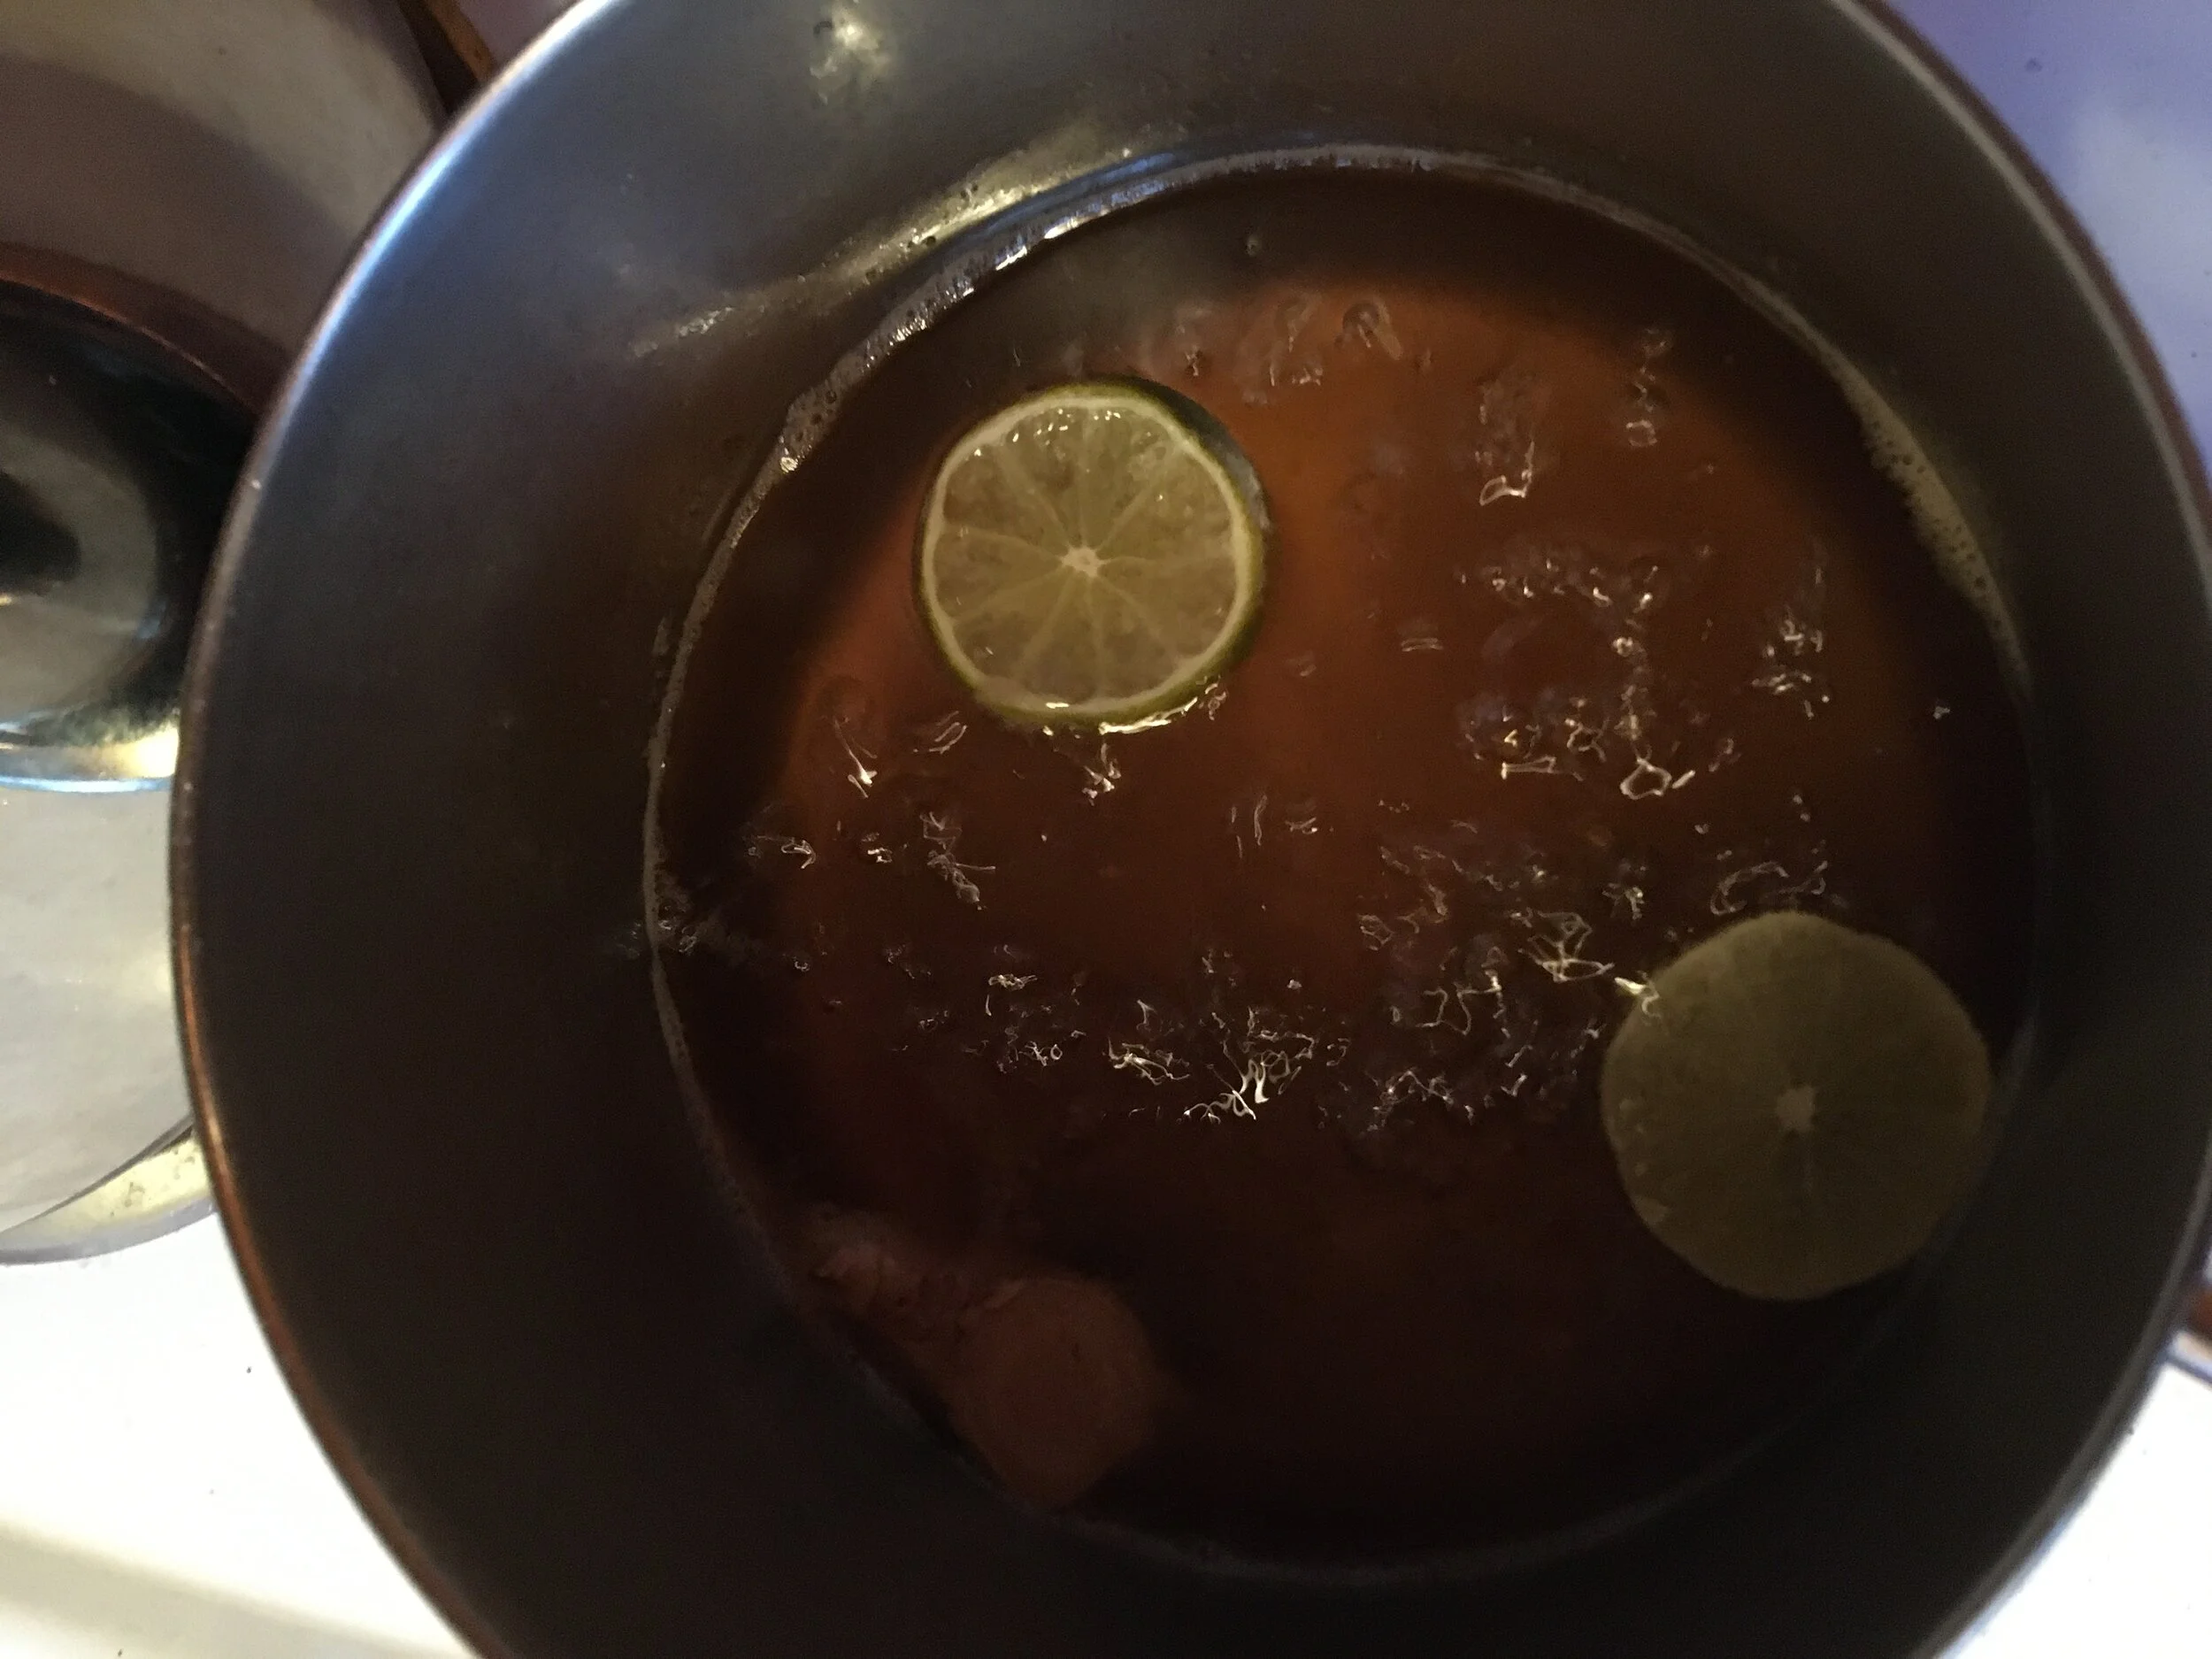
I subbed lime for the lemon and ground cinnamon and allspice for the cinnamon stick and mace.
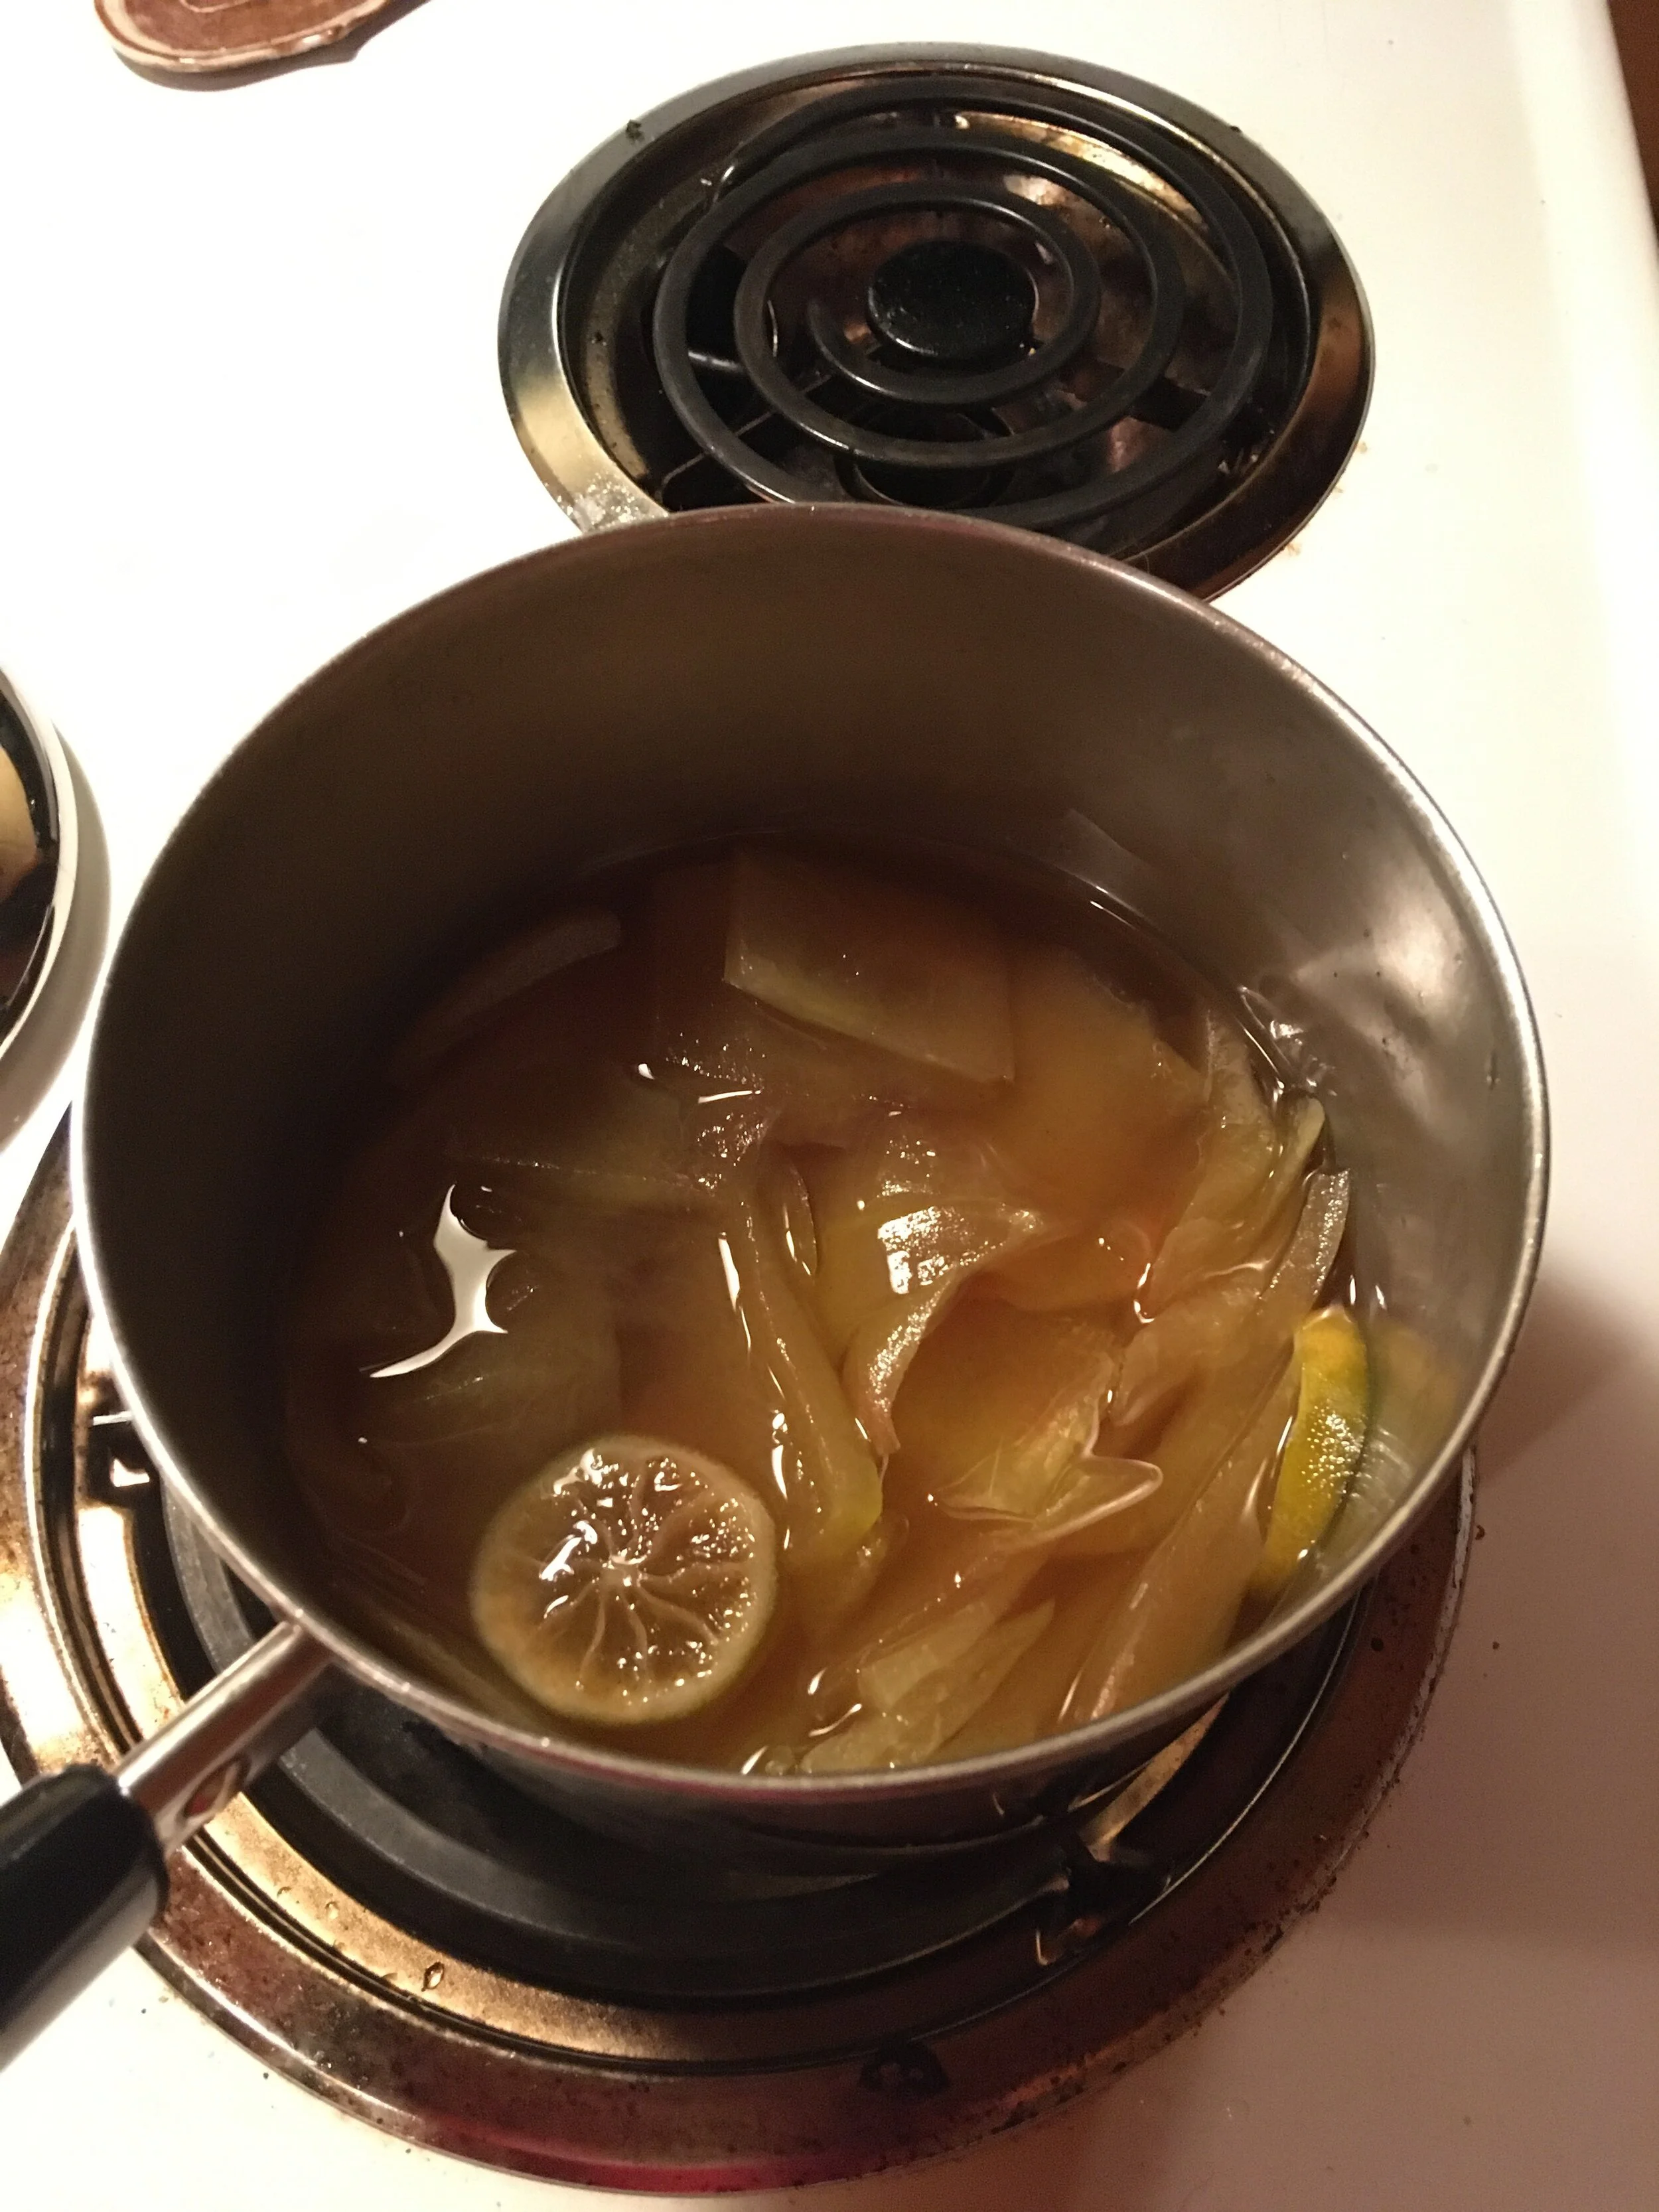
The rinds turn glassy and translucent in the pickling solution.
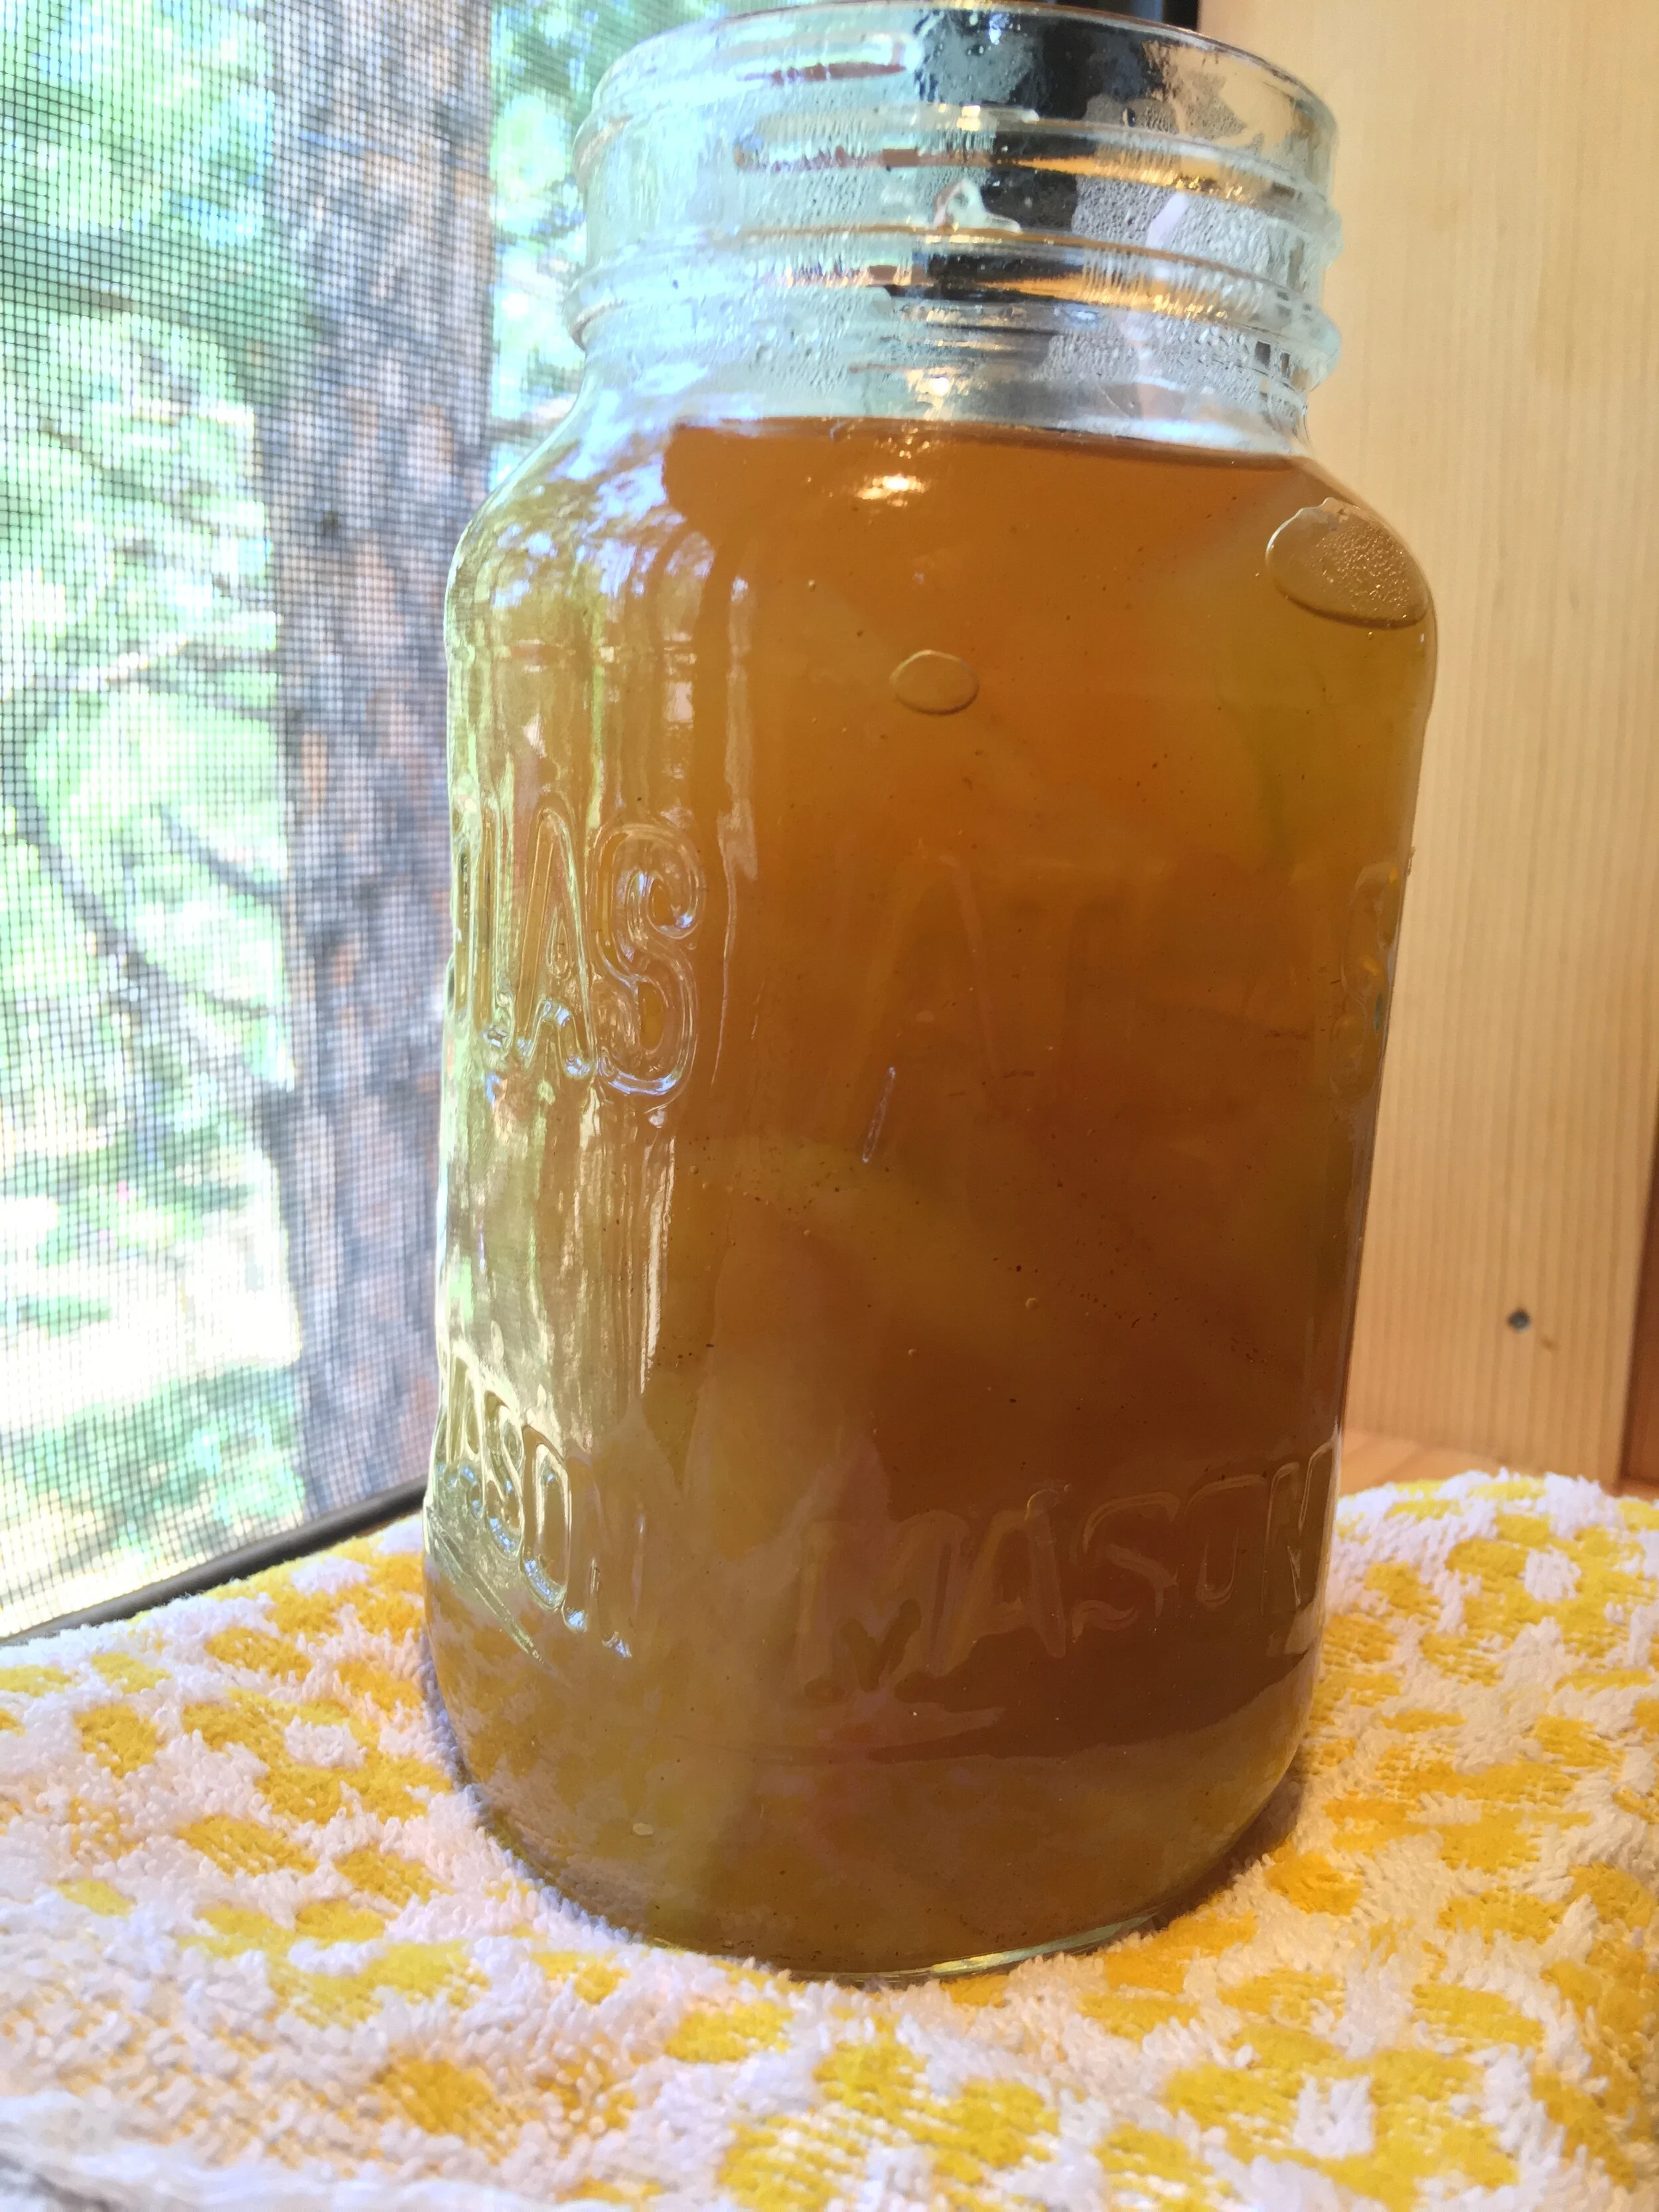
Unsuccessfully trying to capture the quality of sunlight filtering through the jar.
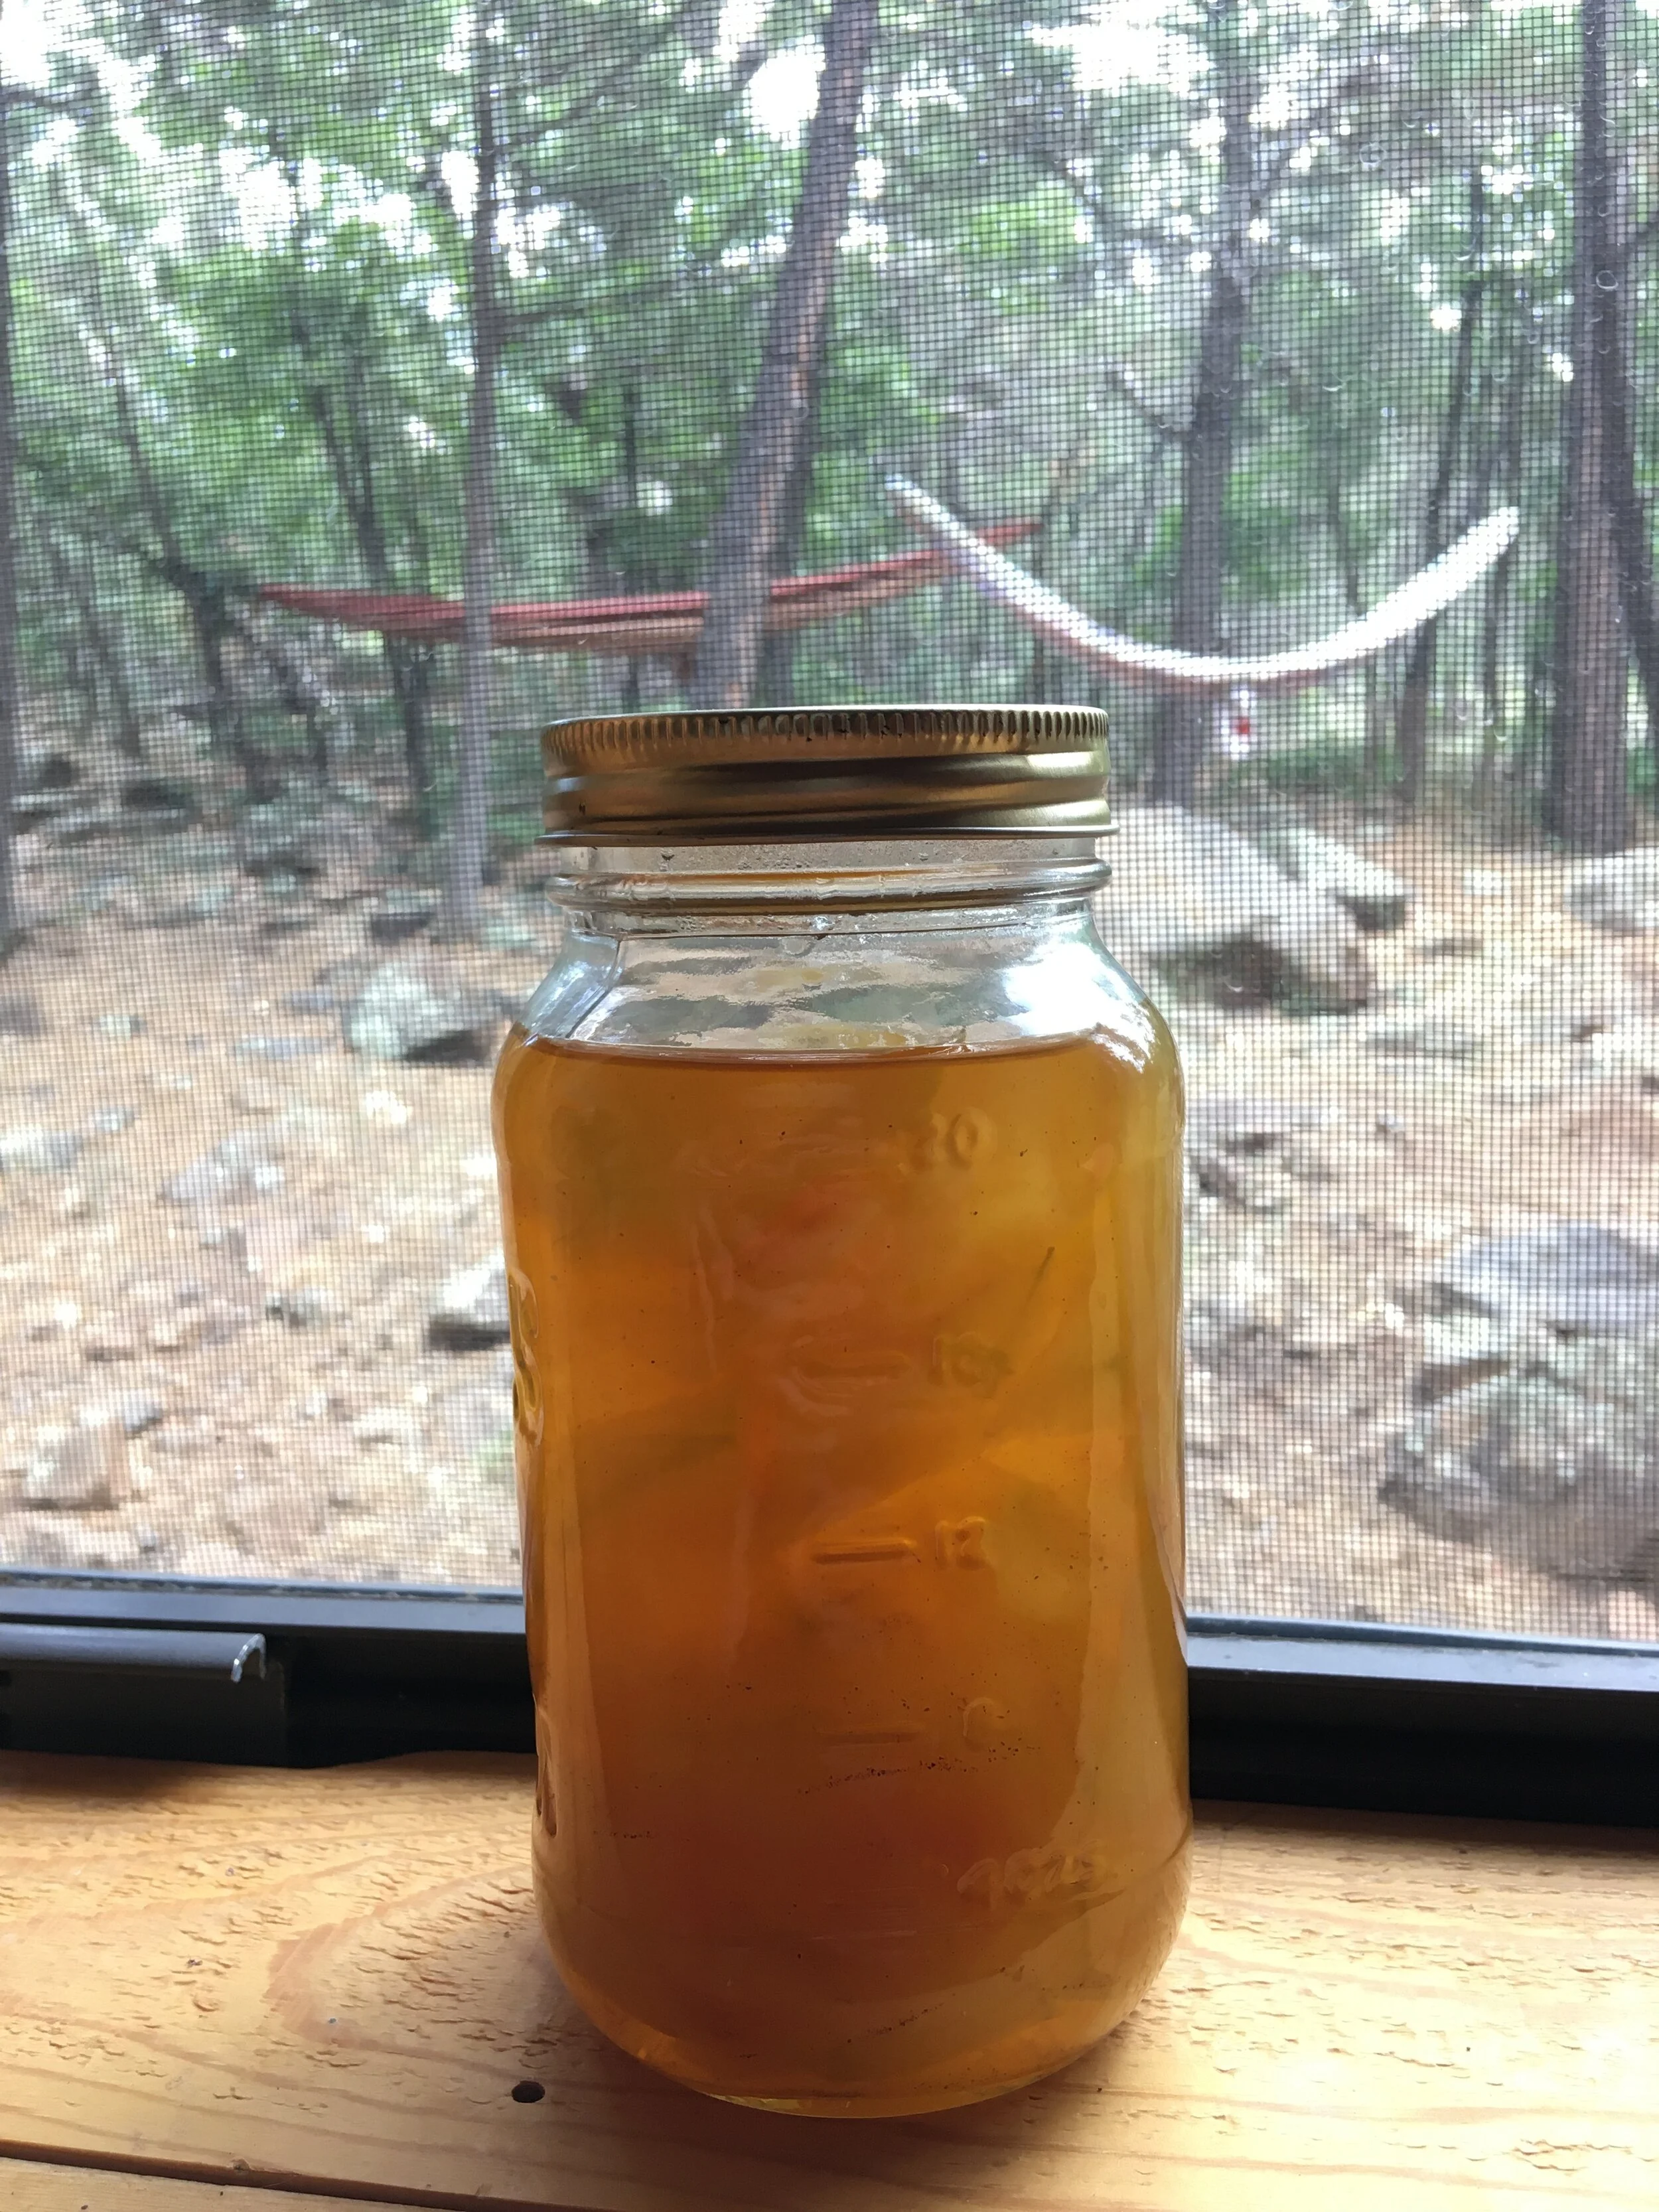
My hammock and mason jar lifestyle. Is this cottagecore?

Moving To The Country, Gonna Eat A Lot Of Peaches
A recipe to use up some of the ripe peaches you can't eat before they go bad, one of summer's sweetest burdens.
First off, it feels strange to post any lighthearted content at the moment. The political efforts against police brutality and white supremacy are still moving along full force. I have chosen to direct most of my support at the Austin Justice Coalition. You can find more about them here.
I seem to be really getting in a groove of not-really-pies. Summer is approaching, and with it the call to find fun uses for all of the amazing in-season fruit.
Here in Central Texas, peach season just started, reminding me that peaches are my favorite fruit. At least, they are for the month or so when I can buy locally grown ones that don’t taste like rock-hard orange cucumbers.
A perfect peach needs no recipe, and cannot be improved by any human intervention, but even in-season peaches vary in quality. I recently bought a pound of peaches, ate all the perfect ones, and decided to make a dessert with the also-rans.
It’s always hard to choose whether to make peach crumble or peach pie, so I basically made both at once. This recipe packs a sugar wallop, but all the butter and salt add a savory note that makes the peaches taste, uh, peachier somehow. What I’m basically saying is that this recipe is health food, and don’t let anyone tell you any different.
The crust on this bad boy is another easier-than-pie-crust pie crust. It’s a basic shortbread that you just kind of mush into the pan instead of rolling out on a board.
Peach Crumble Pie Bars
Crust:
1 cup white flour
6 tbsp cold butter
1/4 cup sugar
Tsp salt
Filling:
5-ish ripe peaches
1/4 cup sugar
2 tbsp white flour
1/2 tsp salt
Tsp lemon juice
Tsp vanilla extract
Crumble:
1/2 cup sugar
1/3 cup white flour
4 tbsp butter
Tsp cinnamon
1/2 tsp salt
Preheat oven to 350 F
For the crust, mix together the flour, sugar and salt. Grate the butter on the large side of a box grater and mix with the dry ingredients with your fingers. When thoroughly mixed, you should be able to squeeze the sandy mixture together in your hands to form a ball that sticks together. If you can’t do this, add another tablespoon or two of butter.

That poor crust rim has no idea it’s about to burn
Dump your butter/flour sand into a buttered 8 by 8 baking dish and press until it forms an even, flat layer over the bottom of your pan. You may notice that I pressed my dough up the sides of my pan as well. DO NOT DO THIS. That part burned when I made this recipe. Bake the crust for around 15 minutes, until it’s just a teeny bit golden at the edges.
For the filling, pit your peaches and slice them into wedges. Mix with the other ingredients, and place this mixture on top of your baked crust. You can obsessively tile them neatly like I did, or you could just vibe, man. Just make sure your peach mixture covers the entirely of the crust, as any exposed crust will burn.
For the topping, mix together your sugar, salt, flour, and cinnamon. Grate the butter like you did for the crust, and mix with your hands. Scatter your mixture loosely over the top of your peaches.

96% of this picture looks delicious
Bake your pie/crumble/bars for 30-45 minutes, until your peaches are cooked through and your topping has browned a little bit. Let it cool for a few minutes, then cut into squares to serve. You can serve this with whipped cream or ice cream, but it’s sweet enough on its own.

Tiny Pies For Trying Times
Pies that are truly “easy as pie.” And they fit in your hand like Pop-Tarts! What’s not to love?
The creator of the phrase easy as pie is a goddamn liar.
Making pie filling is easy. Making a pastry crust, rolling it out large enough to cover a pie plate, transporting it from the counter to the pan without breaking it, and making sure the crust and filling finish cooking at the same time still often rewards you with a soggy or tough crust. It’s a bummer.
That’s why I don’t make big pies anymore! I make pop-tarts. Also called hand pies, pocket pies, empanadas, or about a million other things depending on where or when you’re from. In America, at least in modern times, pocket pies are thought of more as a pre-made gas station item than a home-cooked treat. The pies made by the snack cake companies are good, but they’re tooth-achingly sweet, and their crust sucks. We can do better.
You can make pocket pies with any kind of pastry. You can use store-bought pie crust or puff pastry dough, or even probably roll out canned biscuits and use those. I used to make classic butter short crust for my hand pies, but lately I’ve been using a more tender, less crispy dough to better replicate the eating experience of a gas station snack pie.
You can go sweet or savory with these. I have included one example of both genres of filling here.
Hand Pie Crust
Makes 10-ish pies
2.5 cups all-purpose flour
6 tbsp butter, frozen
1 egg
1/4 tsp baking powder
tsp salt
cold water
tbsp vegetable oil
Whisk together flour, salt, and baking powder in a large bowl. Grate the frozen butter on the large side of a box grater and incorporate it into the flour with light tossing motions until it’s evenly combined but the butter is still chunky. Mix in the egg, and then add cold water a tablespoon at a time until you get a dough that juuuust comes together into a ball. Too much water=shitty dough, so make sure you thoroughly mix after each addition of water so you don’t over-hydrate.
Turn your dough out onto a lightly floured board and press into a rough rectangular shape. Wrap in plastic and chill for at least an hour, and up to a couple of days.
When you’re ready to make pie, preheat your oven to 425. Pull your dough rectangle out of the fridge, cut it in half longways, and then cut each half into 5 nuggets. Roll your dough nugs into balls with your hands and roll the balls into disks with a floured rolling pin. I like to go pretty thin, like 1/8th of an inch.

Dough nugs! I used whole wheat flour for all the pies in these pictures, which is why they are brown. White flour will definitely produce tastier results, but I decided if I’m going to be baking at home all the time I might as well gesture towards health a little bit.
Put filling on one half of your dough circle, leaving about a half inch border of bare dough at the edge. Fold your dough over your filling and press the seam together with your fingers, then crimp with a fork.
Either cut slits with a sharp knife in the top of your dough or dock the top by poking a bunch of holes in it with a fork. Rub down each pie with vegetable oil, and bake on parchment lined pans for 20-30 minutes. When done, the edges should be golden brown and all the pastry should feel hard to the touch.

The finished product. The oil rub on the outside produces a nice pseudo-fried exterior.
*Notes*
If you don’t want to roll out each pie individually, you can roll all your dough out at once and cut it into rectangles. Fill and fold the rectangles the same way you would a circle of dough.
You can also totally deep fry these if you want to throw caution to the winds. Fry at 350 in deep oil, turning frequently until both sides are golden brown. Filling can leak out of the pie and cause gnarly splatters so, uh, watch out.
Greens and Feta Pie Filling
This is like a much much easier, slightly less indulgent spanakopita.
one batch of cooked greens
2 cups crumbled feta
2 tbsp lemon juice
salt and pepper, to taste.
Working a handful at a time, squeeze all the juice out of your greens and put the dry greens on a cutting board. Save the juice!! Use it in soup. Chop your greens finely, then add to a bowl and mix with the other ingredients. Go heavy on the seasoning here. The crust will kind of mellow out the flavor of the filling, so you want to season aggressively to compensate. Mound your filling onto a plate and divide into 10 equal portions before you start making your pies.

You can see how the baking powder makes the interior of the crust a little biscuit-y.
Glazed Apple Pies
For the filling:
3-4 green apples, peeled, cored and diced into 1/2 inch pieces
2 tbsp flour
tsp salt
6 tbsp brown sugar
tbsp apple cider vinegar
tsp cinnamon
tsp vanilla
FYI: for sweet pies, I like to mix a couple teaspoons of sugar into my pie dough. Everything else is the same.
Mix everything together in a saucepan on medium heat and cook, stirring constantly, until the apples have softened. If stuff starts sticking to the bottom of the pan, add a little water. When done, your apples should be sitting in a good amount of syrup. Put in a tupperware or similar container and chill until set.
Once cold, you should be able to cut your filling into equal pieces with a butter knife. Construct your pies and bake. Make sure to vent the tops of these well. I didn’t dock mine thoroughly enough, and half of mine exploded. Let them cool, and then add glaze.
Thoroughly gelled filling cut into portions.
Glaze
3/4 cup powdered sugar
tsp vanilla
1/2 tsp salt
water or milk
Whisk together the first three ingredients, and add just enough liquid to make a frosting that you can pipe. Transfer to a ziploc bag and cut the corner off to use it like a piping bag. Pipe attractive squiggles over the tops of your pies, just like a toaster strudel.

These were for a socially distanced birthday party. Disregard the exploded pie splatter in the left of this image.

Collard Greens: A Method
Southern-style slow-cooked collard greens, without the meat.
When I was a ravenous high-schooler, I bought food at the street carts outside my school every afternoon. Back then, I needed a full extra meal to tide me over between lunch and dinner or I felt like I was starving. Philly is an incredible street food town, and not the new-wave gentrified version that has taken over American sidewalks. The carts in Philly are old-school grease trucks, serving up classics like cheesesteaks, scrapple-and-egg sandwiches, and chili dogs to a mostly working-class crowd.
One of my favorite carts to visit in high school was Jamaican D’s, which served a mixture of Jamaican food and soul food. People would travel from all over Philly to buy their most popular dishes before they ran out. It was a lucky day if they still had oxtails to sell after 10am. When I was really hurting for cash, I could buy a bag of fried dough from Jamaican D’s for a dollar and eat the savory doughnuts with hot sauce to sate my teenage hunger. When I had a couple extra bucks, I would spring for a plate of sides. Each order of a side of mac and cheese or rice and beans or whatever cost 2 bucks for a ton of food.
The collard greens from Jamaican D’s were the first green vegetable I can remember willingly eating. The greens were slow-cooked and tender, accented with garlic, vinegar and a touch of chile heat. They tasted good, and they made me feel good too. Greens feel like medicine, like they can protect your body from harm and heal what ails you.
I won’t call this recipe a recreation of the one from Jamaican D’s. It’s been too long since I had their greens to make any such claim. This is my method for cooking collards, trying achieve the perfect balance of sour, savory and spicy I remember from the street cart. This recipe is vegetarian/vegan if you make it with the msg instead of the chicken bouillon. Although the home cooks in the state I live in now would smack me for saying so, I prefer my greens cooked without pork. I think hog is unnecessary and totally covers of the flavor of the greens. That being said, this is more a method than a specific recipe, so play around with ingredients and amounts to suit your needs.
Greens
3 bunches collard, mustard, or turnip greens
1/2 a yellow onion or 1 bunch scallions, cut small
4-5 cloves garlic, minced
1/2 tsp chili flakes
dash of cajun seasoning blend like Tony Chachere’s
a few splashes of Louisiana-style hot sauce like Crystal
2-4 tbsp apple cider vinegar, depending on how tangy you like your greens
1 tbsp soy sauce
2 tsp chicken bouillon powder or 1/4 tsp msg (you could leave this out, but why deny yourself pleasure in these troubled times?)
If using collards or turnip greens, strip the greens from the woody stalks with your fingers or scissors. Wash your greens well. I feel like supermarket greens have less dirt on them than they used to, but crap still hides on the folds of those leaves. I found a caterpillar the last time I picked through some greens before cooking. Chop cleaned greens roughly into segments about 2 inches long.
Sweat onions/scallions and garlic with a pinch of salt on medium heat in a healthy glug of olive oil in your biggest pot. When the onions and garlic go translucent and start to brown a little around the edges, add chili flake and toast for 20 seconds. Add your greens a couple handfuls at a time, stirring to wilt the new additions to make room for more until all have made it into the pot.
Throw in all your other ingredients along with some black pepper to taste and cook on low heat, covered, until the greens have reached your desired level of tenderness. Stir every 10 or 15 minutes so the bottom doesn’t burn. Add a little water if it looks like your greens are drying out. For meltingly soft southern-style greens, you need at least an hour of simmering time. Mustard greens cook more quickly than collards or turnip greens.
Season to taste with salt and serve hot, making sure everyone gets a fair portion of the liquid that releases from the greens as they cook. This “pot liquor” is liquid gold, and I have drank a mug of it by itself before without shame.

Disregard the stray onion on my placemat
*Bonus Recipe: Egg, Green, and Provolone Sandwich*
I love incorporating little handfuls of cooked greens into other recipes. This sandwich mimics many of the flavors of a Philly roast pork and Broccoli Rabe sandwich, but with no meat and for breakfast. Shoutout to Chef John, who inspired me with his St. Pattie’s Melt idea. Stay tuned for my recipe for Mustard Greens Hand Pies sometime in the next few days if you want something else to do with your greens!
Makes 2 Sandwiches
4 slices bread
Mayonnaise
Garlic Salt
Sharp provolone
1/2 cup cooked greens
Crank your oven as hot as it will go. Slather one side of each slice of bread with mayo, then sprinkle with garlic salt and pepper. Squeeze all the juice out of your greens (please save the juice for another use!!) and chop finely. Spread evenly over the mayo side of two of your slices of bread, then top with a slice of sharp provolone. Throw another slice of provolone on the other two slices of bread. Toss all your bread on a sheet tray and into the oven to heat up the greens and melt the cheese while you fry 2 eggs in your preferred style (the correct answer is sunny side up). Egg the greens side of your bread, top with the other slice of bread, and serve.

Towards a Unified Theory of Hash
All you need is a little technique, and you can make a delicious, greasy hash with just about any set of leftovers.
The first time I tasted hash, I fell in love. My father, wanting to introduce me to a flavor memory from his youth, bought a can of corned beef hash to fry up for a weekend breakfast. The gelatinous log that slid out of the can looked horrifying, and the smell was reminiscent of wet dog food. As he broke the quivering mass apart and slowly browned it in butter, however, something magical began to happen. The aroma shifted from strange to delicious, picking up savory Maillard notes and the unmistakable smell of crispy potato. The formerly grey-pink sludge, as if through some mysterious alchemical process, transformed into a breakfast fit for a king with crispy edges and a rich chocolate color. For the final flourish, he poked four holes into the hash and cracked in eggs, covering the skillet to let them bake to soft perfection.
For many years, canned corned beef hash was the only hash, as far as I knew. I never lost my passion for it, to the point that when I moved to another country for college I had my parents send cans in their care packages. As I improved my cooking skills and learned more about food, I came to realize that hash was not a specific dish, but rather an age-old technique for making odds and ends delicious. People have been frying their leftovers in skillets for centuries, and the technique still does a far better job at making yesterday’s dinner seem appetizing and fresh than the microwave does.
While pretty much any assemblage of foods browned together could be called a hash, I have determined that hashes that reach the acme of deliciousness all share similar components. Follow these guidelines, and I promise you can cook some of the best breakfast you will ever eat, perfect for soaking up hangovers or wowing houseguests.
Starch
The backbone of any hash is some kind of starchy vegetable. You can use any tuber, depending on what you like. Beets make for a bright red, slightly sweet dish traditionally called red flannel hash. Sweet potatoes are great as well, and their relatively low calorie count and high fiber content make for a slightly healthier hash. If you want to go for pure deliciousness though, nothing beats a starchy potato varietal. Russets are great, as are Yukon golds and fingerlings. The most delicious hash is made with leftover roasted or boiled potatoes, because pre-cooked potatoes give you a wonderful contrast between fluffy interior and crispy exterior when fried in oil. You can start with raw potatoes, but you have to cut them small and the texture won’t be as nice.
Meat
Potatoes bring heft and crispiness, but for hash to truly be hash, it also needs to have umami and chewiness. That’s where meat comes in. Again, leftovers are great here. I personally love making hash with leftover barbecue, but ham, bacon, steak, chicken, pork, or really anything works. Smoked salmon is also delicious, and a great option for those who abstain from terrestrial animals. For vegetarians, mushrooms would do the best job of giving that crucial combo of savoriness and texture. Just make sure to pre-cook them by themselves before throwing them in the hash so they don’t release too much water into the mix. Water is the enemy of crispiness.
Alliums
Onions are great, and I use them in hash sometimes, but they have the disadvantage of being very high in moisture. When I do use them, I try to cook them hot so they brown a bit on the outside but retain a crisp sharpness in the interior. Most often, I forego onions and use either minced fresh garlic or onion and garlic powder. These don’t negatively impact the texture and still amp up the flavor of the dish.
Greenery
Greens aren’t strictly necessary in hash, but they provide a fresh flavor and bright color that really make what can be a homely, one-note dish pop. I never cook the greens into the hash, because that dulls their color and softens their flavor. Instead, I chop them fine and scatter them on top after the dish is cooked. My favorites are cilantro and scallion tops, because they play nice with almost everything and have a strong enough flavor to stand up to all the grease.
Heat
Again, not strictly necessary, but to my palate a touch of heat makes almost everything taste better. My favorite is to use some kind of minced fresh chili because it adds color, but failing that I’ll use a dash of cajun seasoning or smoked hot paprika. I also like topping my hash with some kind of bright red hot sauce because it enhances the visual appeal of the dish and brings a little acidity to the mix.
Process
The most important factor to get right when preparing hash is cooking technique. The best hash is a delicate balance of different textures, and this can only be achieved by cooking the ingredients in the correct order at the correct temperatures.
Start by heating up a healthy amount of fat in a heavy-bottomed skillet over medium heat. Bacon grease or butter are the most delicious options, but if you’re not trying to kill yourself vegetable or canola oil work great as well.
While your oil is heating up, gather your ingredients so you have them in easy reach. Make sure your potatoes, meat, and onions are cut to approximately the same size, small enough that you can get all the elements of the hash in one reasonably sized forkful.
Once your oil is hot but not smoking, throw in your potatoes. You have to start with the potatoes by themselves or they will not crisp up properly. Stir the potatoes in the skillet until they are nicely browned on all sides, then add onions if using. Salt and pepper your potatoes heavily.
After the onions are a little brown around the edges throw in the meat and stir until warmed through. If you are using minced garlic and chilies or garlic powder, now would be the time to add them to the party.
When you are satisfied with the flavor and crispiness of your hash, turn the heat down very low, and form the hash into a contiguous mound in the middle of the skillet, about an inch thick. Poke holes into the top of the mound and crack eggs into the holes. You want your eggs far enough apart to have a border of hash separating them. This will make serving easier later. Cover the skillet and cook just until there’s no transparent white left in the eggs and a lovely crust has formed on the bottom of your hash. Garnish with the greens and hot sauce of your choice, and bring the sizzling skillet directly to the table. Eat greedily, with lots of coffee.
Lamb Breast and Nostalgia
An attempt to recreate the flavors of Montreal smoked meat, but in Texas and with a different animal.
Hello everyone! I hope this blog finds you well. If you’re reading this at a later date, I am writing during what looks to be the beginning (but hopefully is the middle) of the Great Coronavirus Catastrophe of 2020.
In the Before Times, when I could move freely around the city and shop without fearing that I would contribute to the spread of a mysterious and deadly pathogen, I often passed by a little hole in the wall on East 12th called the Texas Sausage Company. It’s exactly the kind of place that appeals to my sensibilities. The sign proudly proclaims that the business started in 1942, and no attempt has been made to renovate the building for modern tastes. It’s just a little shack full of meat fighting against the tide of gentrification that threatens to wash away everything left of the history of East Austin.
Even though I walked by the shop on many occasions, it took me three years to actually step inside. And boy howdy I’m glad I did! This butcher shop lived up to my expectations and then some. They pretty much only sell pork country ribs, house-made beef and pork sausage, and what they call mutton (which is actually lamb breast). It’s a one-stop shop for a very old-school Texas BBQ. The butcher cracked me up. He regaled me with tales of getting wasted on extra strong German import beer in the 70s and advised me that nobody will be able to tell the difference between beef and pork sausage once they’re drunk. As he wrapped up my order, he reminded me to save the shitty beer for the end of the party when everybody has low standards. I left with 2 pounds of hot beef sausage and a 4 pound chunk of lamb breast in my hot little hands, all for under 30 bucks.
My acquisition of the lamb breast coincided with a resurgence in my nostalgia for the Jewish deli foods of my youth. Austin is truly a food lover’s paradise, but its deli options are… somewhat limited. I had been nursing a craving for real pastrami or Montreal smoked meat for weeks by the time I was deciding how to cook my lamb. Thus, I decided to try my hand at lamb pastrami, which Wikipedia assures me is a thing.
This isn’t a real pastrami recipe, since I lacked the sodium nitrate necessary to pickle the meat before smoking, but the taste is damn close. The first bite sent me hurtling back to Schwartz’s, but with an extra touch of lamby game flavor. If you find yourself with a lot of extra time right now for some reason, and want to fill that time by babysitting a grill for a couple hours, I heartily recommend this.
Note: Lamb breast isn’t a super commonly available cut of meat in the states, so feel free to make this recipe with any large, fatty cut of red meat. Brisket would slap, as would a chuck roast. You could even make this with pork butt if you wanted to get super traif.
Lamb Breast “Pastrami”
Makes enough for a 3.5 lb piece of meat.
3 tbsp kosher salt
2 tbsp ground black pepper
2 tsp granulated garlic
2 tbsp crushed coriander seeds
1 tsp crushed chile piquin, or other hot chile powder, or paprika
Season your meat the night before you plan on cooking it. Mix your rub together and apply to all surfaces of the meat, pressing it in to get it to stick. Wrap and let sit overnight in the fridge to allow the salt to penetrate.

Before resting
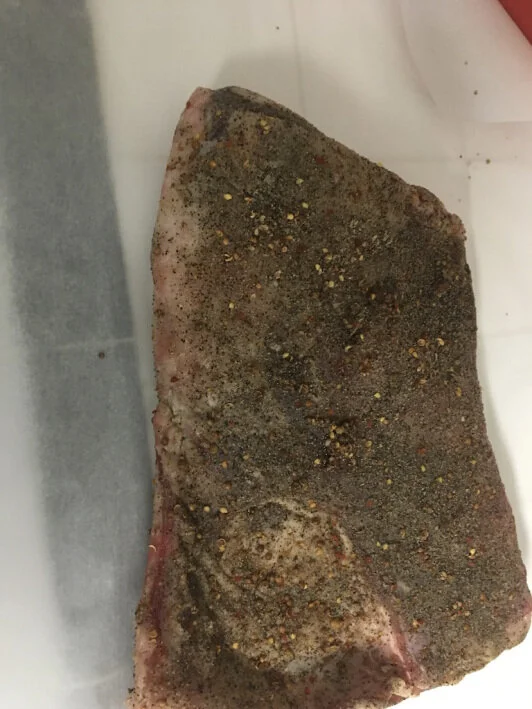
After resting; the meat has cured slightly
Preheat your oven to 275F. If you think of it, pull your lamb out of the fridge an hour or two before you start cooking to let it come up to room temp. Wrap the lamb in parchment paper like a Christmas present, then wrap that bundle in aluminum foil. Place on a lined baking sheet and cook for around 2 hours.

My kind of Christmas present
Prepare a charcoal grill for indirect heat, piling your coals all on one side of the grill and leaving the other side empty. This will allow your lamb to gently smoke instead of charring. Add some soaked wood chips to your fire if you would like. I had none and it still turned out great. If you have a gas grill, only turn on the burners on one side and put a foil pouch of soaked wood chips on the hot side.
After your 2 hours in the oven, unwrap your lamb package and place the meat on the cool side of the grill. Cook with the lid closed for around an hour and a half, checking every 15 minutes or so to rotate the meat for even cooking and to make sure your coals are still making enough heat. The meat is done when it feels soft when you poke it with your finger.

Fire on one side, lamb on the other
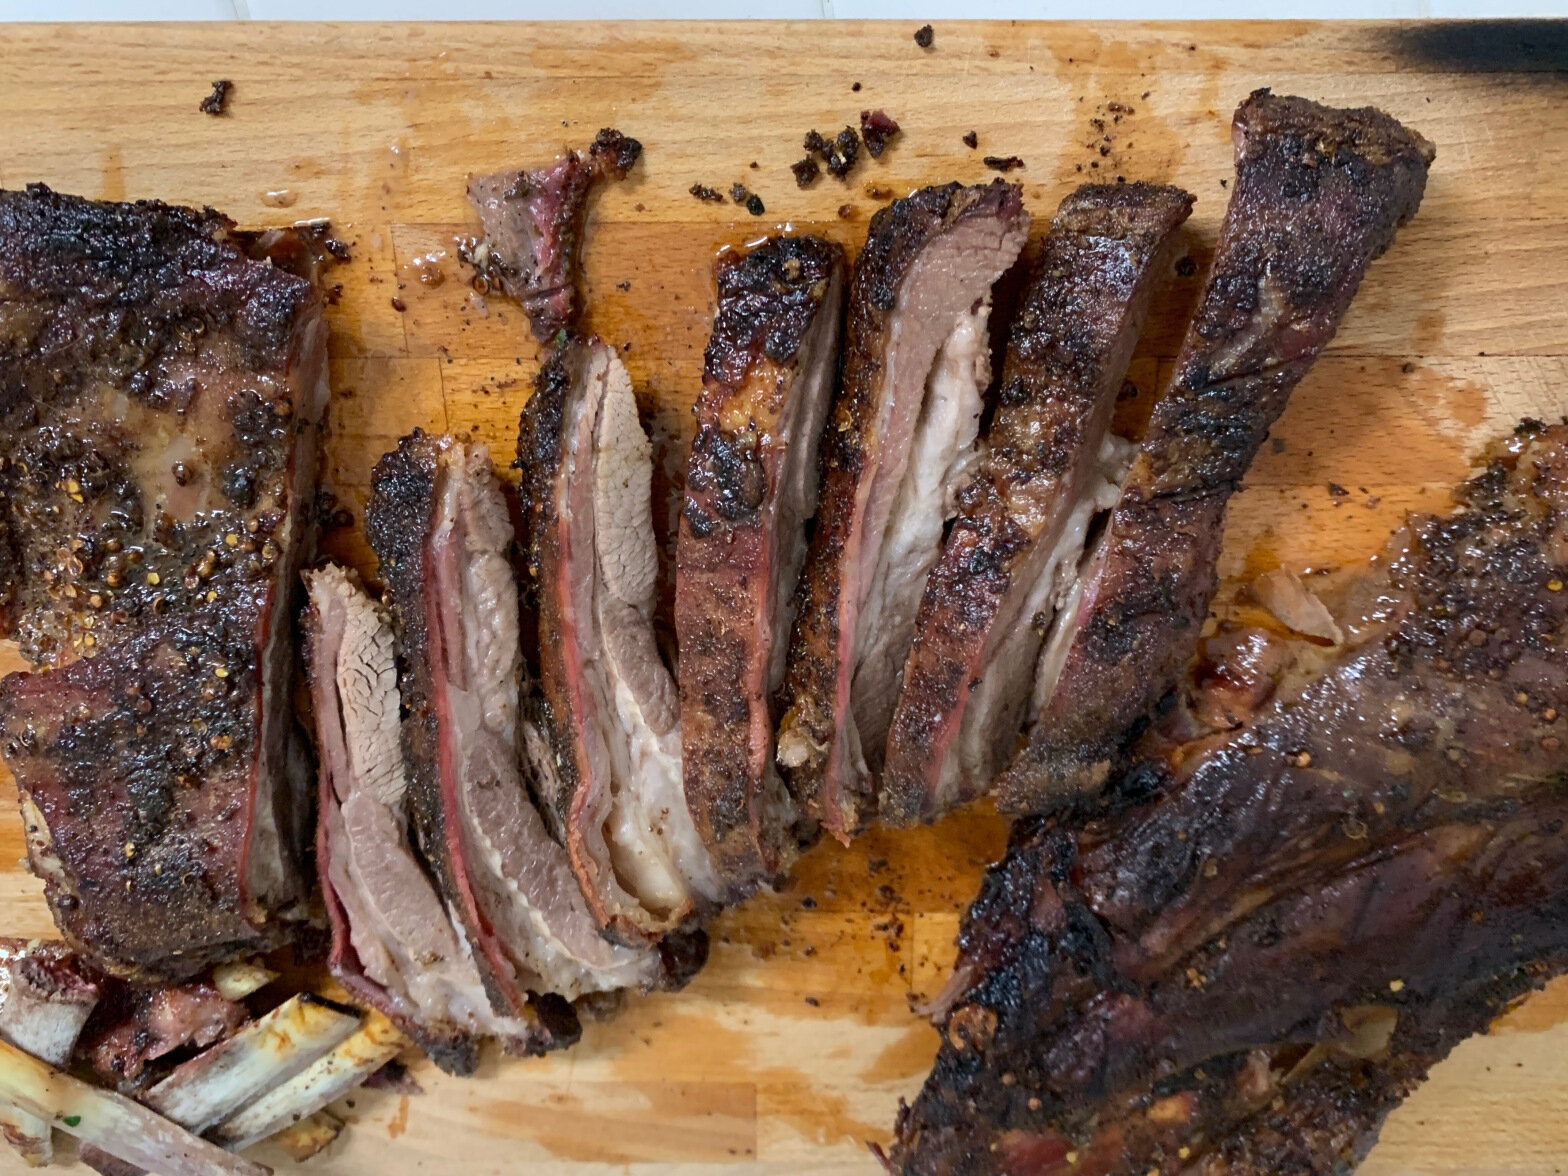
Pull the lamb off the fire and carve. You should be able to wiggle the rib bones out with your fingers. After the ribs are out, find the shoulder blade, and follow it with your knife to completely debone the lamb breast. You can then cut nice boneless slices. Serve with spicy mustard and some rye bread.

Mmmmm, Meat
The exact ratio of oven time to grill time depends on personal preference. The important rule is that your meat needs about an hour of cooking time per pound. If you want to babysit a fire for 3 and a half hours and want to get kicked in the mouth by smoke flavor, do it all on the grill. If you don’t have a grill, this recipe will still be delicious cooked all the way through in the oven. Just unwrap the meat halfway through so it can develop a crust on the outside. You’re cooking a huge piece of salty, fatty meat; the only way to screw it up is to not cook it long enough or to cook it too hot.

The Only Way To Cook Brussels Sprouts At Home
A foolproof method for making crispy, sweet, spicy Brussels sprouts that are downright snackable.
Brussels sprouts inspire passionate reactions. They are both one of the most reviled and most desired vegetables, by turns venerated and cursed.
How can one little brassica be the source of such controversy? The answer lies in how differently these little cabbages respond to different types of cooking. When abused, Brussels turn grey and taste like the sour memory of thin cabbage soup wafting down the hall of an Eastern European boarding school. Treated correctly, however, they remain crisp and green, picking up crunch and deep browned savory notes during the cooking process.
The tastiest way to cook Brussels sprouts is inarguably to cut them in half and deep fry them. Deep fryers are the secret behind many, if not most, of the crazy-good crispy brussels sprout dishes you may have had at restaurants before. This method, while delicious, is impractical for weeknight home-cooking purposes and turns a nutritious vegetable into something approaching Bloomin’ Onion territory health-wise.
In the interest of our moral responsibility to our arteries and hearts, we shall gloss over the restaurant method and settle on a procedure that gets you a sprout at least 90 percent as delicious as a deep-fried one.
The secret to making incredibly crunchy and delicious sprouts at home is to slowly caramelize halved sprouts cut-side down in one layer in a cast-iron skillet. While the cut side browns, the rest of the sprout gently steams, creating a contrast between charred and fresh flavor and ensuring the whole vegetable remains crisp.
After the sprouts are mostly cooked, I like to toss them in a glaze to serve. This recipe includes one glaze idea, but really you can use any combination of spicy, sweet, sour, and umami ingredients to maximize deliciousness.
Unilaterally Seared Brussels Sprouts with Sweet Chili Glaze
Brussels sprouts
1 tbsp honey
1 tbsp cider vinegar
1 tsp soy sauce
1 tsp chipotle powder, to taste
salt, to taste
shitton of black pepper
Take as many Brussels sprouts as will cover one half of your biggest cast iron skillet with no overlaps. Cut each sprout in half through the root, and discard any loose outer leaves.
Arrange the sprouts cut-side down in one layer in your oiled cast iron skillet, ensuring that the flat side of each sprout is fully in contact with the bottom of the pan.
Place the pan on a burner over medium heat, and cook without moving or flipping the sprouts until the cut sides are dark brown and the tops are bright green and feel slightly tender to the touch. If you know your burners tend to produce uneven heat, rotate your pan a couple of times during the cooking process.
While the brussels sprouts cook, mix together the ingredients for the glaze. Once the sprouts are mostly done, crank the heat to high, pour in the glaze and toss the sprouts to coat evenly. Remove them from the pan once the glaze is mostly dry and sticks to the sprouts like caramel. Season with salt and pepper to taste.
Apples And Dough, Two Ways
If you bake with apples, you can eat dessert for breakfast without people getting all judgmental.
If my social media feeds are any indication, folks out there are doing a lot of stress baking right now. I’m in the nervous dessert club too. My stress has been doubled by the fact that I’ve been working from one dwindling bag of flour, unable to locate a replacement on the barren shelves of my local grocers. Thankfully, I was able to score a bag on my latest trip, so I can continue treating my gnawing anxiety with pastry.
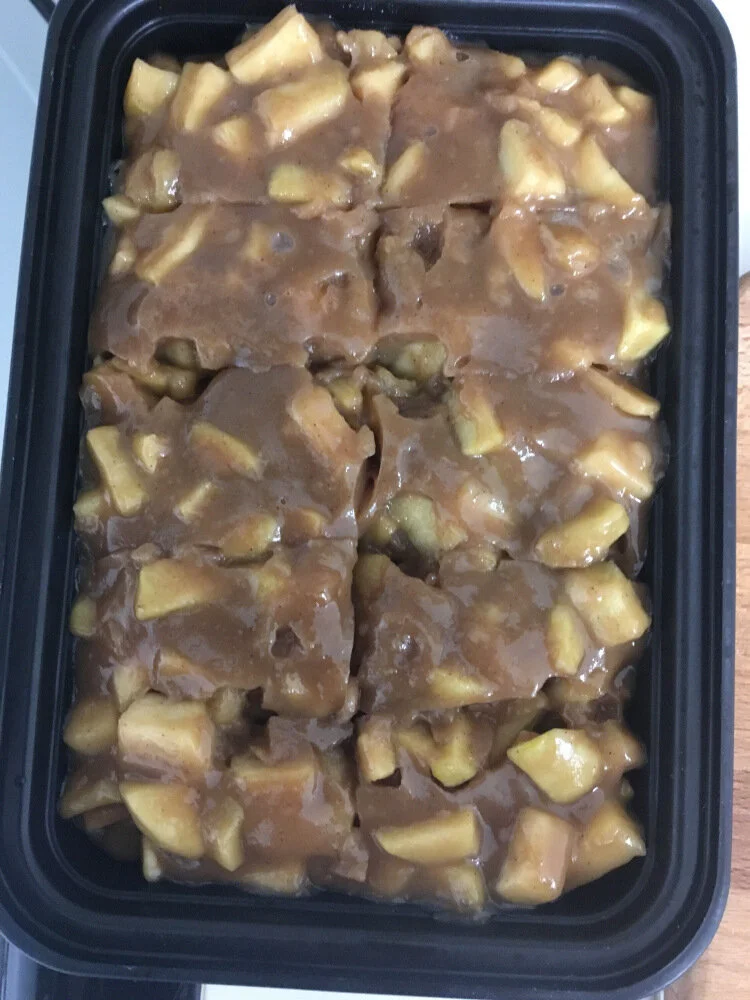
Before that miraculous find, I was stretching my flour by making flour-light desserts like pudding and souffle. When I did make dough, I used it as a topper for large quantities of things that were not dough. One of the things I was able to score from the walk-in at Apple on the day I got laid off was a boatload of Fuji apples. I made a simple apple filling and baked two different confections with it: cobbler and coffeecake. Both filled the hole in my stomach that used to be filled with my confidence that the world around me would act basically normally and in line with my historical assumptions.
I stole some techniques from Rick Bragg’s delightful book about his mother, “The Greatest Cook in the World.” Not a traditional cookbook, this work interweaves a biography of the author’s mother with the recipes she cooked for him growing up. I found these recipes truly inspiring. Some of them are centuries-old family heirlooms that I’ve never seen before in any source on “Southern” food. The book is an incredible resource for vernacular cooking of the American South, and I can’t recommend it enough. Mama Bragg’s recipes include pages and pages of careful, homey instruction; the pinto bean recipe, for instance, has three ingredients and three pages of philosophical musings on bean cookery. I took the ideas for macerating the fruit before baking and using a lattice top on the cobbler from Mrs. Bragg.
Anyway, here’s 2 recipes:
Apple Filling
4 medium-size apples
1/4 cup brown sugar
tsp salt
tsp cinnamon
1.5 tsp grated or minced fresh ginger
2 tsp lemon juice or apple cider vinegar
tbsp flour
tsp vanilla extract
Chop the apples in your desired shape and mix with the other ingredients. The size of your pieces depends on the end texture you want. I like my apples cooked soft in desserts, so I cut mine in little baby slices. Let this hang out for at least a couple hours or up to a couple days in the fridge so the flavors can marry and the apples can release their juices.

Mmmmm, wet apple chips
Cobbler
1 cup flour
3 tbsp butter, ice cold
yogurt or buttermilk or milk mixed with a little lemon juice/vinegar
2 tsp baking powder
1 tsp baking soda
tbsp white sugar
1/2 tsp salt
egg wash (optional)
flaky sea salt and/or turbinado sugar (optional)
Preheat your oven to 375F. Mix together flour, white sugar, baking powder, soda, and salt. Dice your butter into teeny little pieces and cut into the flour using your fingertips or two forks. Your desired end texture here is tiny chunks of butter evenly distributed and coated in flour. Add your yogurt or whatever a couple tablespoons at a time, mixing until you have a dough that’s dry enough to roll out without making a huge mess but wet enough not to break apart. Don’t overmix!

This is your desired texture, pretty dry, just a little bit wetter than pie dough. You can see visible chunks of butter still. You want that.
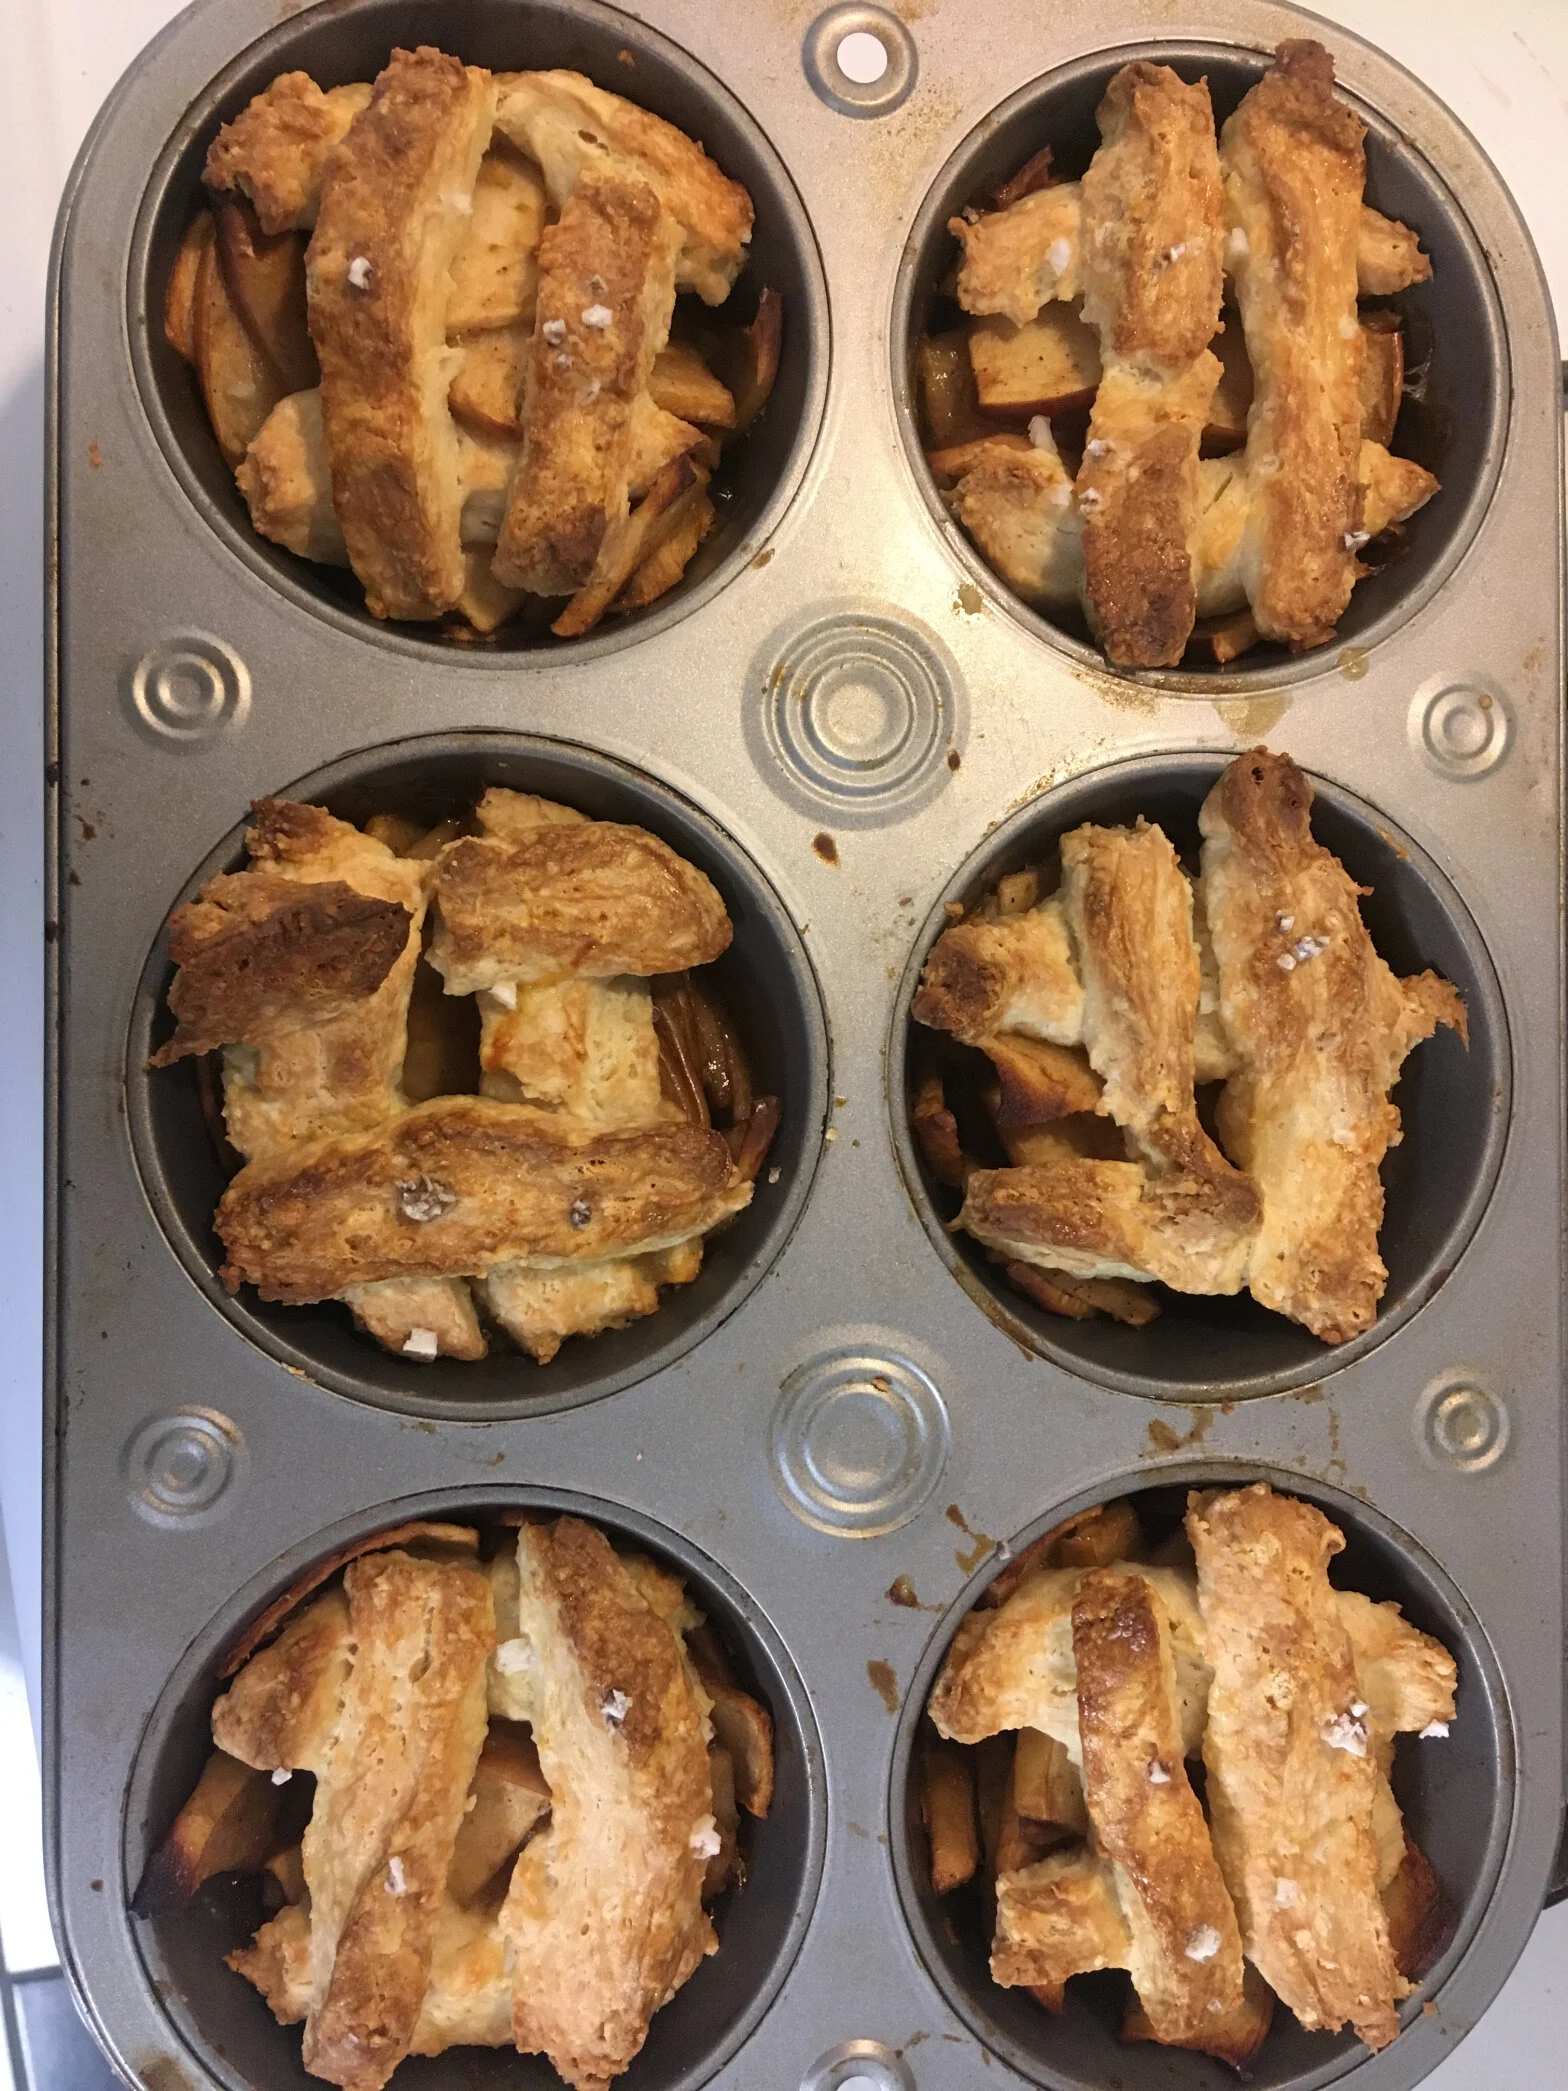
Roll out your dough on a floured surface to about 1/4 inch thick and cut it into little strips. This makes enough dough to cover about 3/4 of your apple mixture. Save the rest for coffee cake! Spoon your apple mixture into the greased baking vessel of your choice (I went with a muffin tin for maximum crispy edges, as per Kristen’s request). Arrange your strips of dough in a criss-cross pattern on top of the apple mixture. If you’re feeling enterprising, brush the top of your dough with beaten egg and scatter some coarse sea salt or turbinado sugar over the top.

Don’t be like me. Use a big boy knife to cut your strips.

You can tell I’m primarily a savory cook because my lattice top looks like trash.
Bake until the top is golden brown and delicious and your dough is cooked all the way through. I think I started checking after about half an hour.

I went with pretzel salt for the top
This cobbler has a lot less sugar than most recipes do. I highly suggest serving with vanilla ice cream or caramel sauce, or both.
Coffee Cake
For the batter:
3 tbsp melted butter
3 tbsp white sugar
3/4 cup flour
1.5 tsp baking powder
sour cream or yogurt
tsp salt
1 egg
1 tsp vanilla extra
For the crunchy topping
1.5 tbsp butter, softened
2 tsp semolina or flour
2 tbsp oatmeal
3 tbsp brown sugar
1/2 tsp salt
Preheat your oven to 350F. Spread your remaining apple mixture (about 1 apple’s worth) in the bottom of a very well-greased small loaf pan or baking dish (you could also do this as muffins, I won’t stop you). Mix together all the batter ingredients except the yogurt/sour cream, then add enough of that in to make a batter that’s juuuuuuust pourable. Think slightly thicker than pancake batter. Don’t overmix this either! Spread your batter over your apple mixture. Mush together the topping ingredients with a fork or your fingers and scatter this on top of your batter. Bake for around half an hour probably, but start checking after 20 minutes. Could be longer than half an hour too. Never trust any baking recipe’s exact times. You’ll know it’s done when a knife or toothpick inserted into the middle comes out mostly clean.

I didn’t take any process pics for this one, but it’s mostly a mix-and-dump kind of thing. If you’ve ever made pancakes or a cake from a boxed mix, you should be able to handle this.

The Eagles, A Blackout, And Organic Produce
When the Eagles won the super bowl, I blacked out and woke up at an organic farm. I came home with a bunch of groceries to cook.
This year, the Eagles won the super bowl. I watched the game at the Eagles bar in Austin, Texas, my adopted hometown. As I stumbled out into the parking lot, drunk on success (and beer), I ran into some strangers and got into their car.
When I came to, I was in a cabin in a dark field accessible only by dirt roads. Was I about to be “Hills Have Eyes’d” by mutant rednecks like my Yankee prejudices would have me believe? No, in fact, I had been picked up by the kindly workers on an organic farm in town. Now they’re my buds! Not just buds, but buds with benefits, at least for me. Every week, they get a box filled with the bounty of their labor, far too much produce for them to cook before it spoils. Every time I visit their house now, they try to foist their excess veg on me.
My last haul consisted thusly:
a shitton of beautiful red new potatoes
broccoli
green tomatoes
beets
swiss chard
fennel
I imagine people who subscribe to CSA boxes in my area are getting a similar selection of produce right now. One tough aspect of trying to cook seasonally with fresh produce is coming up with dishes that use up ingredients in a cohesive way. Here’s what I came up with.
Fried Green Tomatoes with Remoulade
This is a Southern classic, one that I had never gotten the opportunity to make because green tomatoes are hard to come by up north.
For the breading:
1 cup AP flour
1 cup bread crumbs
3 eggs
2 tbsp water
Mexican hot sauce (something like Valentina)
Cajun seasoning (I used Tony Chachere’s)
3 Green tomatoes, sliced into ¼ inch rounds
For the remoulade:
¼ cup mayonnaise
Cajun Seasoning
Mexican Hot Sauce
Mustard
Pickle Relish
Capers
Oil for frying
Put the flour, breadcrumbs, and eggs in three separate containers. Season the flour and bread crumbs well with cajun seasoning. Beat the eggs with a little water and hot sauce until they are uniform in color and texture. Any unincorporated egg will make for an uneven coat of breading.
While you are preparing the breading station, heat frying oil in a skillet so it’s ready to go. You don’t need a huge pot of oil here, just enough to reach ⅔ of the way up the breaded tomato slices. I used a mixture of butter and olive oil for flavor, but you can use vegetable or canola oil if you’re afraid about oil burning. You don’t want the pan to get screaming hot, just hot enough so that the tomatoes sizzle once they hit the oil.
Dredge the tomatoes in flour first, making sure they are coated all the way around. Coat them in egg, and then in bread crumbs. Take special care to coat the edges of the slices with skin on them, you may have to press crumbs into the sides to make sure the slices are entirely covered in breading. Drop the tomatoes into the oil, taking care not to overcrowd the pan. Fry until golden brown on both sides, flipping occasionally. Drain on paper towels or a wire rack. Salt the tomatoes as soon as they come out of the oil.
To make remoulade, just mix the mayo with the other ingredients. This is all to taste, so experiment with different ratios of the flavorful stuff to make your ultimate sauce. Eat the tomatoes while they’re still hot, slathered with as much remoulade as your arteries can handle.
Beet Salad with Goat Cheese, Pistachios, and Herbs

It seems like every fine dining restaurant in America serves some version of this salad. This one is inspired by the one on the menu of the restaurant where my Significant Other works. The key to success with this is the technique for roasting the beets. Roasting them whole in their skin gives them an intense flavor and firm-yet-yielding texture that I haven’t replicated with any other method
For the beets:
2 to 3 medium beets
Olive oil
Salt
For the vinaigrette:
½ cup olive oil
¼ cup lemon juice
1 tsp mustard
1 clove garlic, minced
Salt and pepper
For the salad
Fresh goat cheese
Fresh mint, ripped into pieces
Fennel Fronds or fresh dill, also ripped
¼ cup salted roasted pistachios, shelled and rough chopped
To prepare the beets, preheat your oven to 350. Chop off the greens and root ends of the beets. Save the greens to saute later. Toss the beets in olive oil and lots of salt. Roast until a paring knife can be inserted to the center of the largest beet with little effort (This took about an hour and a half for me, but exact cooking times will vary). Let beets cool, and then while cool enough to handle but still warm, peel them under cold running water. I mostly use my hands to rip the skin off, breaking out a paring knife for the stubborn patches. You can do this part up to several days ahead of time if you want. Just store the roasted beets in the fridge until you’re ready to use them.
For the vinaigrette, mix all the ingredients in a jar and shake to combine. This recipe makes more vinaigrette than you will need for this salad, but it will keep for a month or two in the fridge and is very versatile. Olive oil solidifies at fridge temperature, so just run the jar under warm water a few minutes before you need to dress the salad.
Now it’s time to build the salad. Slice the beets into wedges that aren’t too big to eat in one bite and toss them in a mixing bowl with a healthy amount of vinaigrette, salt and pepper. It’s good to let the beets hang out in the dressing for a few minutes to let them soak up the seasoning. In a separate bowl, toss together the herbs with a small amount of vinaigrette and salt and pepper. Lay the beets on your serving platter in a single layer, then top with the herbs. Crumble goat cheese on top of these, then scatter the pistachios. Finish with olive oil and a little extra salt.
Kitchen Sink Vegetable Soup
Think of this not as a recipe, but a method. Soup is just about the easiest way to use random bits of vegetables hanging out in your fridge, and most veggies taste good together. This is the soup I made with various stuff I got from my farmer friends, but feel free to use whatever you have around. Just try to get something umami, something spicy, and something acidic in there to make sure your soup is bursting with flavor.
1 quart chicken stock (sub veggie stock or mushroom stock for a vegetarian version)
1 quart water
2 tbsp miso
Cider vinegar, to taste
1 bulb fennel
1 medium yellow onion
4 cloves garlic, peeled and crushed
1 jalapeno, seeds and ribs removed
6 new potatoes
3 heads of broccoli
Olive oil
Parmesan rind
Roughly chop the onion and fennel, and put in a pot with the potatoes, chicken stock, water, jalapeno, miso, garlic, and parmesan rind. Bring to a simmer and cook for 20 minutes, or until the potatoes are almost tender. Chop up the broccoli and add to the pot, cooking until just tender and bright green. Blend using an immersion blender, or a tabletop blender if you don’t have one. Stream in about ¼ to ½ a cup of extra virgin olive oil while blending, and season with cider vinegar, salt and pepper. I like to serve this kind of soup with garnishes that add some crunch. The first night, I garnished with toasted pistachios, olive oil, and ripped mint leaves. The next day, I used crushed tortilla chips, creamy goat cheese, and hot sauce. Both were equally delicious!

The Great Quebec Cheap Beer Taste Test
A blind and drunk taste test of the worst beers available in Montreal circa 2015.
Cheap lager is the fuel that keeps the city of Montreal running. These fizzy, corn-and-rice inflected brews are a ubiquitous part of every pre, party, dumb rock show, brunch, lunch, dinner party, funeral, wedding, commute, and school day in this city, but very few people make the effort to look inside the can and really investigate what’s going on in Quebec’s malt seltzers.
I have long thought of myself as a connoisseur of cheap adjunct brews, but a part of me was suspicious that the sweet mid-century industrial design on certain cans and the cultural baggage attached to specific brews tricked my mind into detecting taste differences where there were none. Driven by my love of science and macrobrews, I decided to invite some friends over for a blind taste test of the crappiest beers available in Montreal.
Since I was relying on my friends to each bring a beer, this was by no means a comprehensive taste of every yellow beer you can get your hands on in this city, but the pool was deep enough to provide real insights into Quebec’s cheap beer scene.
Interesting insight #1: Cheap beer preferences are a vital part of many people’s identity. The results of the blind test shocked and appalled several people.
Interesting insight #2: Despite their reputation for uniformity, cheap lagers actually taste very different from each other.
Interesting insight #3: Most macrobrewed cheap lager, when removed from the context of a can, tastes legitimately awful. However, even nasty beers mostly remain drinkable if carbonated enough.
Interesting insight #4: The popular favorites for the most part did not hold up well to scientific scrutiny.
We evaluated each beer by drinking a couple ounces from a solo cup poured by our elected beer master. The beers were each graded on a 15-point scale with five points awarded for flavor, mouthfeel, and drinkability. Now, for the test:
THE CONTESTANTS

Vieux Montreal- Locally-produced swill. Has a stronger flavor than many in its class, which is not necessarily a good thing.

Bud Light Apple- Holy shit this is sweet. Good for people who don’t like beer.

PBR OG- Normal Pabst. Party standby. Cultural joke.

PBR Dry- Pabst that can get down. 1% more alcohol than OG.

Labatt Dry 6.1- The slightly more hardcore version of Labatt Bleu. American stereotype of what Canadians drink.

Old Milwaukee Dry- Alternative PBR. Perhaps the most similar to seltzer of all beers surveyed.

Moosehead- Another stereotypical Canuck beer. Often more expensive than it should be.

La Metropole- Adjunct lager that uses pretty bottles to put on airs.

Sapporo- Japanese lager conglomerate that owns many of Quebec’s “microbreweries.” High rice percentage in this recipe.

Busch- A horse prances through fountains of ice-cold Rockies water while electric guitars wail.

Tremblay- Local amber lager that likes to tout that it only uses barley, water, hops, and yeast in its recipe.

Pilsner- This west-coast favorite has a dope can with pastoral imagery on it.

Boris Bold- 8.5% malt liquor. I thought this would run away with worst in show.
THE RESULTS
First, let’s start with the worst. Shockingly, OG PBR, the ever-popular standby that I previously considered to be one of the best beers on the docket, was voted the nastiest overall. Tremblay, which many people predicted would be best in show, had the worst flavor and drinkability scores. Both beers elicited comments like “I would never drink this” and “this is the worst thing I have ever tasted.” Both performed worse than even the Boris Bold malt liquor, which was third worst overall.

A useful chart.
Old Milwaukee did significantly better than its dark brother PBR, winning both the mouthfeel and drinkability portions of the test. Its relatively weak flavor scores dragged it down to a third-place finish. Labatt Dry took the silver medal, with strong scores in all three categories. Sapporo had the best flavor, but weaker mouthfeel and drinkability scores made it an also-ran. And the first-place finisher was…
Pilsner! The dark horse west-coast candidate ended up taking the cheap beer crown. Like Labatt, its was a solid all-rounder, not winning a single category but placing highly in all three.
Taking a sip from a Pilsner can after all the tasting was done, I was underwhelmed, but I can understand why it won. The flavor is more sour than I prefer, but it doesn’t have the chemical notes of Old Milwaukee or Busch. Crucially, it is super-carbonated, which is an asset for both mouthfeel and drinkability.
It took a long time, much pouring, a teeny bit of finagling, and a surprising amount of tears, but the Great Quebec-Available Beer Test has been completed. I presume college students, tailgaters, and other scientists the world over will want to see if they can replicate my results, so I have posted the raw data below, courtesy of Henry Kronk.
