Snackable Okra With A Sweet and Sour Glaze
It turns out you can turn okra into an addictive finger food without breading it and deep frying it.

Summertime!
I guess I just have a thing for controversial vegetables. If you follow my blogging, you’ll have seen my previous apologia for radishes, celery, and Brussels sprouts. I feel drawn to vegetables that a lot of people hate because I believe in the transformative power of proper technique. There are no bad ingredients, only bad recipes. That is doubly true for today’s contender: okra.
Many, many people claim to hate okra. I was once one of them. I don’t even remember seeing it served anywhere when I was growing up in the Northeast US. The South is the only region I’ve been in where okra is a fairly commonplace ingredient. Not coincidentally, Southern cooks are more likely to know how to prepare okra correctly than cooks anywhere else.
Okra’s least popular attribute is the mucilaginous slime that it produces after being cut or put in contact with water. Some okra fans love the slime, and it’s great for thickening soups and gumbo, but today I’m sharing a recipe for slime-haters.
This recipe produces an addictive side dish that’s easy enough for as weekday dinner. I simply split and broil the okra and finish it with a vinegary, spicy glaze inspired by Carolina vinegar barbecue sauce. It can all be ready in 15 minutes.
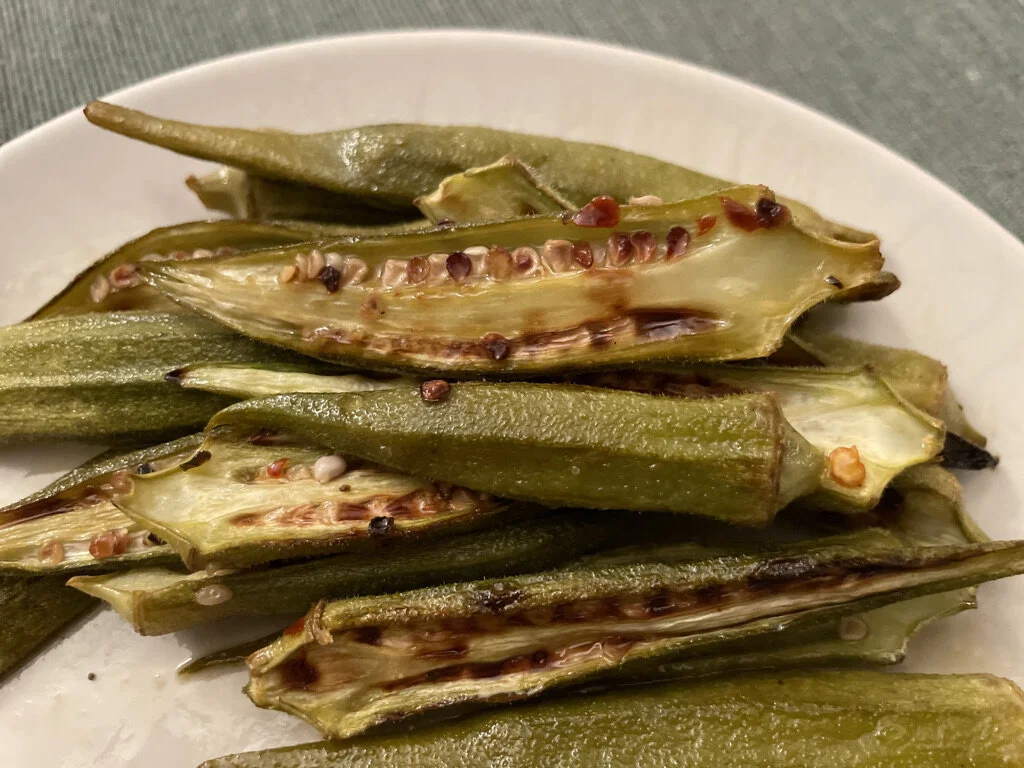
Hot and Sour Charred Okra
Ingredients:
1 lb okra
3 tbsp apple cider vinegar
3 tbsp lemon juice
1 tbsp brown sugar
2 tsp red chili flakes
Lots of black pepper
3 large cloves of garlic
Set your oven to broil. Find a pan you can put under the broiler and line it with foil, then oil the foil. Split the okra longways and arrange in a single layer cut-side up in the prepared pan. Drizzle with olive oil and season generously with salt. Put under the broiler, ideally about 4 inches away from the heat. Check every 4 to 5 minutes and rotate as needed for even browning.
While that’s cooking, mince the garlic and add to a small saucepan with all the remaining ingredients. Cook on high heat until the mixture has lost about 1/3 of its volume and smells slightly less acidic.
Pull your okra out of the oven when it’s fairly well browned all over the cut side, with a little bit of char on some of the edges. This should take 10 to 15 minutes depending on your oven. Pour the glaze over the okra, mix it around a bit, and return to the broiler for one to two minutes. Watch it the whole time! You want to cook it so there’s no liquid glaze left, but if you go too long it burns easily during this stage of the process.
Taste one piece of okra. Yum! Does it need more salt? Add a little more to taste. Serve alongside any protein you desire, cut some bread, and that’s dinner. Just don’t be surprised when the okra steals the show.

The Only Way To Cook Brussels Sprouts At Home
A foolproof method for making crispy, sweet, spicy Brussels sprouts that are downright snackable.
Brussels sprouts inspire passionate reactions. They are both one of the most reviled and most desired vegetables, by turns venerated and cursed.
How can one little brassica be the source of such controversy? The answer lies in how differently these little cabbages respond to different types of cooking. When abused, Brussels turn grey and taste like the sour memory of thin cabbage soup wafting down the hall of an Eastern European boarding school. Treated correctly, however, they remain crisp and green, picking up crunch and deep browned savory notes during the cooking process.
The tastiest way to cook Brussels sprouts is inarguably to cut them in half and deep fry them. Deep fryers are the secret behind many, if not most, of the crazy-good crispy brussels sprout dishes you may have had at restaurants before. This method, while delicious, is impractical for weeknight home-cooking purposes and turns a nutritious vegetable into something approaching Bloomin’ Onion territory health-wise.
In the interest of our moral responsibility to our arteries and hearts, we shall gloss over the restaurant method and settle on a procedure that gets you a sprout at least 90 percent as delicious as a deep-fried one.
The secret to making incredibly crunchy and delicious sprouts at home is to slowly caramelize halved sprouts cut-side down in one layer in a cast-iron skillet. While the cut side browns, the rest of the sprout gently steams, creating a contrast between charred and fresh flavor and ensuring the whole vegetable remains crisp.
After the sprouts are mostly cooked, I like to toss them in a glaze to serve. This recipe includes one glaze idea, but really you can use any combination of spicy, sweet, sour, and umami ingredients to maximize deliciousness.
Unilaterally Seared Brussels Sprouts with Sweet Chili Glaze
Brussels sprouts
1 tbsp honey
1 tbsp cider vinegar
1 tsp soy sauce
1 tsp chipotle powder, to taste
salt, to taste
shitton of black pepper
Take as many Brussels sprouts as will cover one half of your biggest cast iron skillet with no overlaps. Cut each sprout in half through the root, and discard any loose outer leaves.
Arrange the sprouts cut-side down in one layer in your oiled cast iron skillet, ensuring that the flat side of each sprout is fully in contact with the bottom of the pan.
Place the pan on a burner over medium heat, and cook without moving or flipping the sprouts until the cut sides are dark brown and the tops are bright green and feel slightly tender to the touch. If you know your burners tend to produce uneven heat, rotate your pan a couple of times during the cooking process.
While the brussels sprouts cook, mix together the ingredients for the glaze. Once the sprouts are mostly done, crank the heat to high, pour in the glaze and toss the sprouts to coat evenly. Remove them from the pan once the glaze is mostly dry and sticks to the sprouts like caramel. Season with salt and pepper to taste.